Vendor Page provides several options for creating and managing vendors in APTX. Some significant capabilities include bulk vendor data import, SKU assignment, and much more.
To access the Vendors Page, you can click on Vendors menu
Here are some of the useful features in Vendors Page:
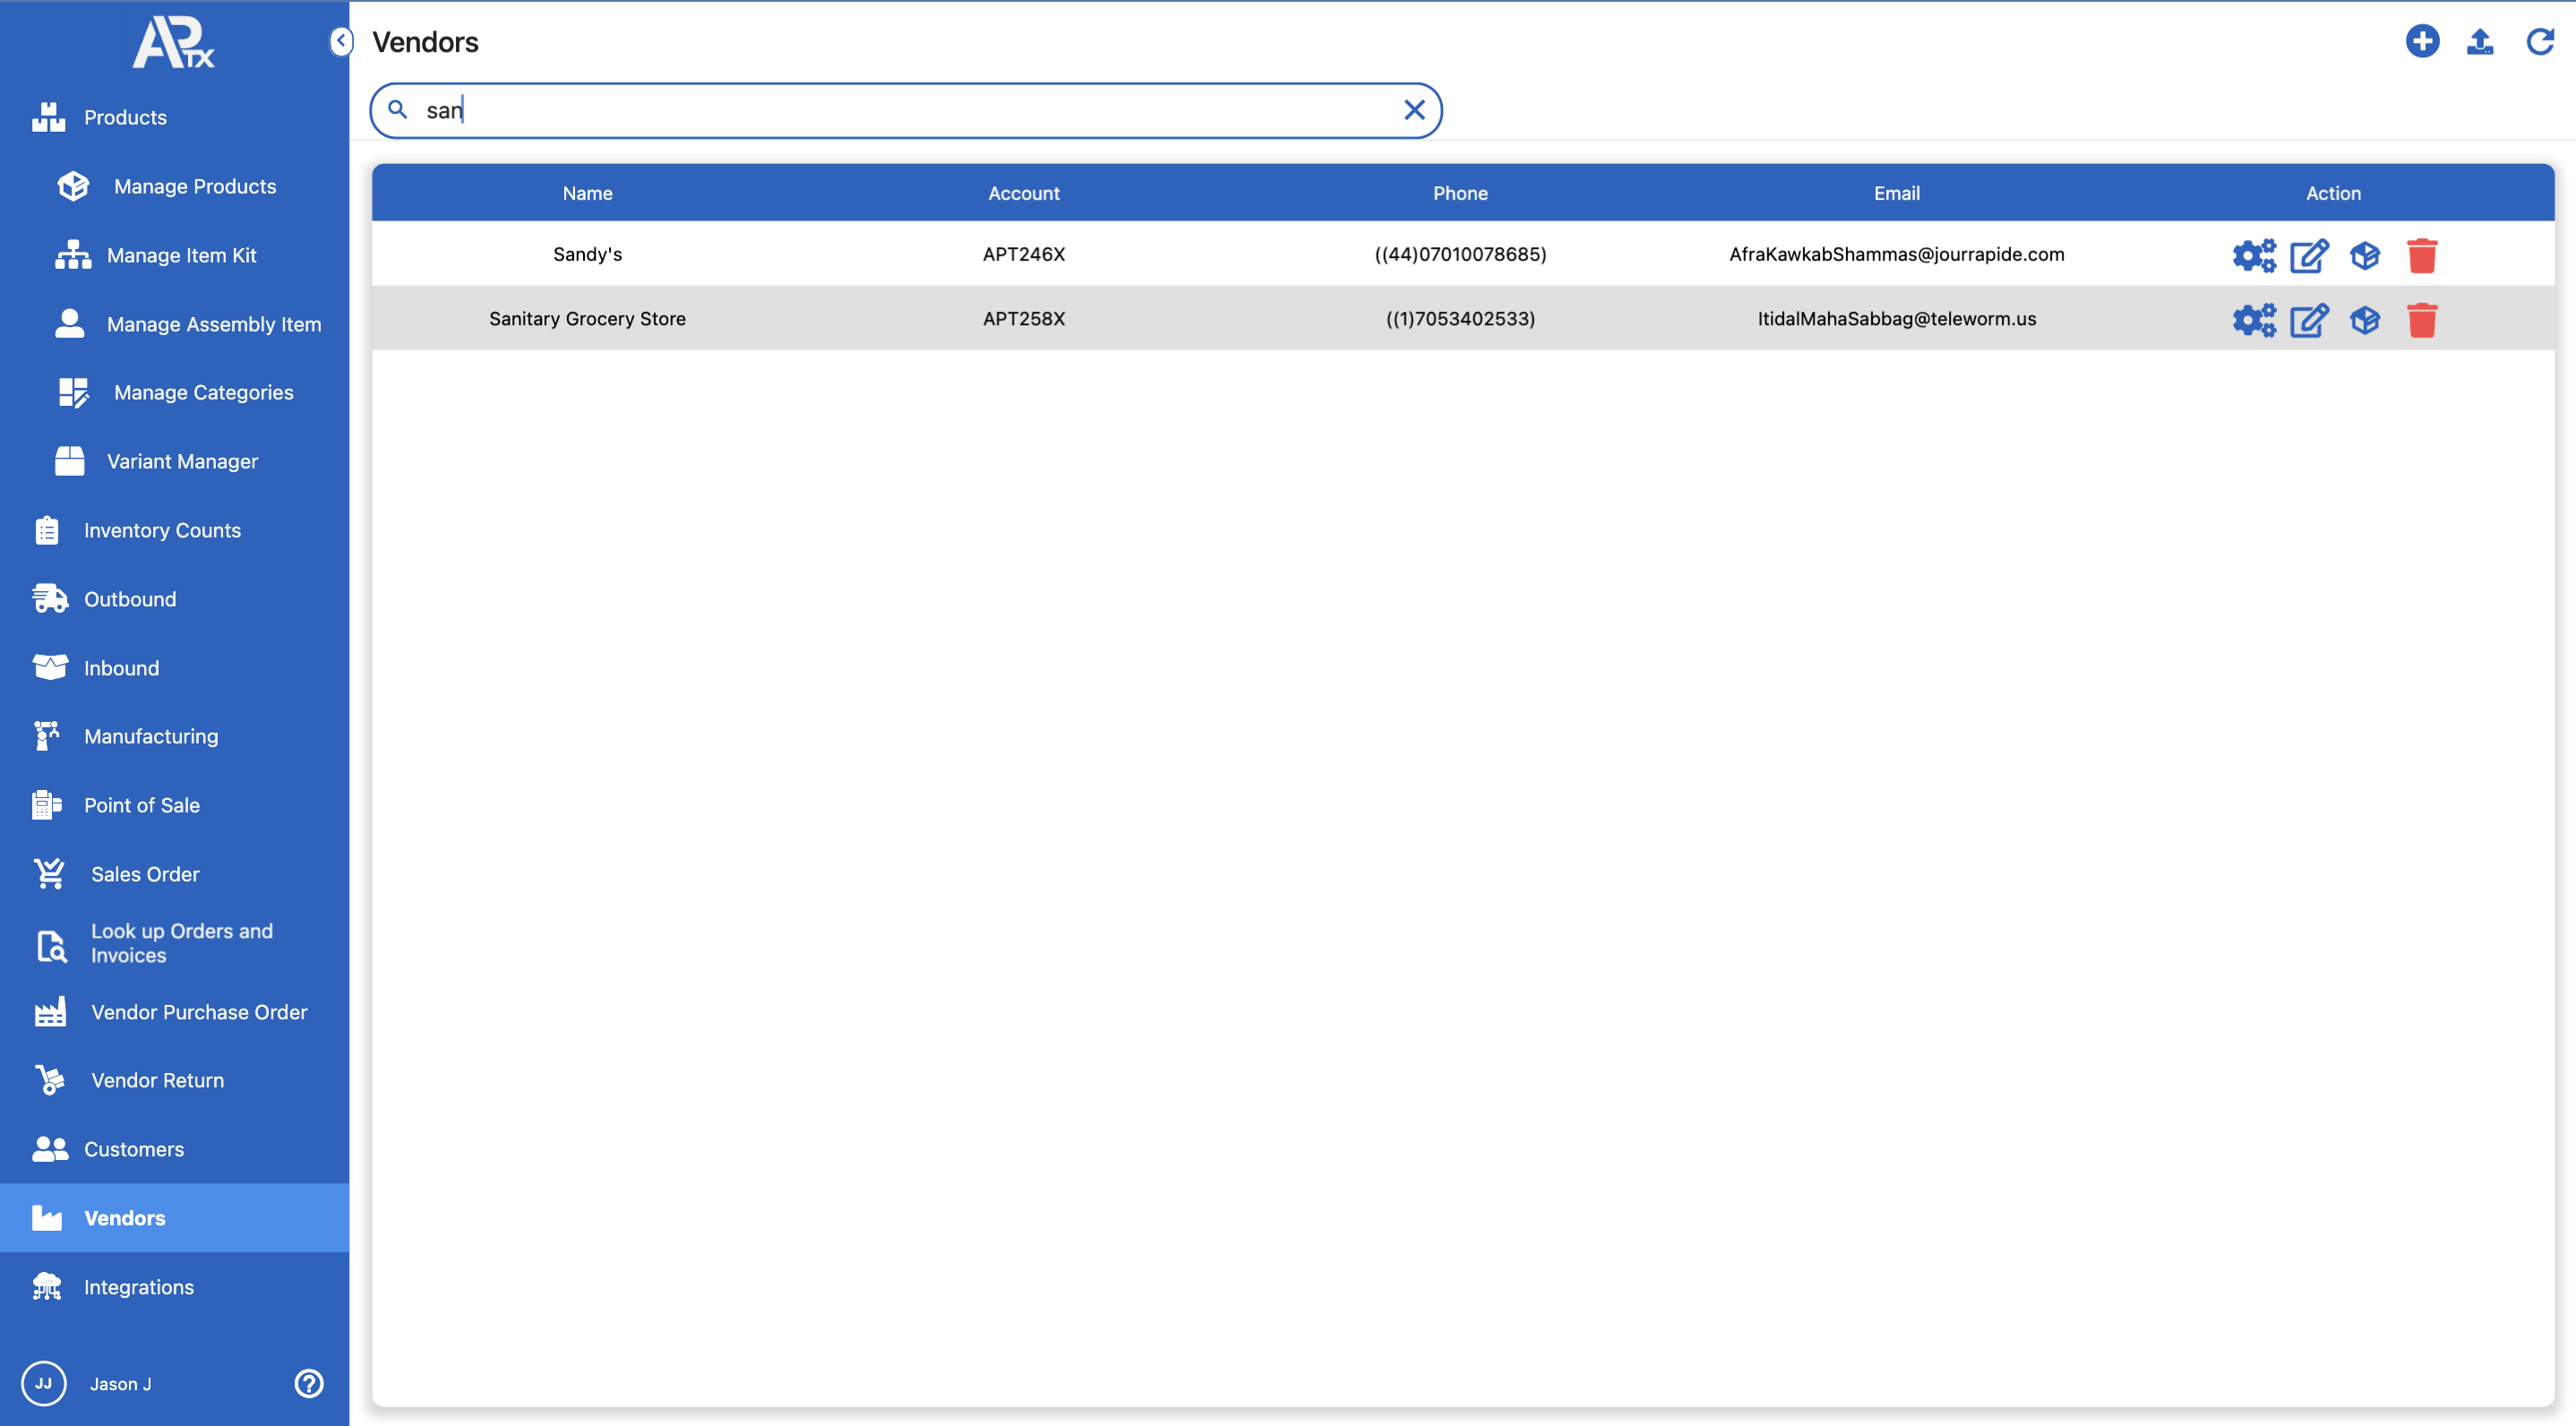
Search Field
You can utilize the search field to search for a vendor by either the name and account number
Add Vendor function
You can add new vendor by clicking on ![]() . After completing the form click on Save & Close
. After completing the form click on Save & Close
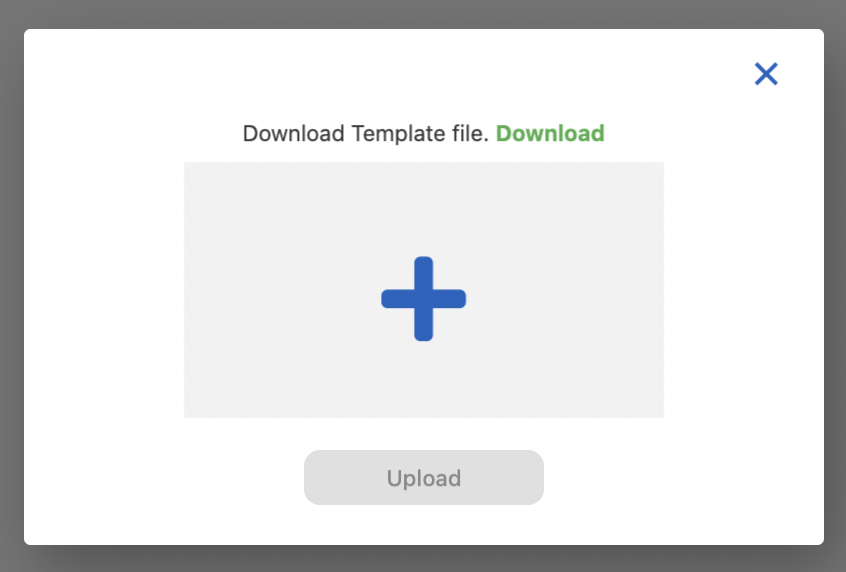
Bulk Import
You also have an option to import vendor data into APTX. Click on ![]() to open the Import vendor menu. You can also get the template file here by clicking on Download. After vendor data has been prepared, click on + to upload.
to open the Import vendor menu. You can also get the template file here by clicking on Download. After vendor data has been prepared, click on + to upload.
Actions
Manage
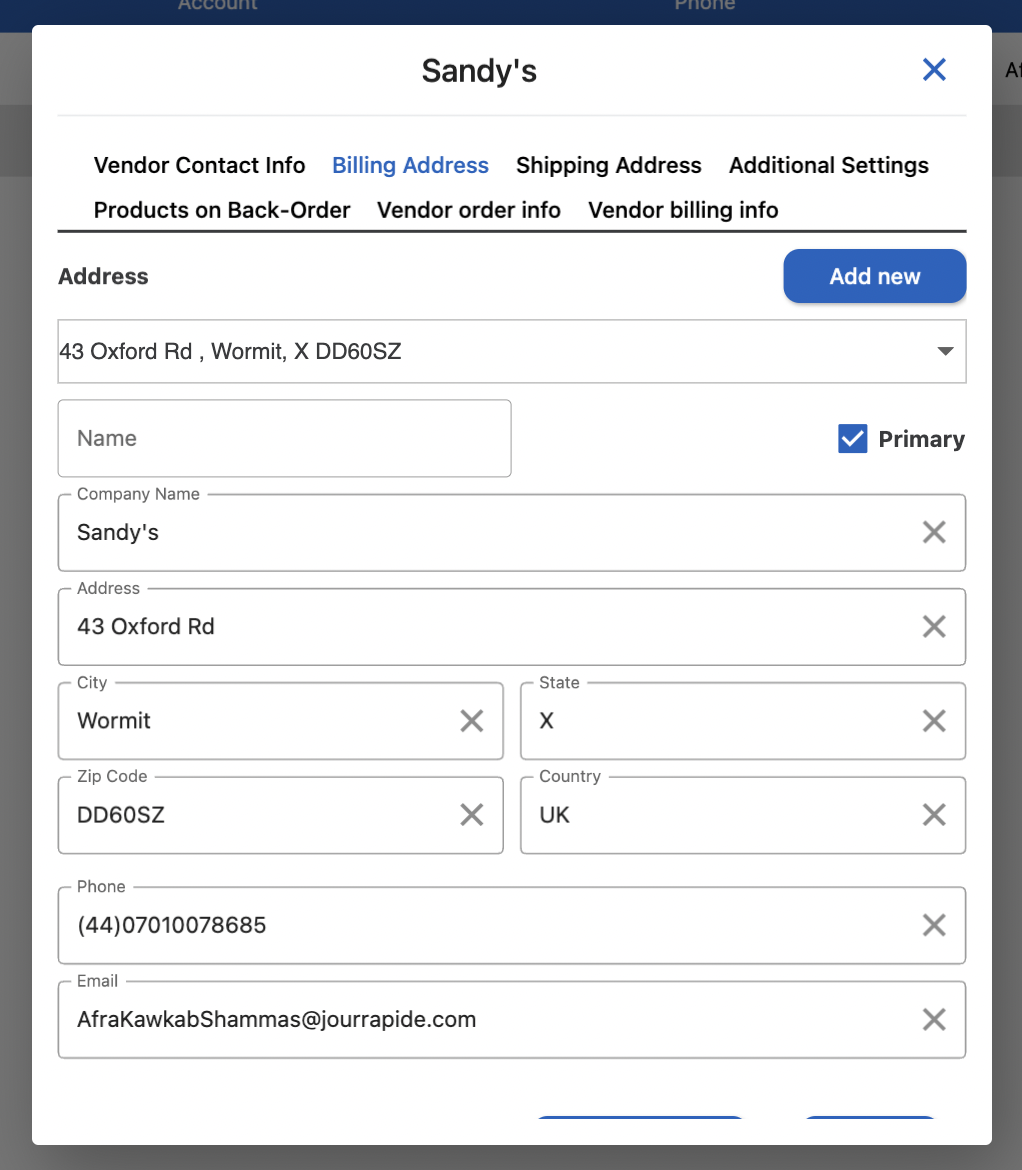
Clicking on ![]() will open Vendors information window. Here you can add details to a vendor, view Products on Back Order, view Order info, and/or assign carriers, default currency, terms and tax codes. You can also add new billing & shipping addresses to a vendor
will open Vendors information window. Here you can add details to a vendor, view Products on Back Order, view Order info, and/or assign carriers, default currency, terms and tax codes. You can also add new billing & shipping addresses to a vendor
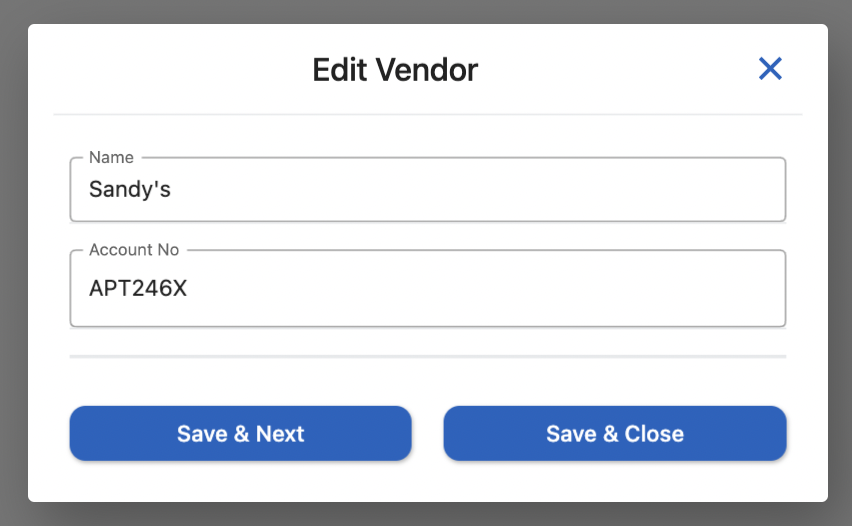
Edit Vendor
Clicking on ![]() will allow you to edit the Vendor Name and account number
will allow you to edit the Vendor Name and account number
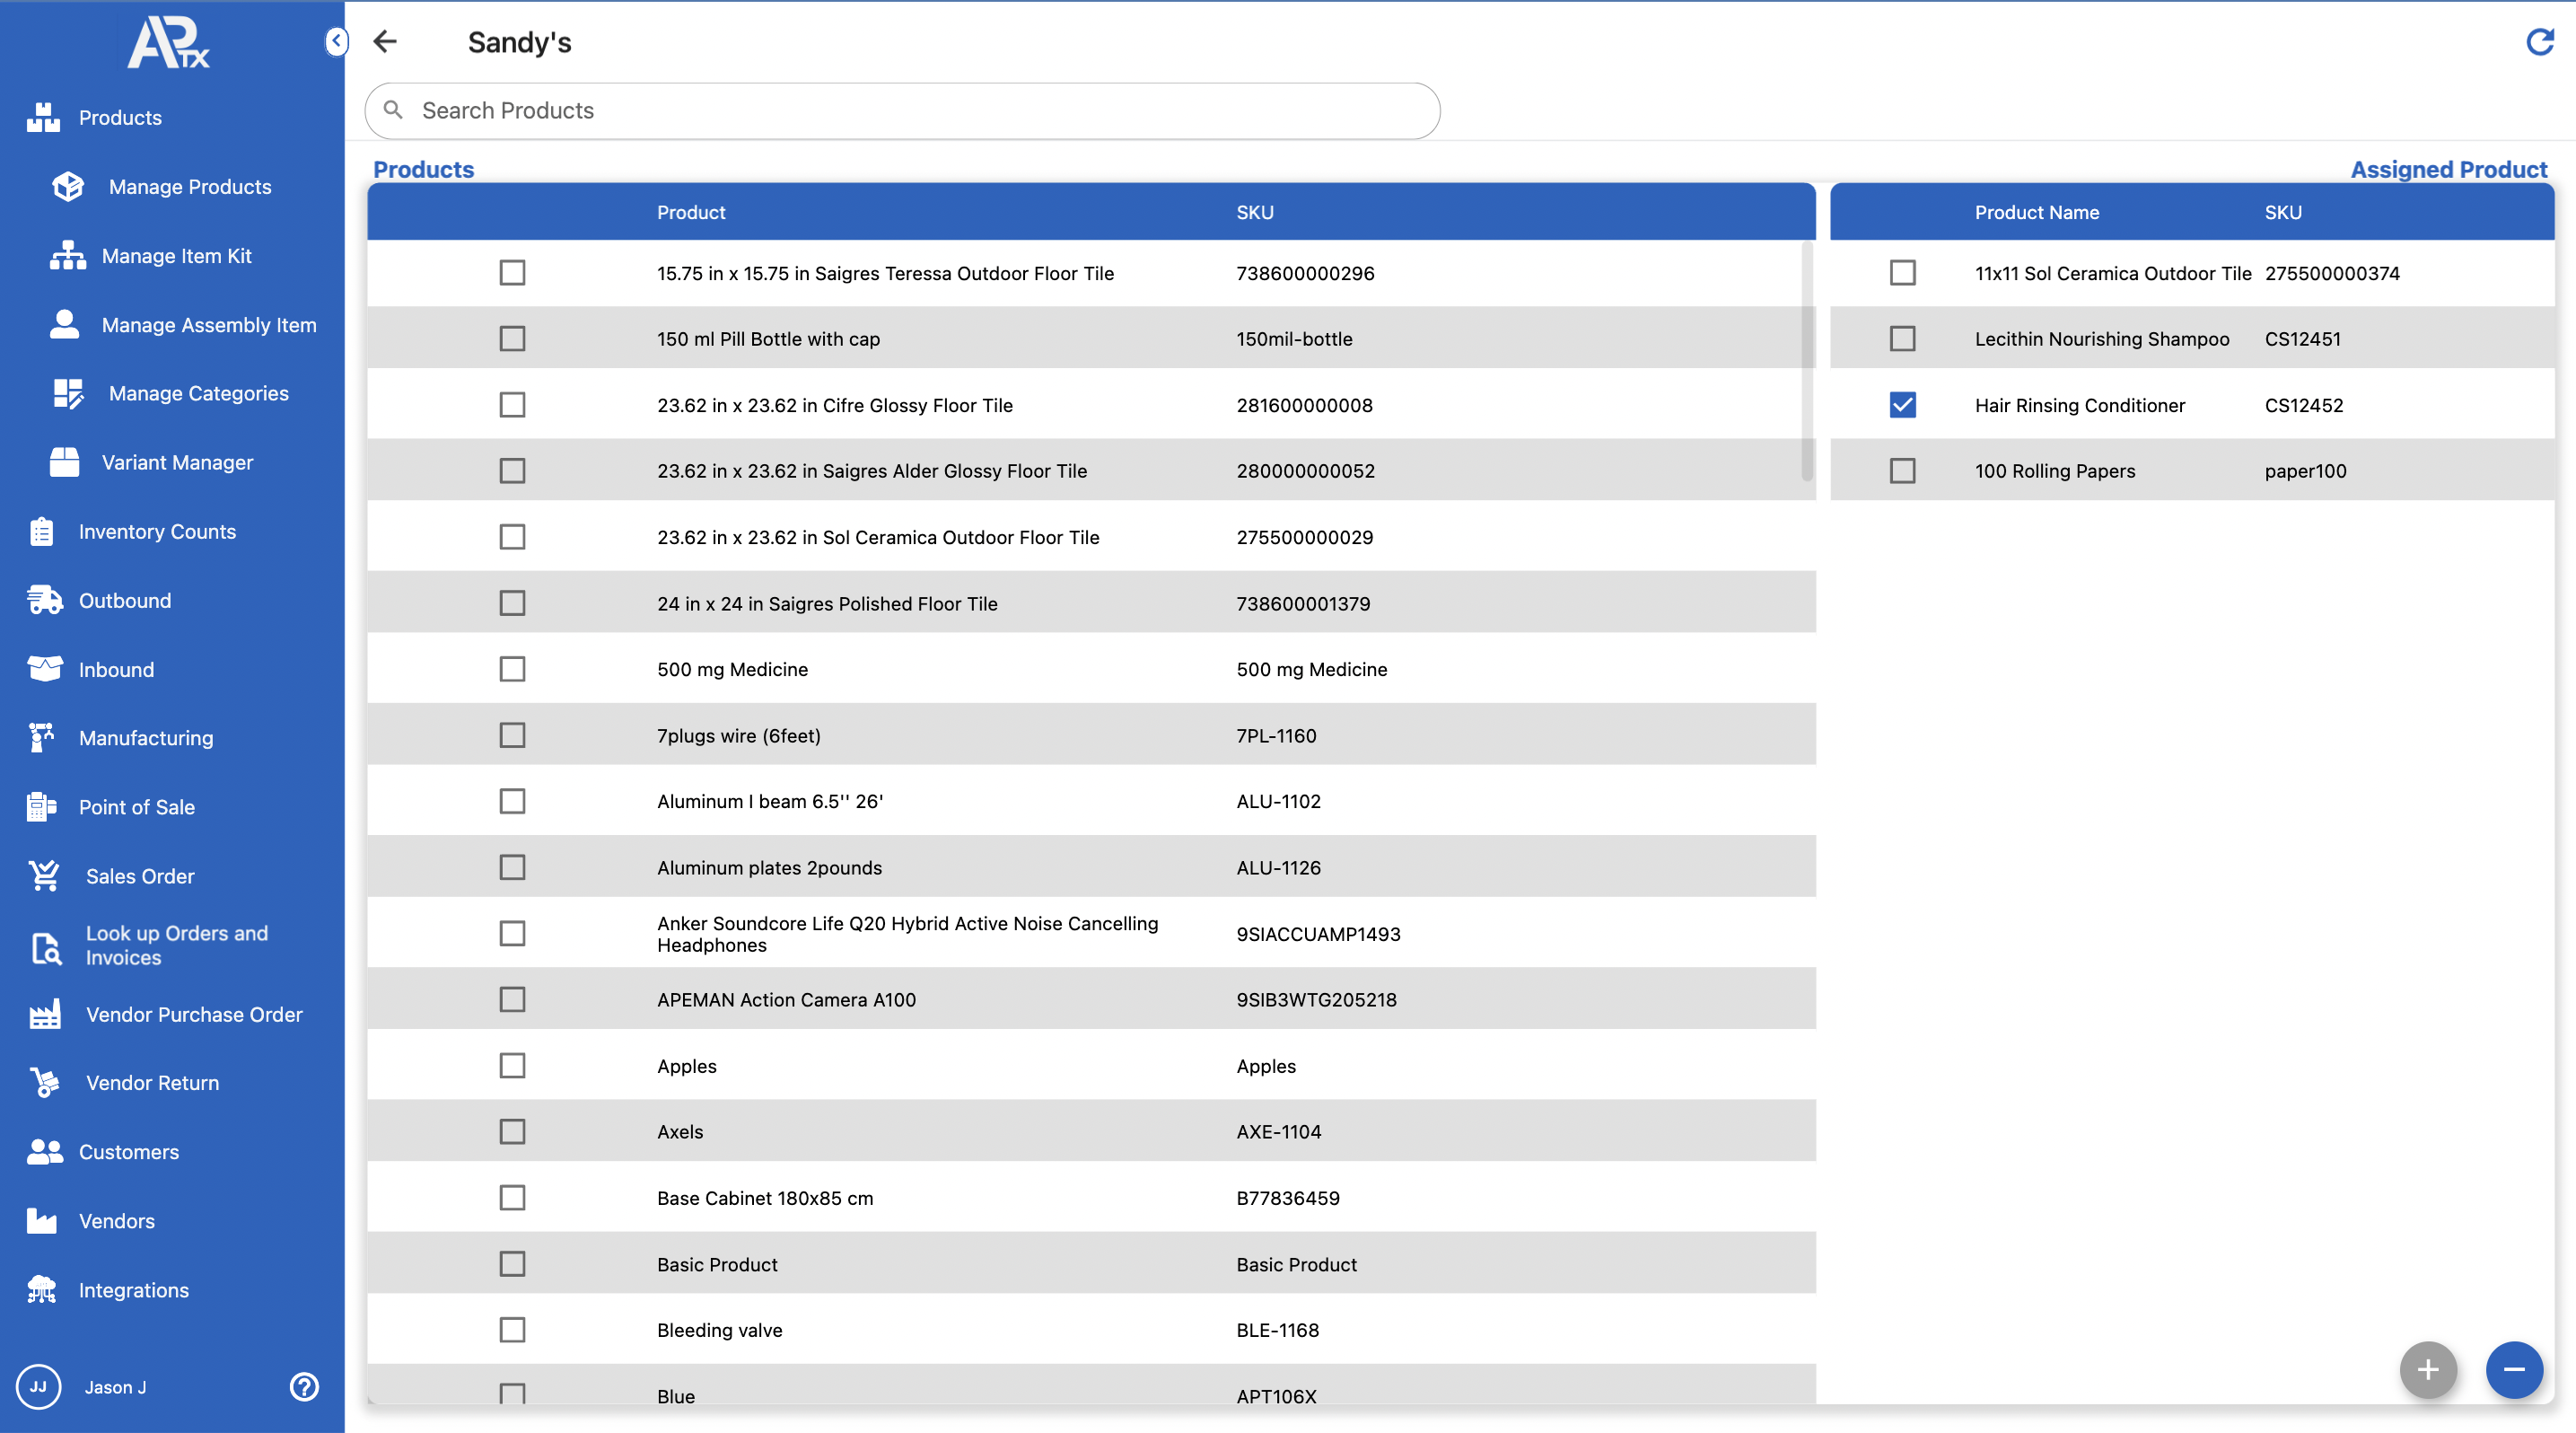
Assign SKU
In this window, you can assign SKUs to a vendor by clicking on ![]() . After clicking on the icon, you'll see the product list and the assigned ones. Select the products you want to associate to the vendor and click on + to assign
. After clicking on the icon, you'll see the product list and the assigned ones. Select the products you want to associate to the vendor and click on + to assign
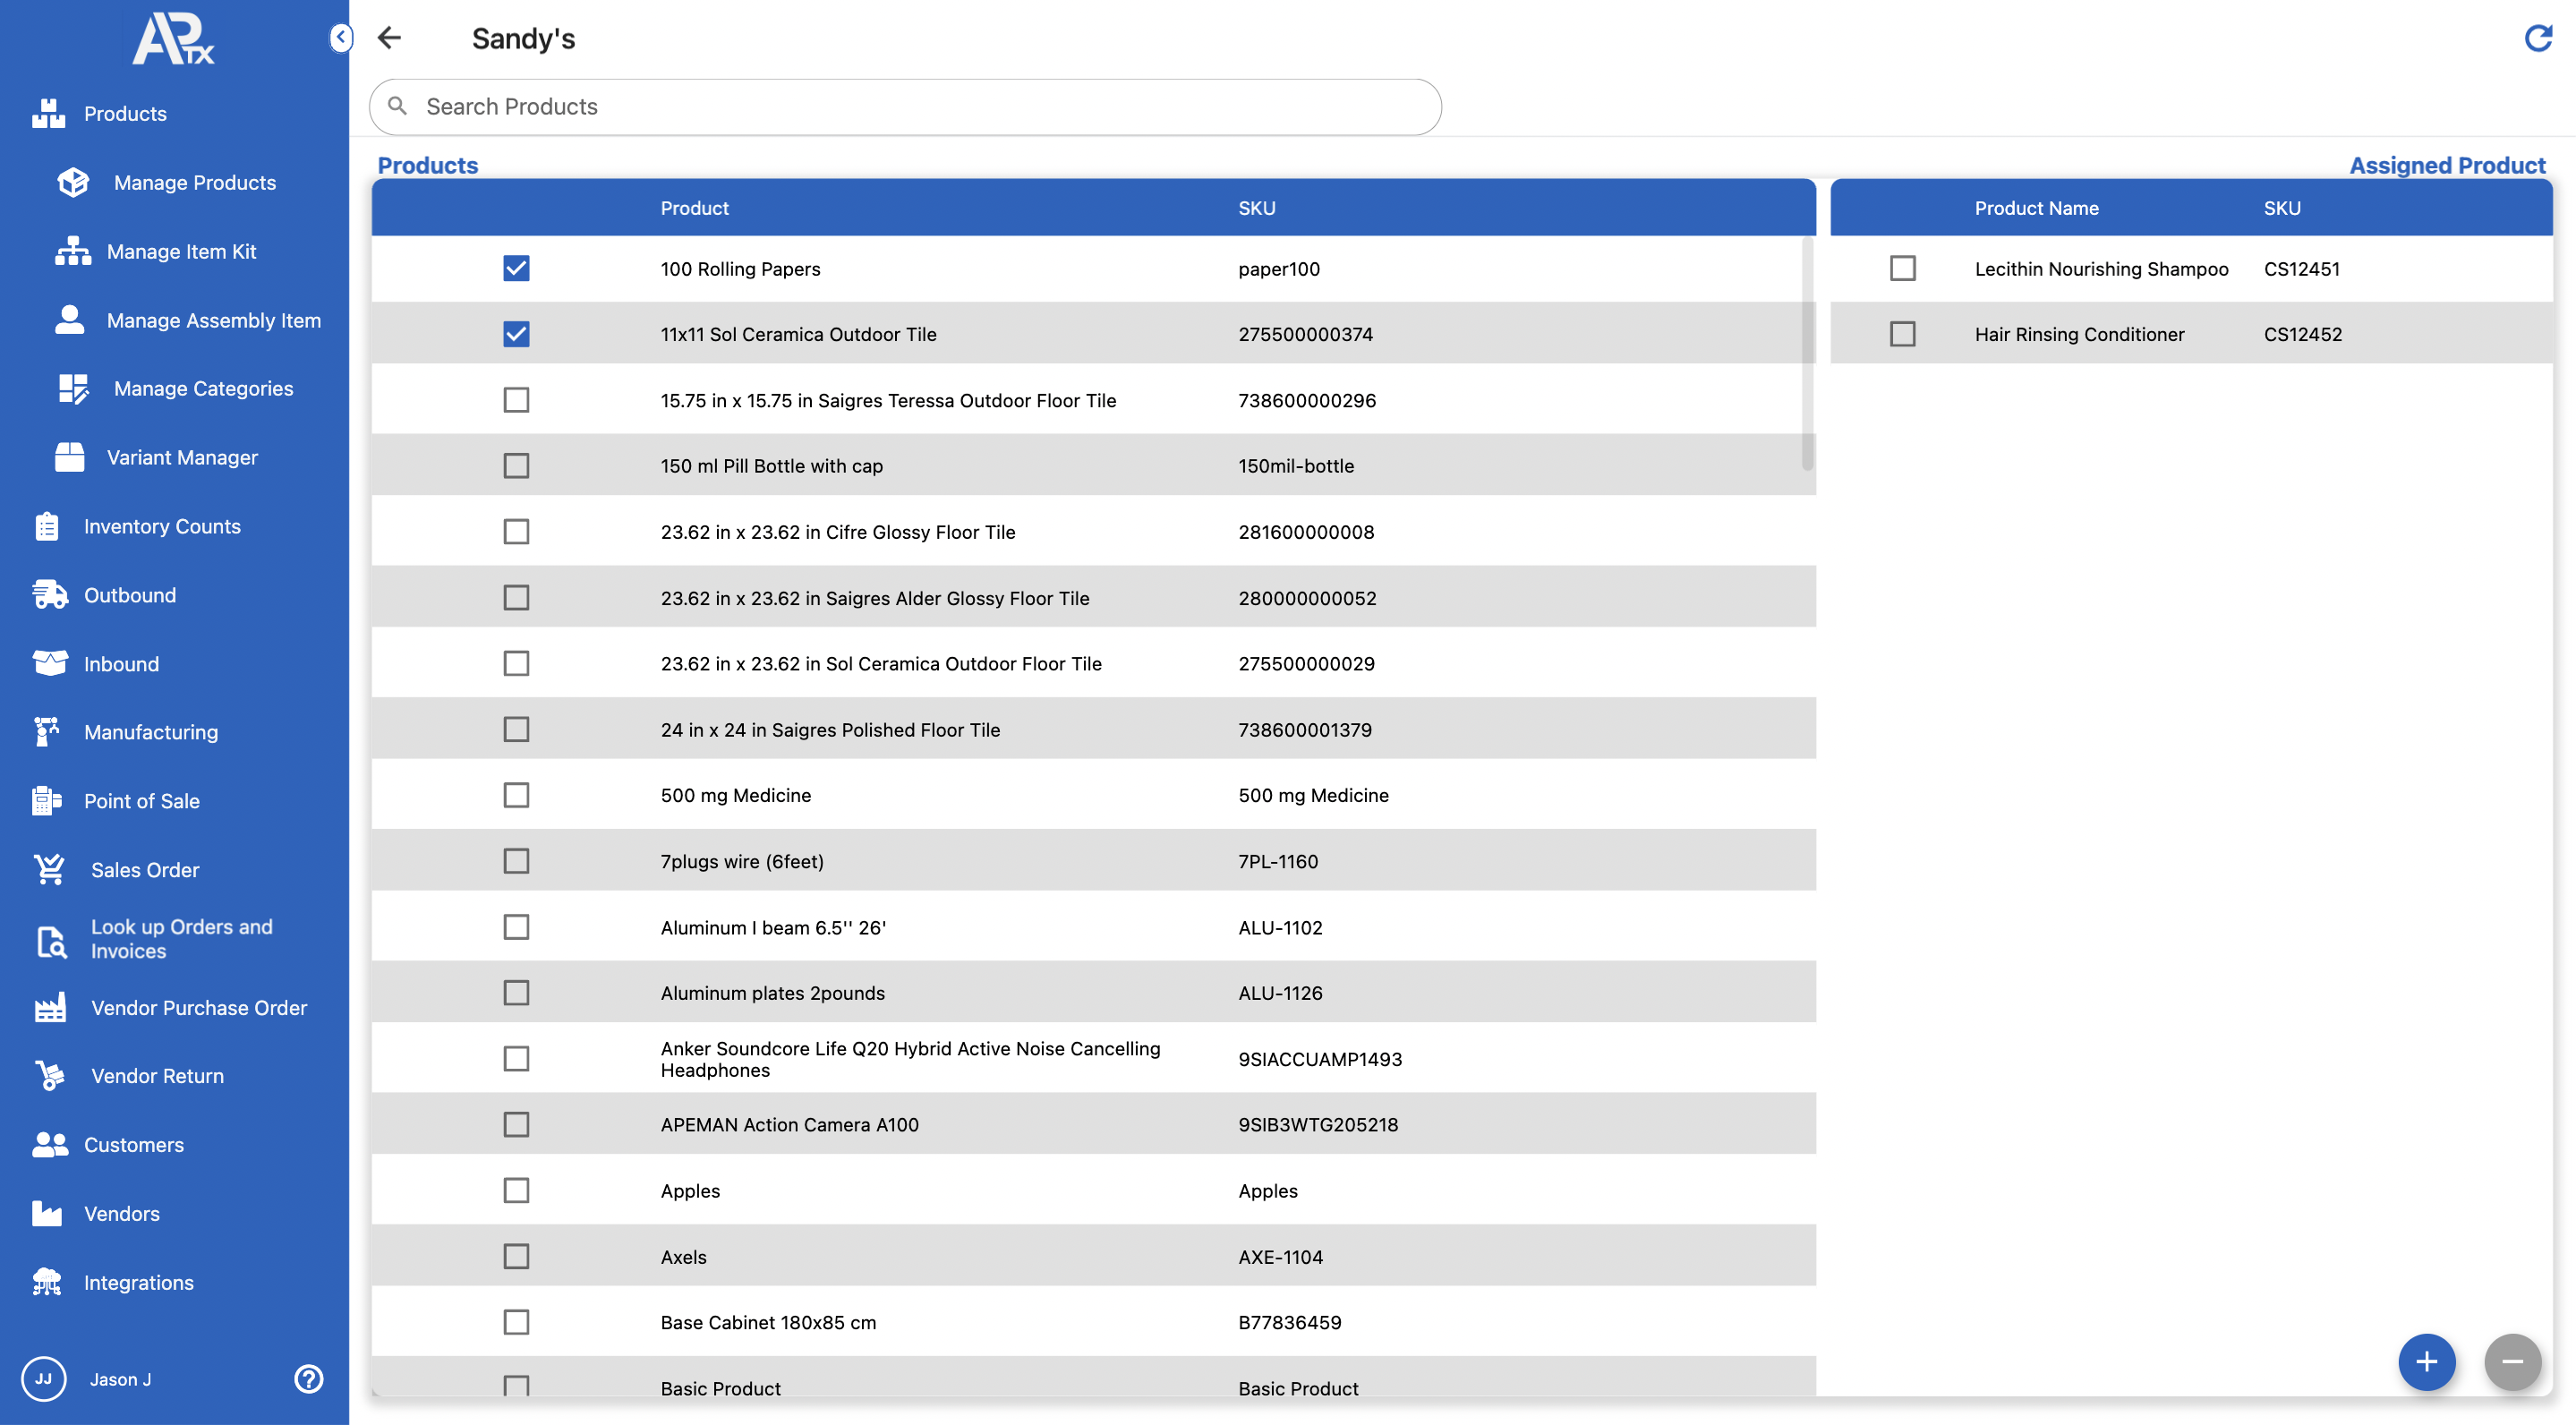
Now, if you want to disassociate a product click on the product and click on -