
1. After installing the UPS WorldShip application open AdvancePro and go to Admin > Utilities > UPS/FedEx/USPS
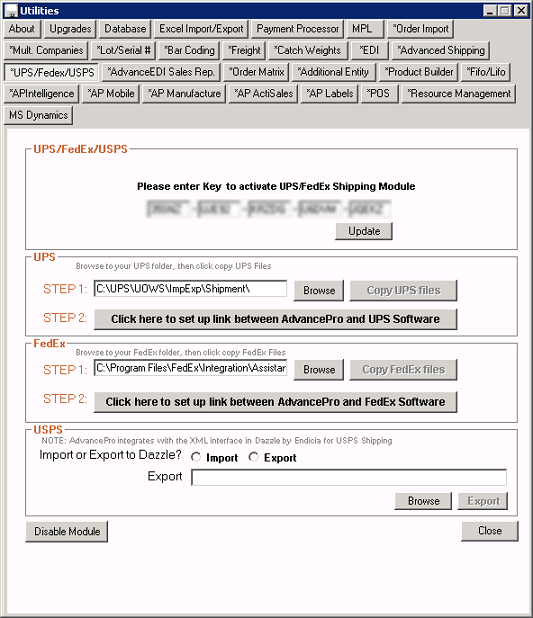
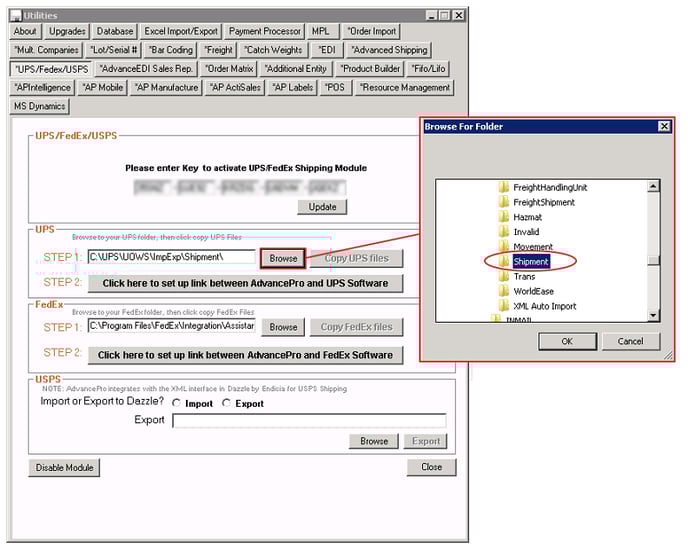
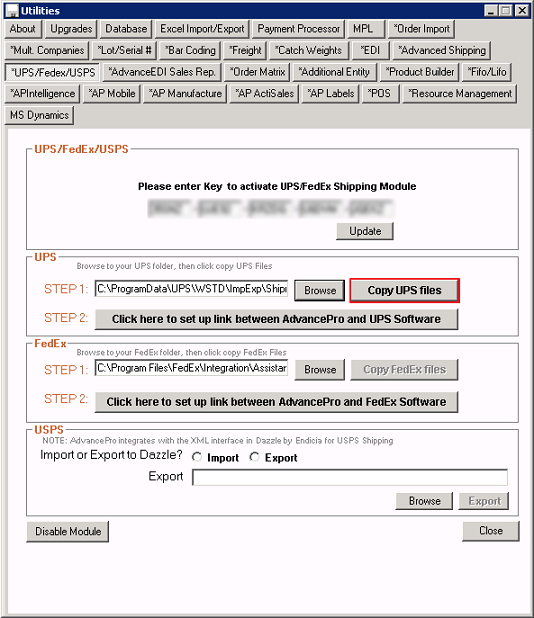
2. Browse for the Shipment folder located in the UPS directory and then click the Copy UPS Files button next to the browse button. This copies the mapping files required for the database connection into the UPS folder directory. Make sure UPS WorldShip is closed before proceeding to the next step
The shipment folder location may vary between the following directories:
C:\Program Data\UPS\WSTD\ImpExp\Shipment
C:\UPS\UOWS\ImpExp\Shipment
OR
C:\UPS\WSTD\ImpExp\Shipment
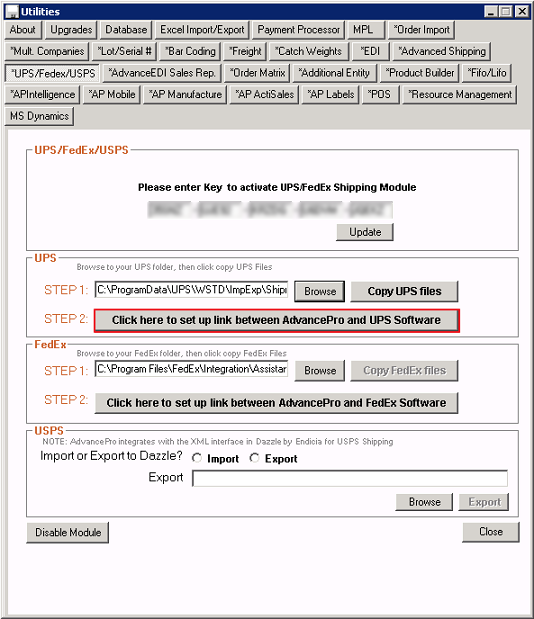
3. Click the button beside STEP 2. Now you can process orders using UPS WorldShip. Process a customer order to the warehouse and then you will be able to use the UPS on that order
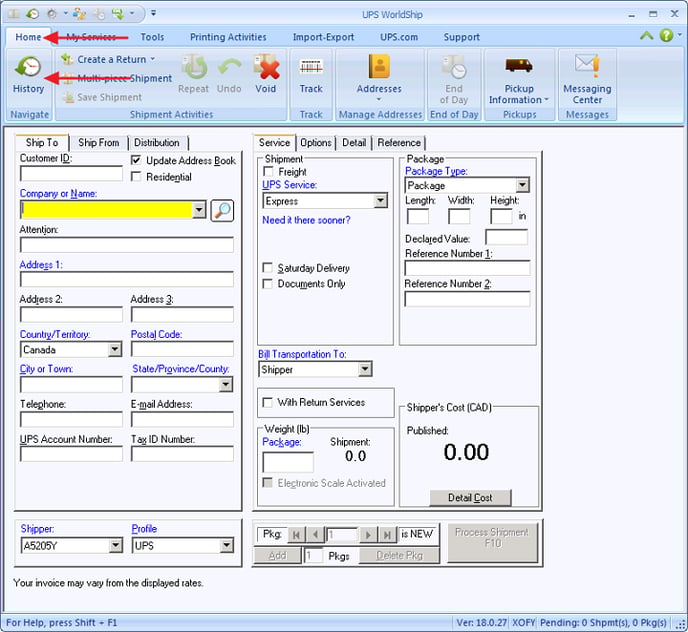
4. Open an order at the warehouse (pick, pack and ship) stage and click the UPS/Fedex button around the bottom left area of the screen. A new window will appear
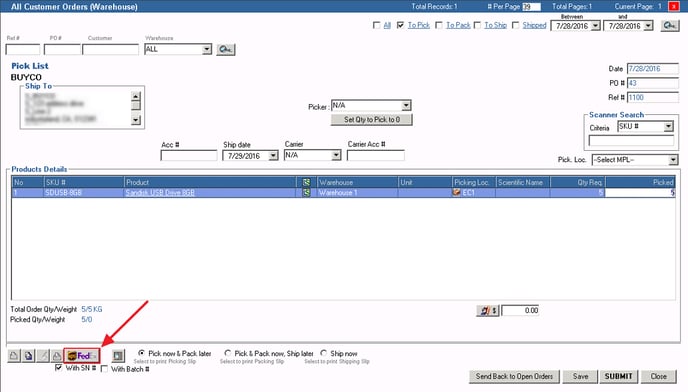
5. Select your carrier from the drop down which in this case should be UPS. Now you can select or fill in the necessary information for the order
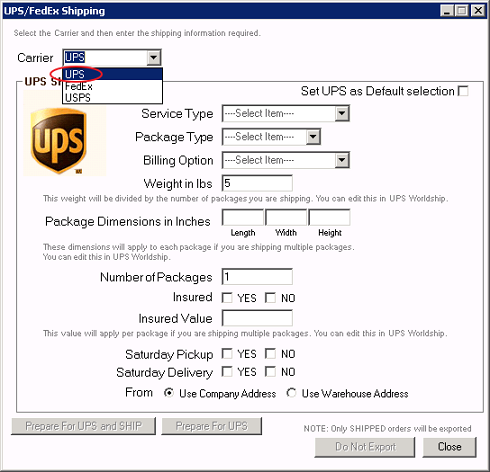
6. After filling/selecting all the desired information you have two options with how to proceed:
Prepare for UPS will be prepared for UPS but it will not be exported or available for processing through UPS until you have picked packed and shipped the order
Prepare for UPS and Ship will automatically ship the order. Now you are ready to process the order via UPS WorldShip
7. Open UPS WorldShip and click Import/Export Data on the top menu. You have various options here for what and how you want to import/export the orders
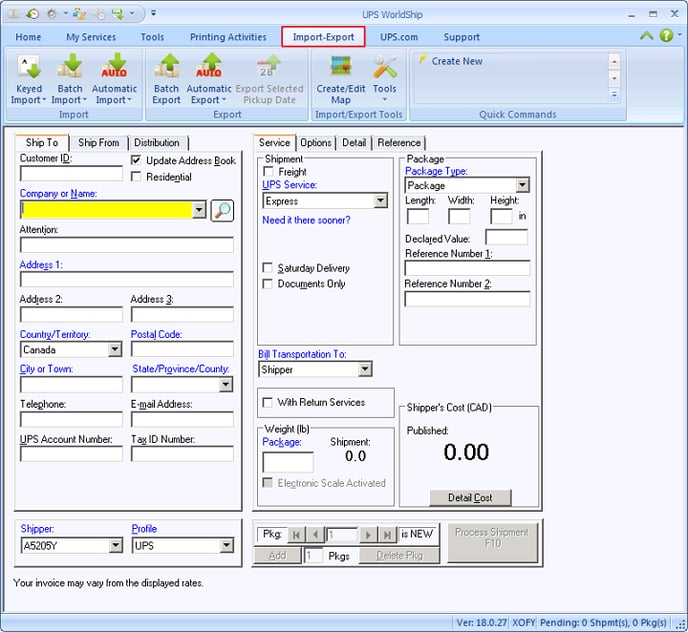
Batch Import - Import all the orders that have been prepared in the warehouse
Batch Export - Export all the tracking numbers that have been shipped in UPS WorldShip for related orders that have been imported
Keyed Import - Allows the user to pull one import at a time and select a specific reference number
8. Select Batch Import and select your AdvancePro import map from the list. After selecting you have two options:
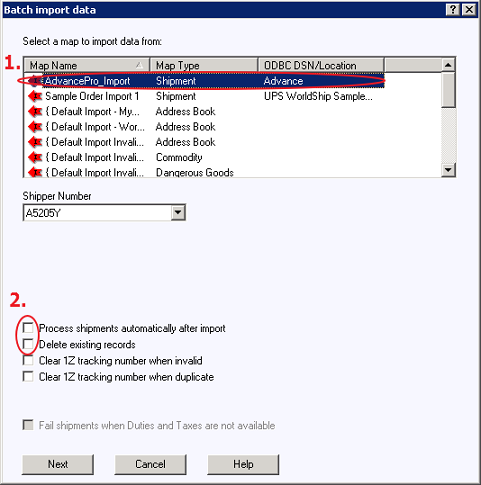
Process shipments automatically after import - Once the import is performed it will automatically process the orders that the user has just imported
Delete existing records - deletes unprocessed orders that are being re-imported over and over again to avoid duplicates
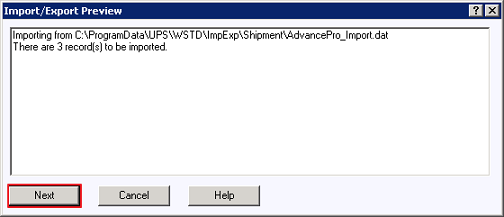
9. Click Next to see a preview window of the orders to be imported and then Next on that window to start importing the available orders. You will get a summary of both successful and unsuccessful orders.

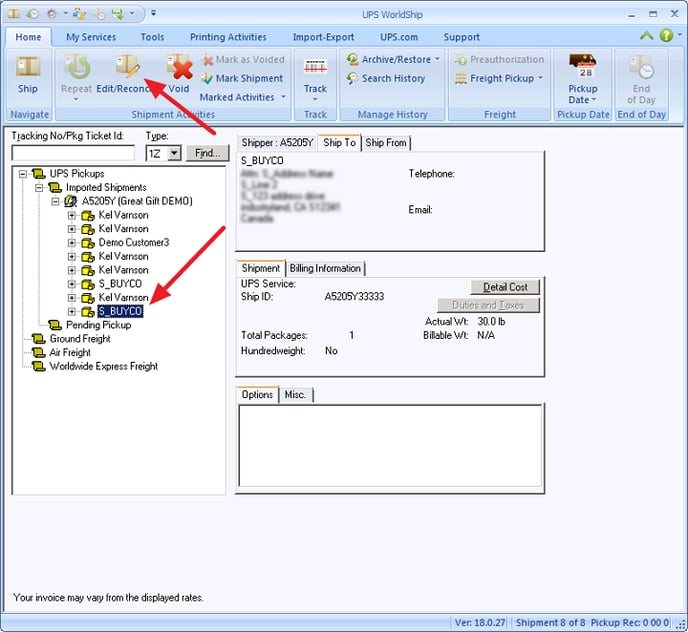
10. After the import is complete click Save to proceed. Go to Home > History and under Imported Shipments - you will be able to view the orders that have been imported
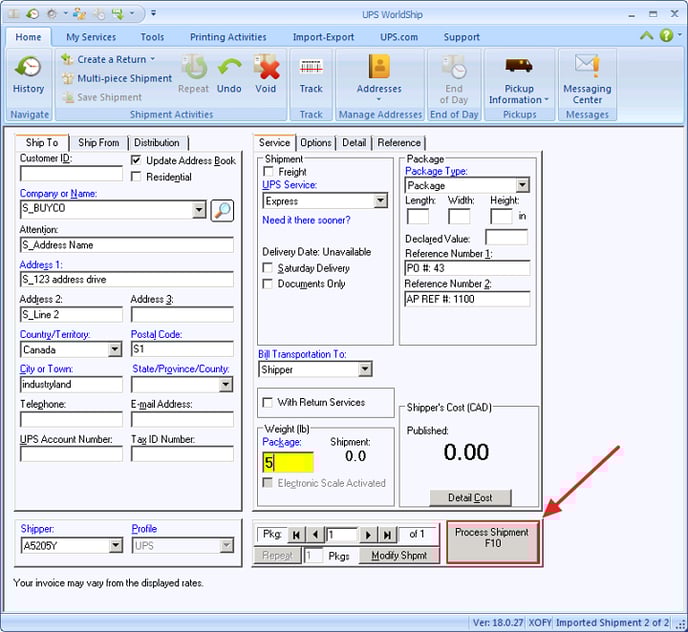
11. Select an order that you would like to process and click the Edit/Reconcile button. A screen will appear that contains information that has been populated from AdvancePro. If the information is OK then you can select Process to finish processing the shipment which will generate a label that identifies that a tracking number has been created
12. You can now export those shipments to AdvancePro. Upon completing the export you can view those orders in the warehouse which will fall under the Shipped status. These orders should now be populated with tracking numbers which can viewed by pulling up the order(s)
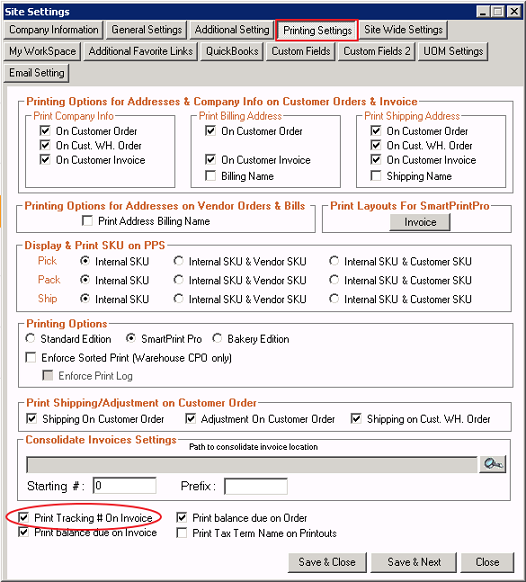
NOTE: You also have the option to print the tracking numbers on the invoices by going to Admin > Site Settings > Printing Settings tab and checking the Print Tracking # On Invoice
UPS Integration Setup and Troubleshooting
If AdvancePro data does not export to UPS please check whether the DSN exists. The ADVANCE DSN gets created automatically when you install AdvancePro. These DSNs can be created on either Server or Client.
To check if DSN was installed correctly follow the instructions below:
1. Go to Start | Settings | Control Panel | Administrative Tools | Data Sources (ODBC)
2. Choose the "System DSN" Tab
3. Search for an entry called Advance
a. If there is none you need to create a new one:
b. Click on Add
> Select SQL Server and click finish
> Enter Advance as the name
> Enter AdvancePro DSN as the description
> Select Advance as the server from the drop down box and click next
> Select “With SQL Server Authentication…” and call AdvancePro Technical Support for the Login Name and Password.
> Follow steps 7 – 9.
4. Double click on it. At the bottom - make sure the SQL Server name has the correct name of their SQL Server
5. Click the Next button
6. It will now display a form where you specify your login details - click Next button
7. Next page will say "Change default database to" - make sure it says "Advance"
8. Click Next button, click Finish, and click "Test Data Source"
Note: If you have multiple AdvancePro companies, you would have to manually create DSN for each company database!
If you do have multiple companies you need to manually create Advance2, Advance3, Advance4, Advance5 DSN for each company database. Then you have to copy and paste the AdvancePro_Import2.dat, AdvancePro_Export2.dat and so on for each company file of AdvancePro. These files have to be saved in:
C:\Program Data\UPS\WSTD\ImpExp\Shipment
C:\UPS\UOWS\ImpExp\Shipment
OR
C:\UPS\WSTD\ImpExp\Shipment
Then login into the child company database and go to ADMIN > Utilities > UPS > Click ONLY on ‘Check Connection between UPS and AP’ button. Do not click the button for "COPY files"
You can contact our Customer Support Department at: 1-800-970-9071
And ask for assistance in creating .dat files.