Overview
The ShipStation integration allows AdvancePro users to print labels in ShipStation without the need to manually enter any information. ShipStation will automatically import orders from AdvancePro and export shipping status and tracking information back to AdvancePro after the label has been created.
AdvancePro Setup
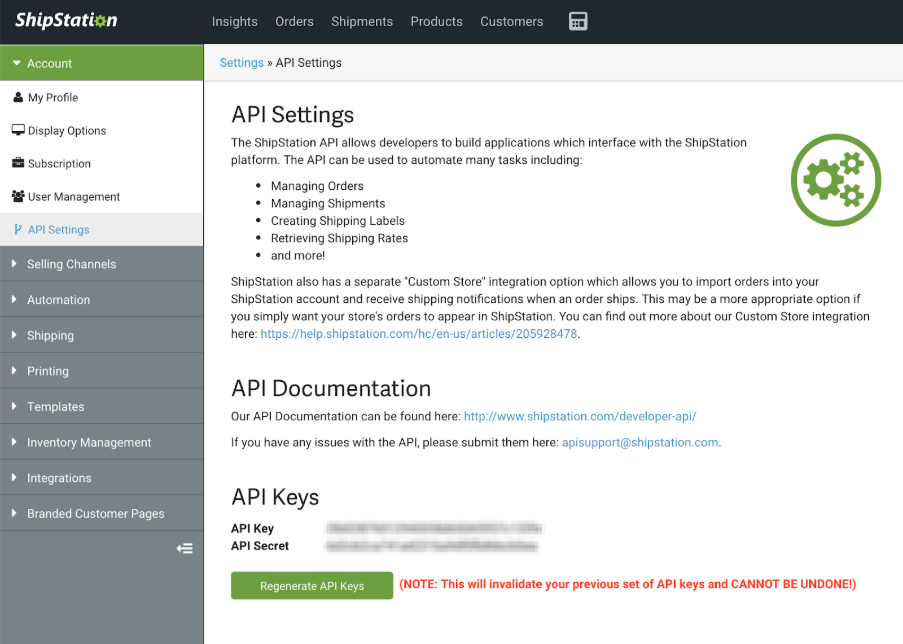
- Log in to your Shipstation account and go into Account Settings (wrench icon on top-right menu) > Click Account > API Settings. This will show the set of keys that will need to be entered in AdvancePro in step 3.
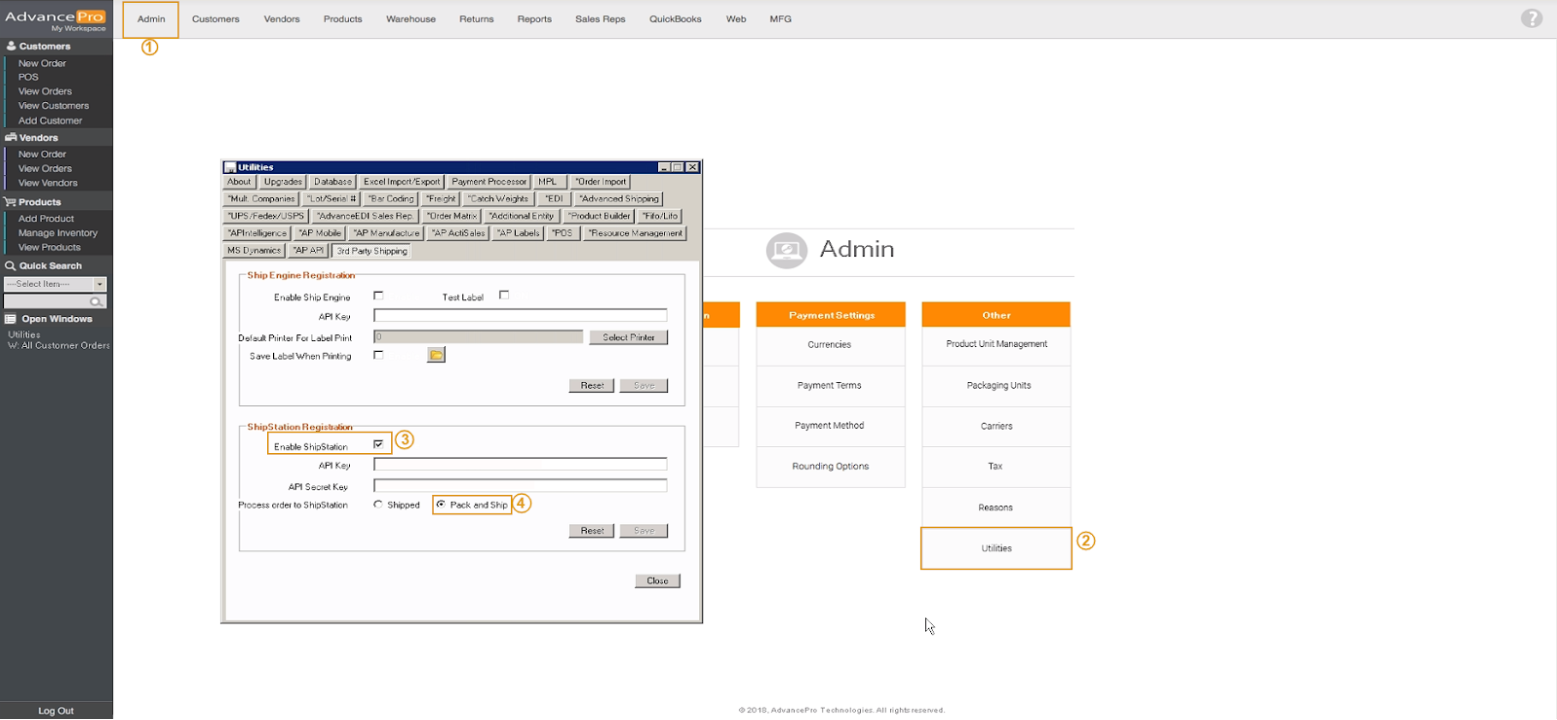
- Log into AdvancePro and go to Admin > Utilities > 3rd Party Shipping.
NOTE: Enter the keys from Shipstation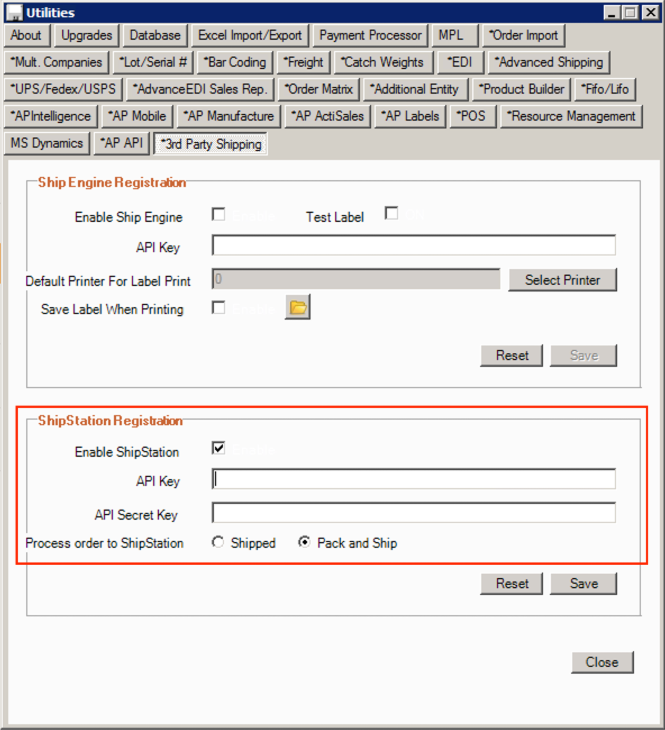
-
Tick the Enable box in the ShipStation registration section and enter your ShipStation API keys. Then select one of the following options:
Pack and Ship - Orders will be marked for ShipStation export as soon as they have been picked. Once the label has been created in ShipStation, the order will be shipped in AdvancePro.
Shipped - Orders will only export to ShipStation once shipped in AdvancePro.
Exporting Orders To ShipStation and Creating Labels
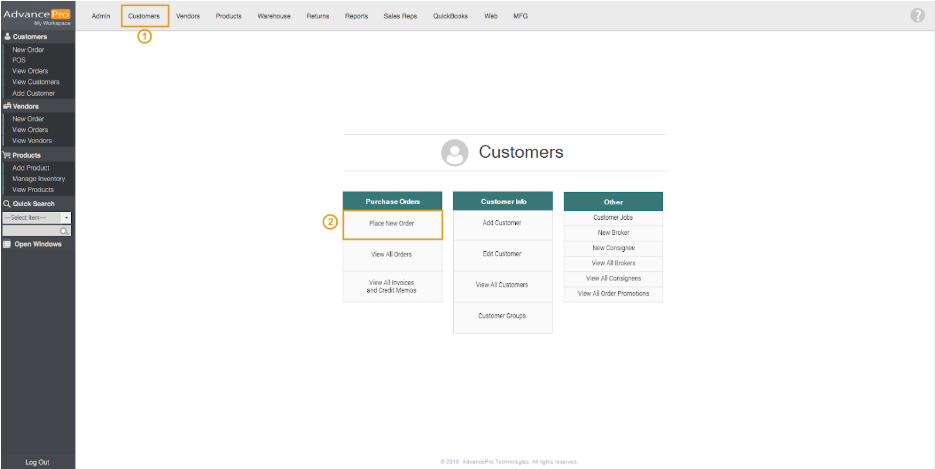
- Go to Customers and place an order
- Select products to order, place and process
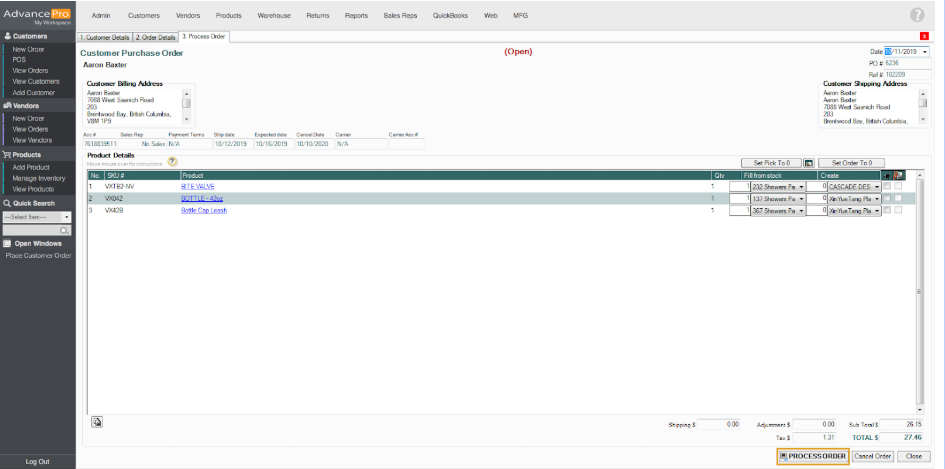
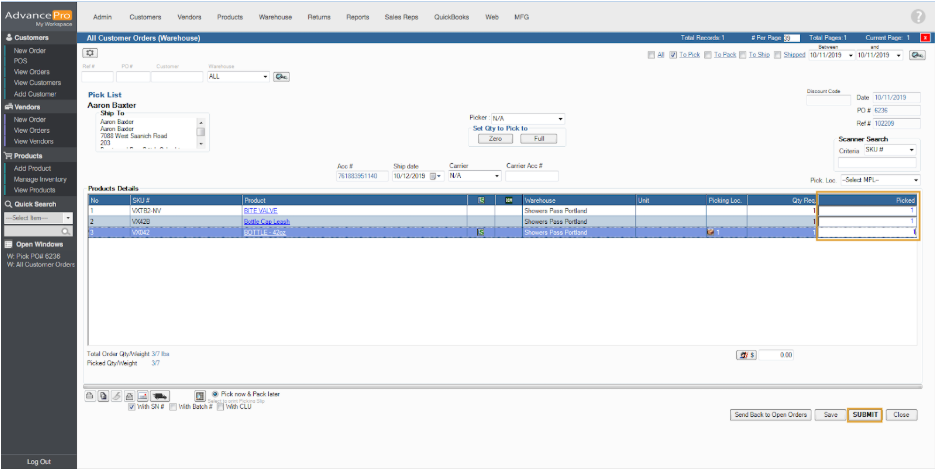
- Pick the items in the order and click submit
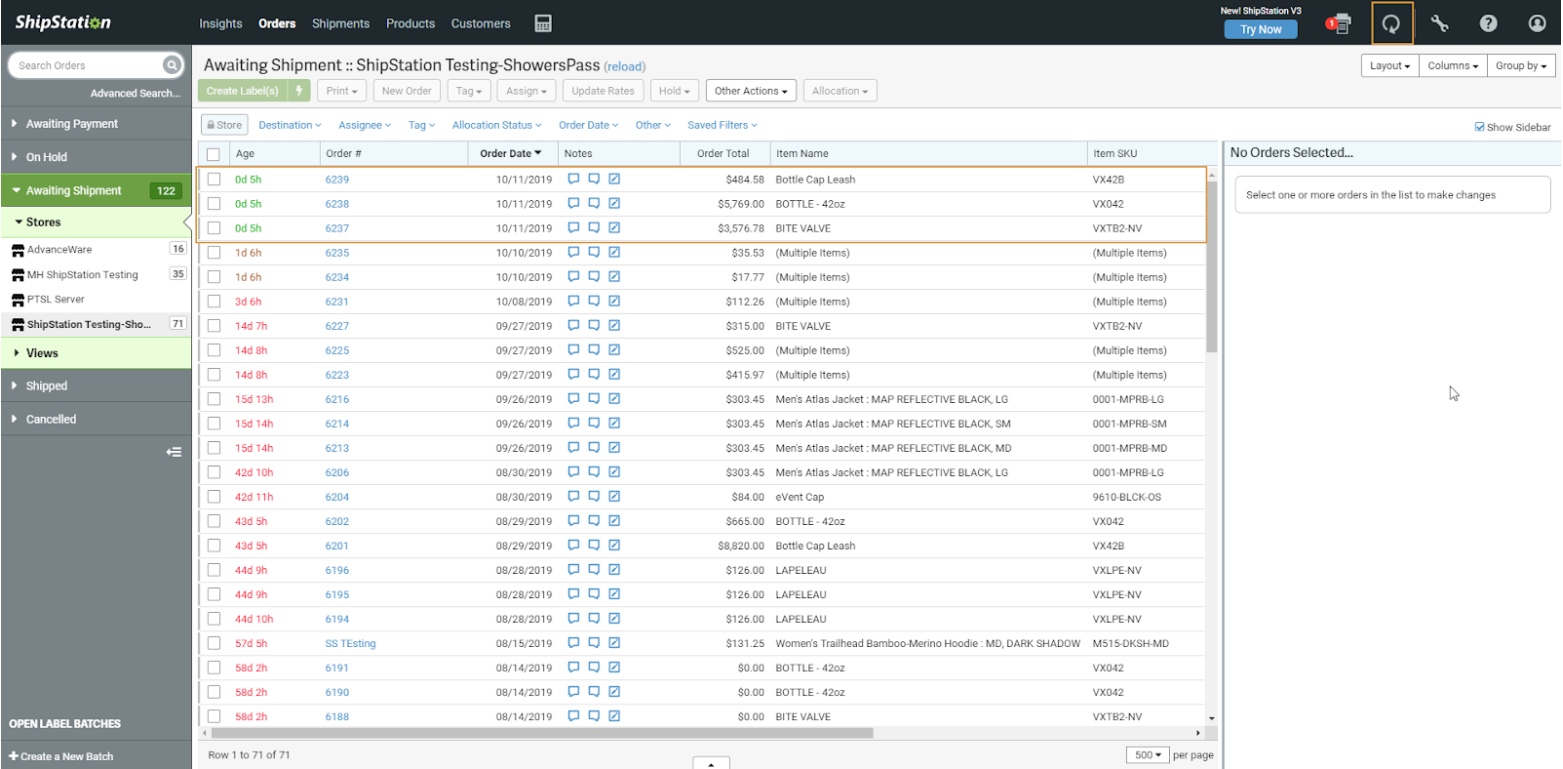
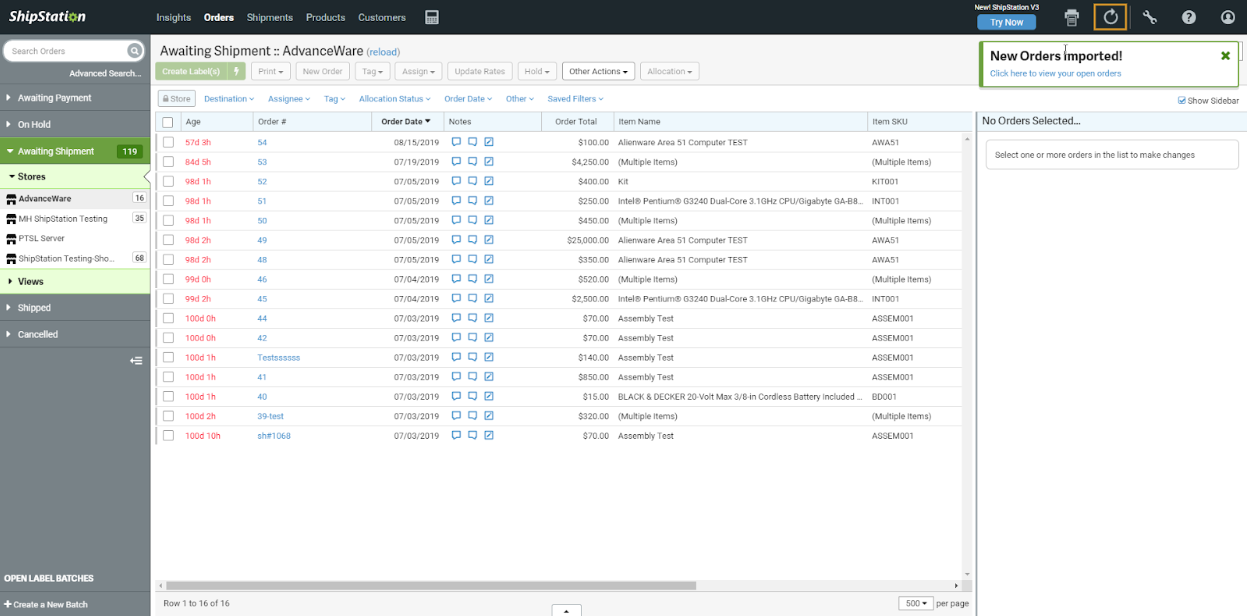
- Depending on which option you choose in the 3rd Party Shipping settings, orders will either automatically export to ShipStation after they have been picked or after they have been shipped. You can verify that this process is working by picking/shipping an order in AdvancePro and then clicking the refresh option in ShipStation to import the latest orders. It will display a notification message once the orders have been exported successfully right under the refresh button
- Click on the Order # to view the following information: Order Summary, Buyer/Recipient Information, Shipping Information & Ordered Items
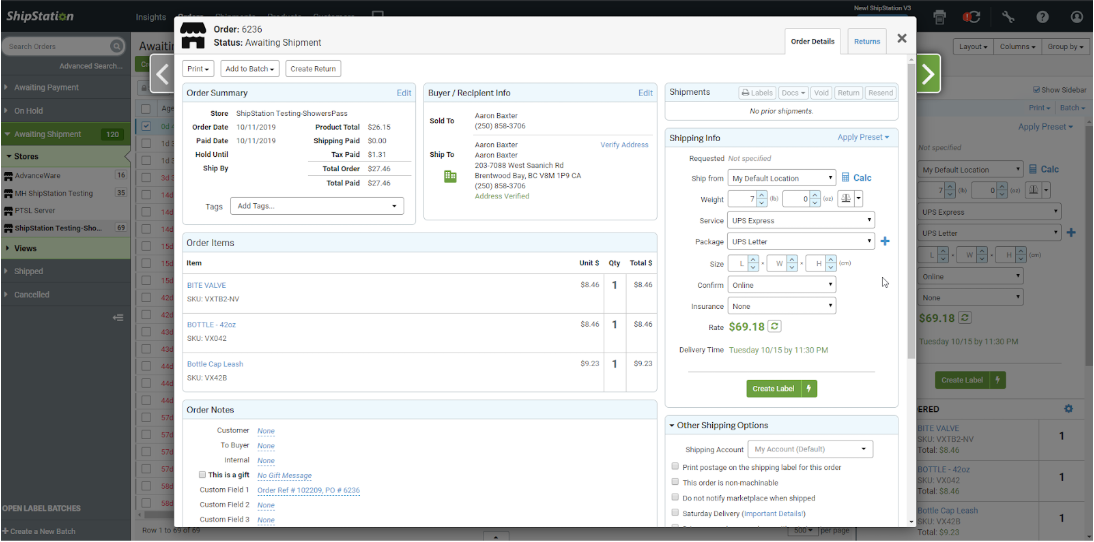
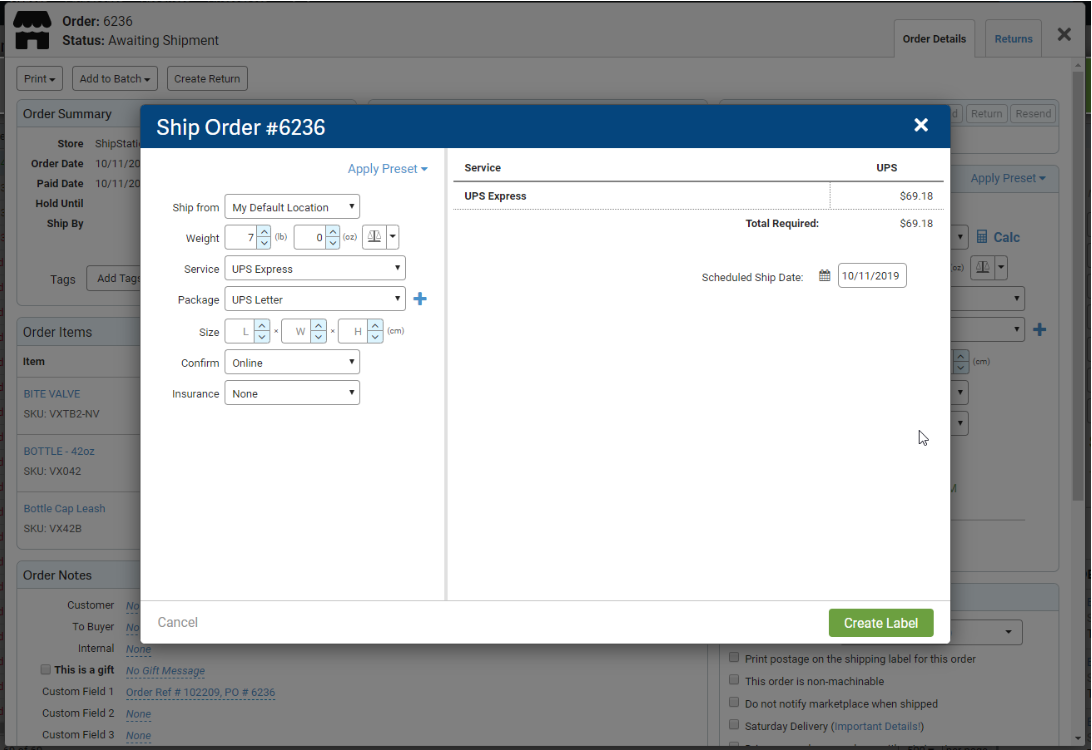
- Once an order has been imported to ShipStation, you can create the label as you normally would. Select Services, Package and then click on Create Label
- This will be displayed after the Create Label button is clicked. It will notify the user that the order has been shipped and it will allow the user to print the shipping label
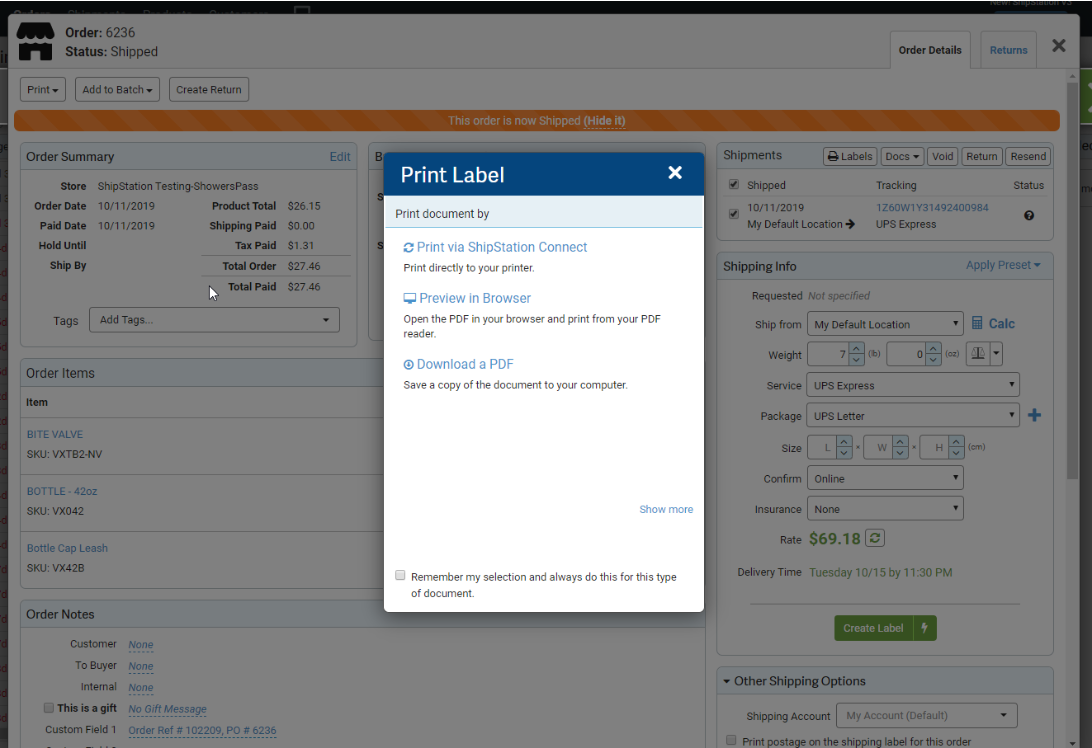
- Afterward, the order should almost immediately become marked as shipped in AdvancePro (there is no need to manually import anything back to AdvancePro as it happens through a webhook).
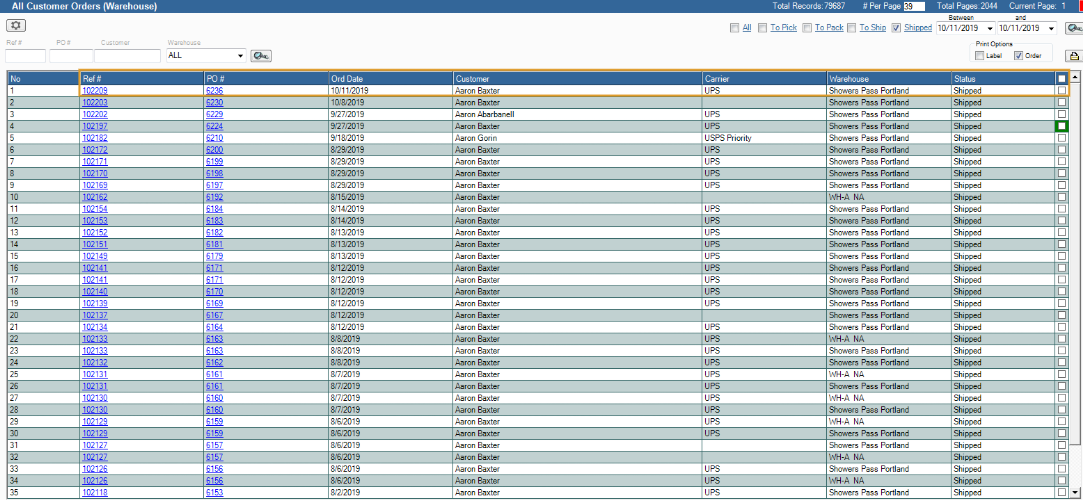
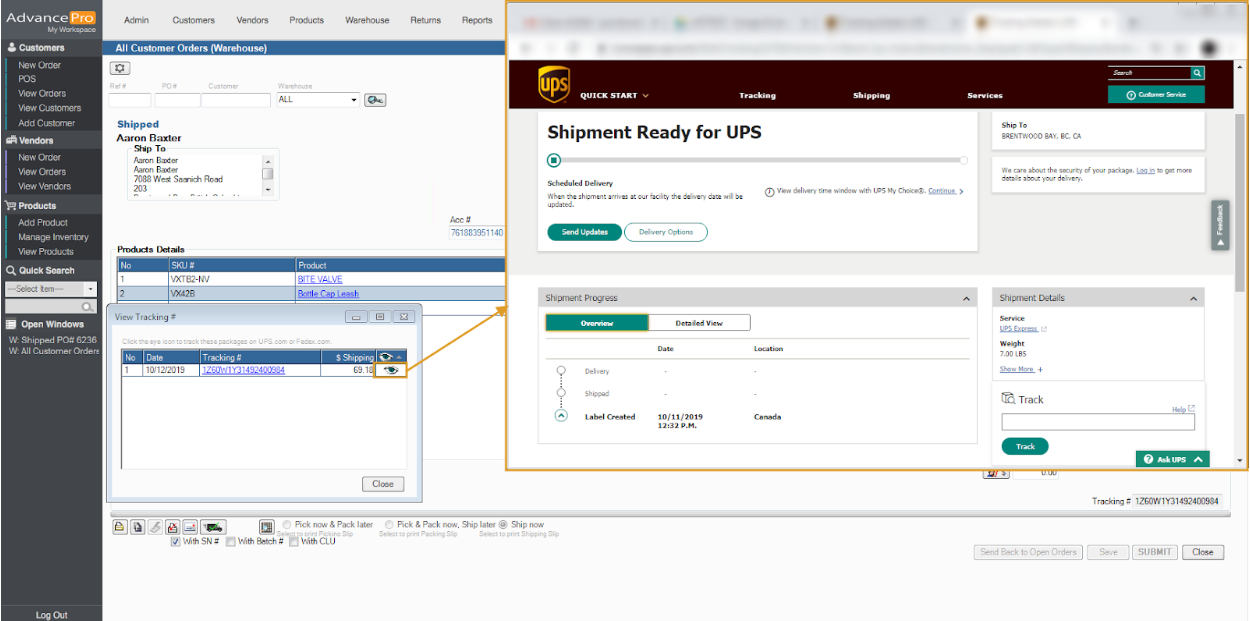
- Click on the order and the tracking number from ShipStation and shipping amount will be visible on the AdvancePro order when clicking “Shipping History” near the top-right of the order. It is also visible when clicking “View Tracking #’s” on the order in the warehouse.
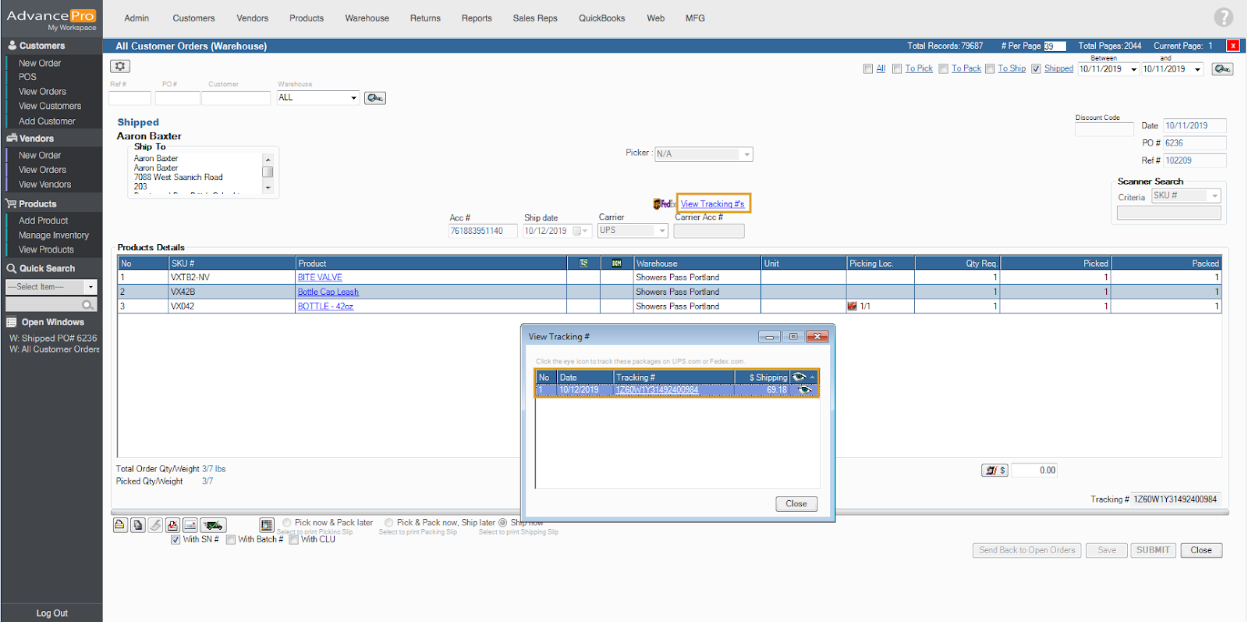
- Clicking on the EYE button will automatically open a website that will track the Shipping Progress
Batch process orders to ShipStation
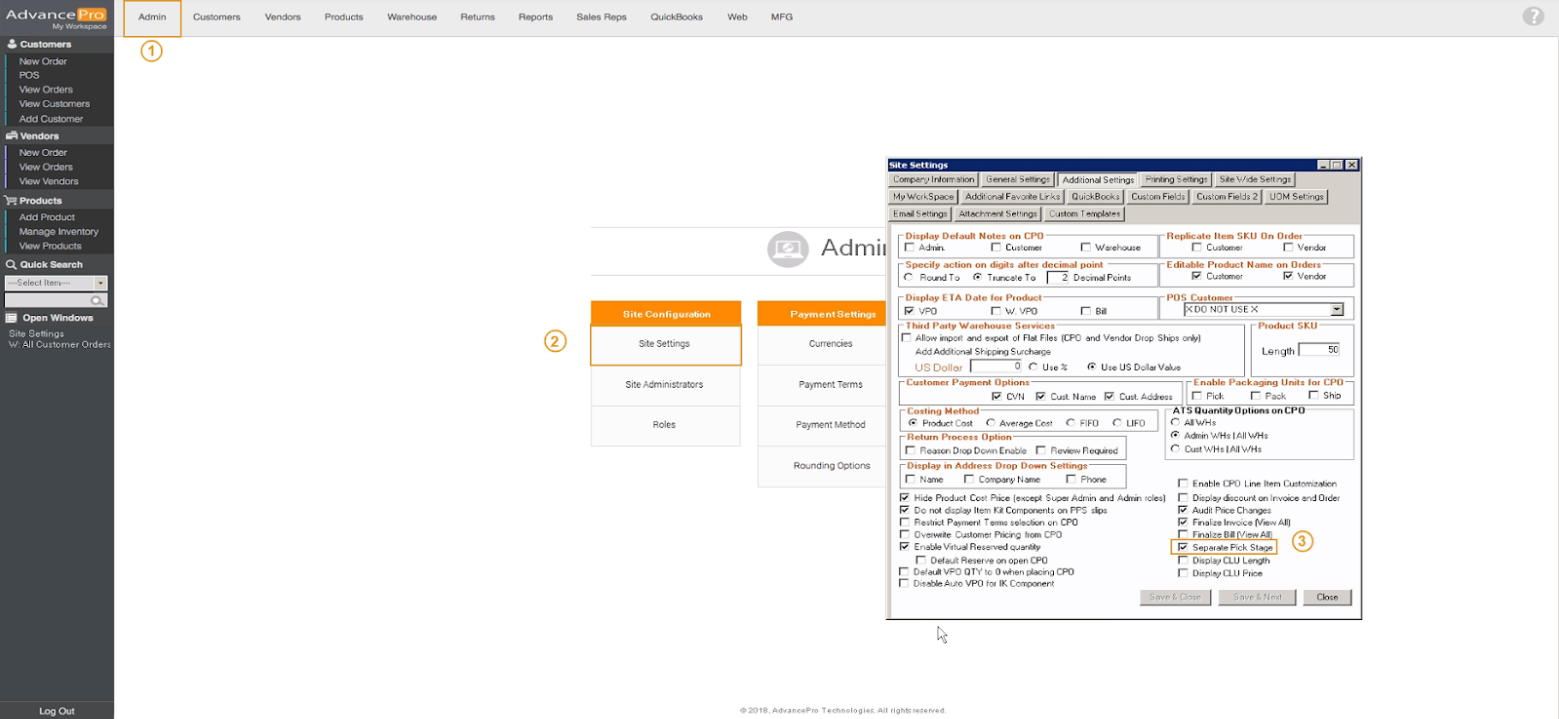
- Login to AdvancePro and go to Admin > Site Settings > tick Separate Pick Stage
- Make sure to enable ShipStation and tick Pack and Ship by going to Admin > Utilities > 3rd Party Shipping
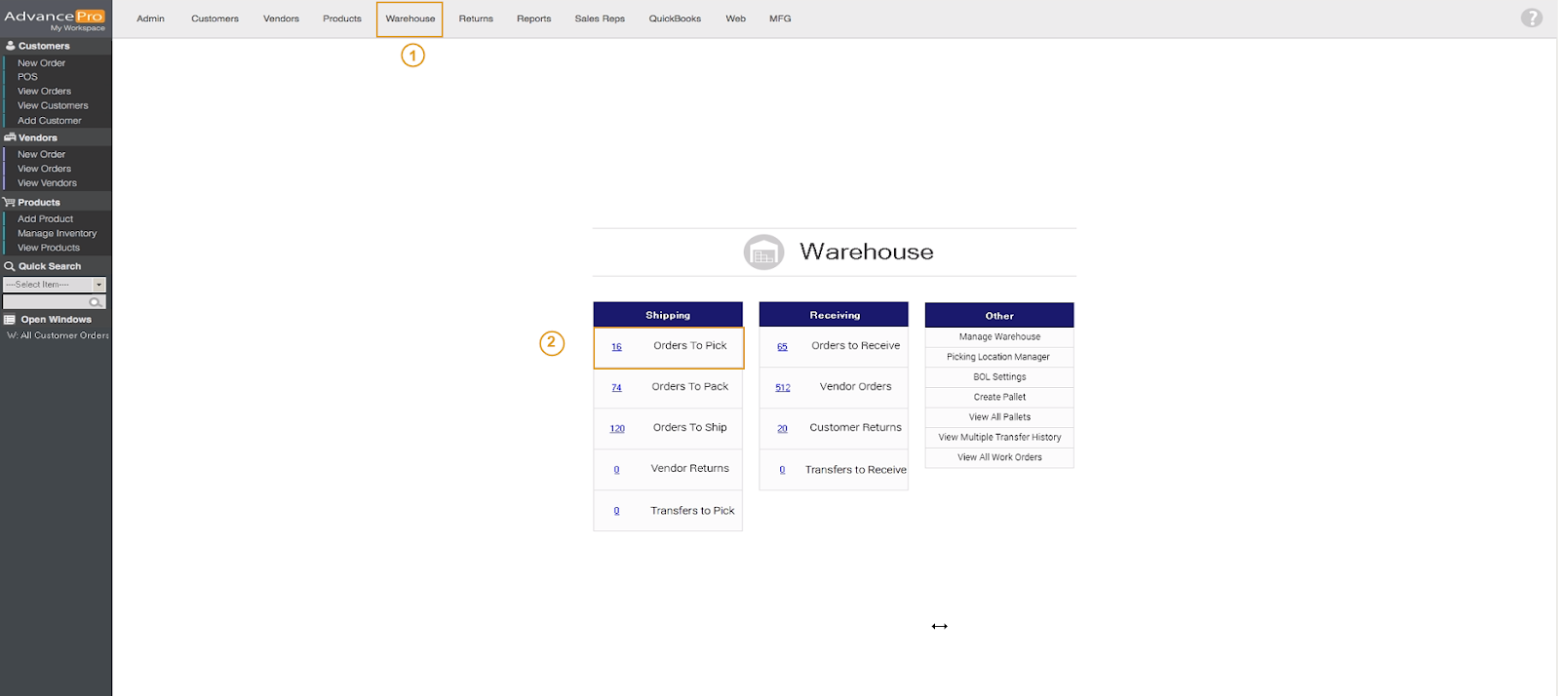
- After creating the orders, go to Warehouse and click on Orders To Pick to show the orders that are for picking
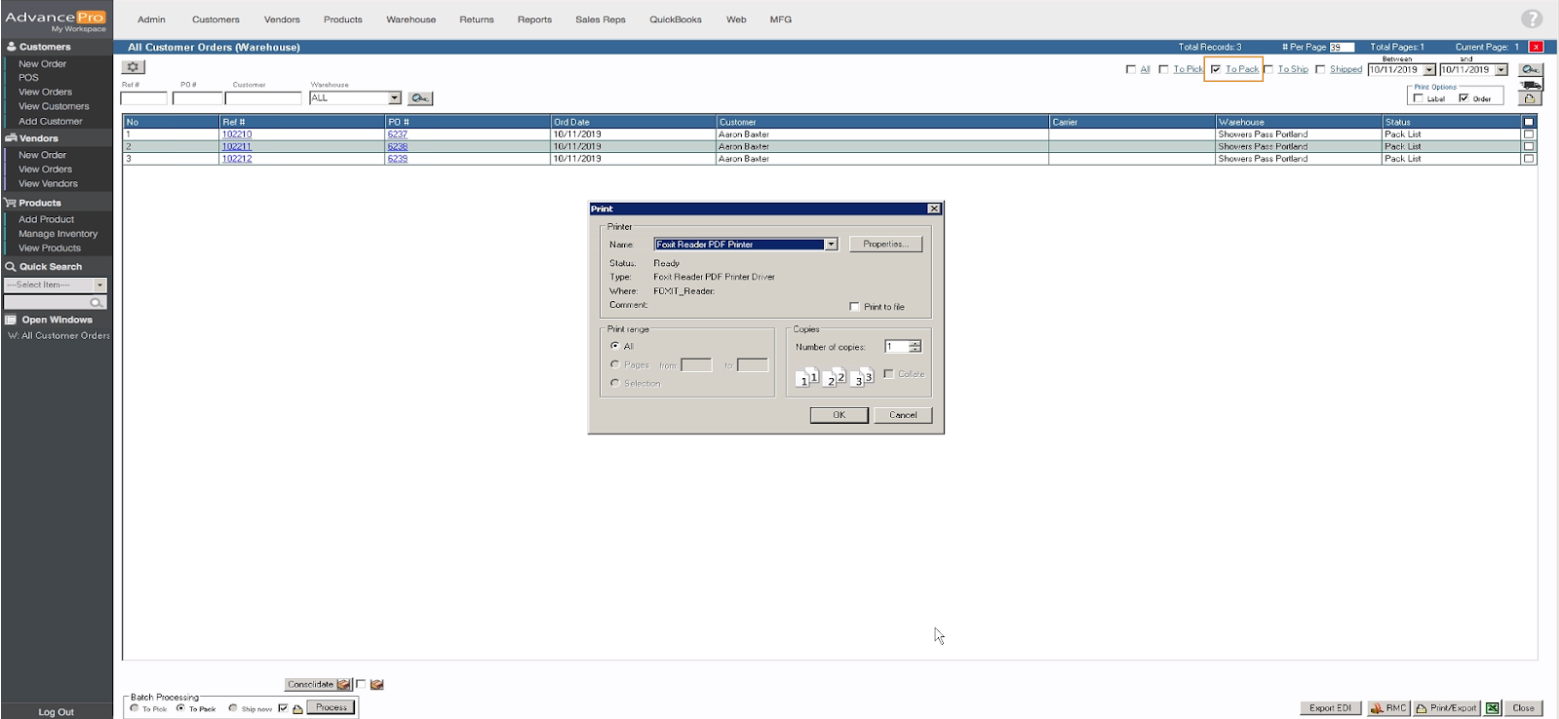
- Then select the orders that you want to process. At the bottom-left of the screen, you can see a Batch Processing option, click on Process
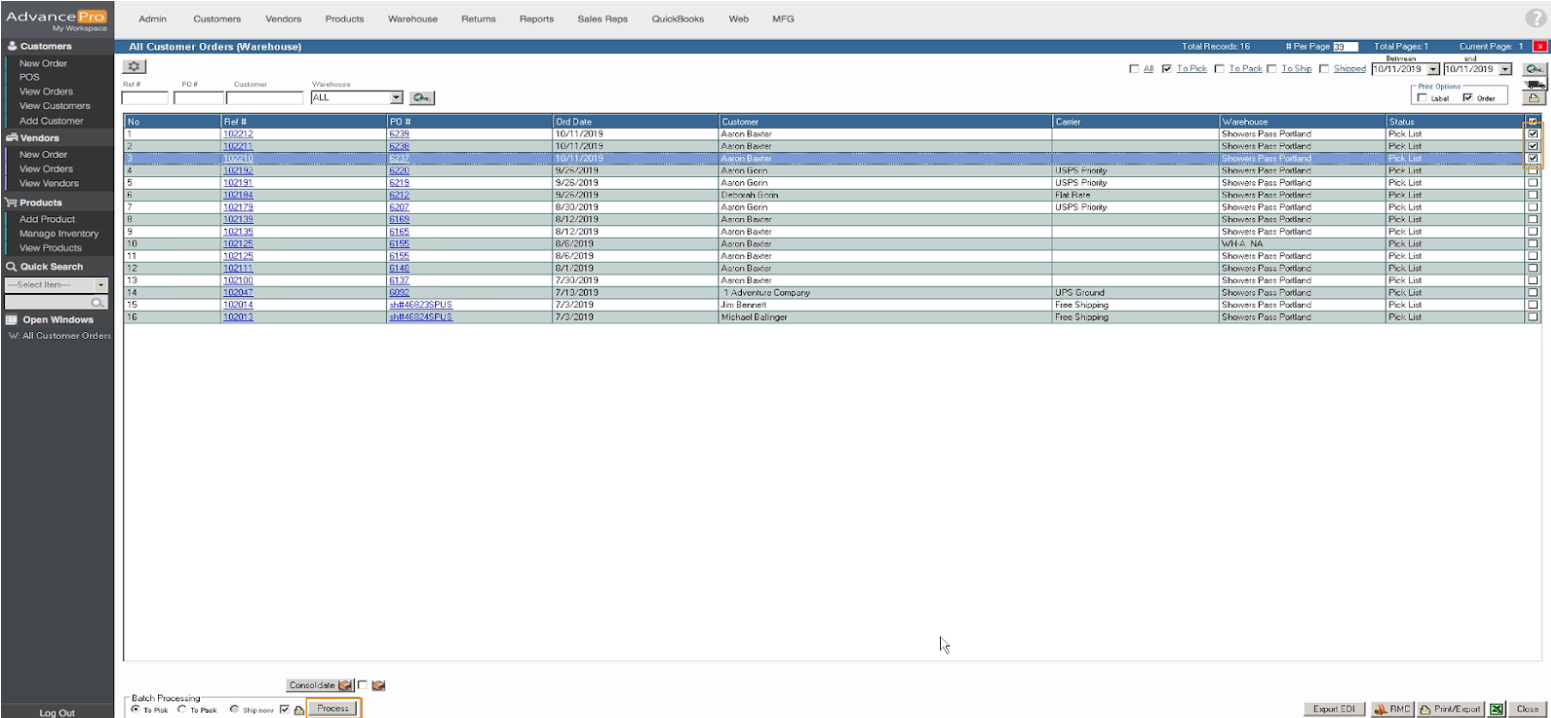
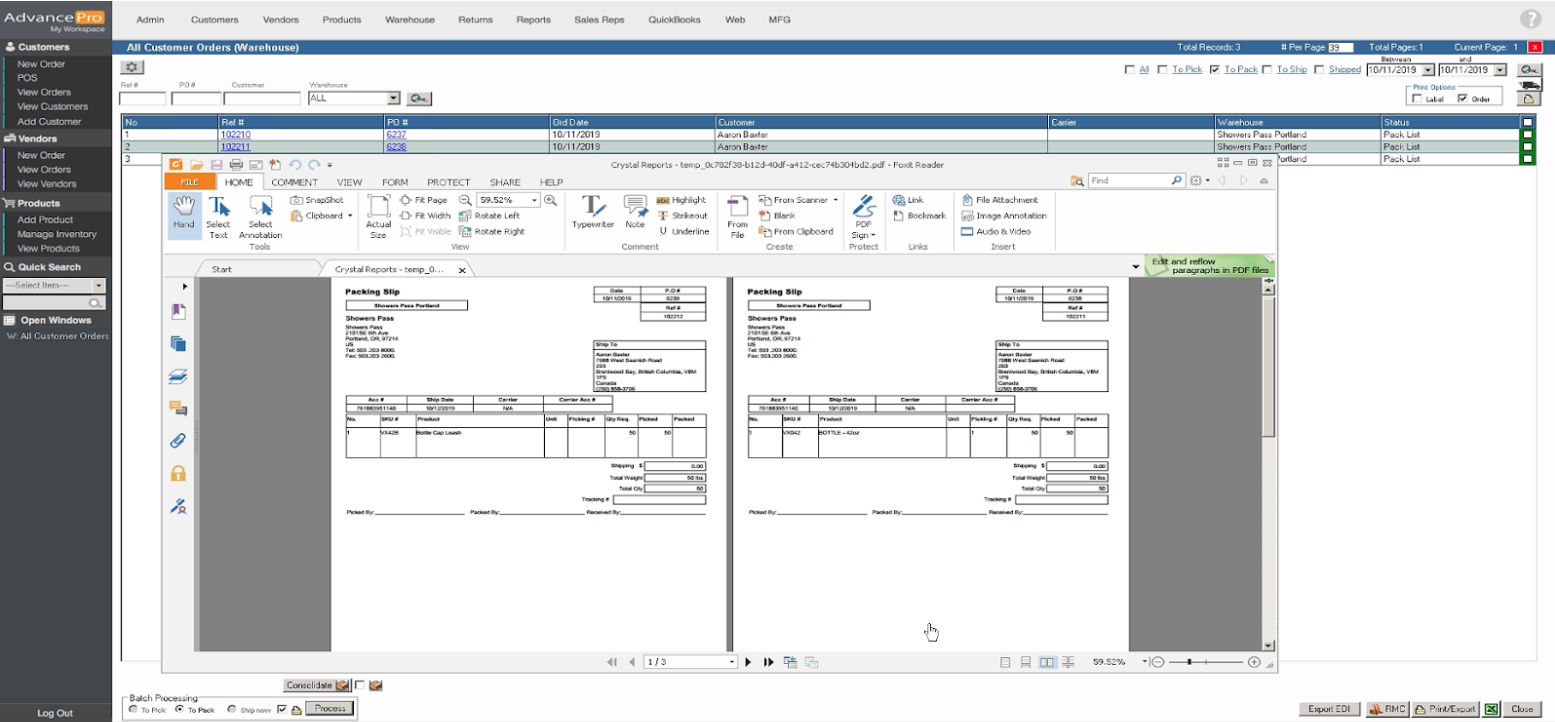
- Orders will be sent to To Pack and a Print window will pop-up, click on OK and the user will be asked where will they want to save the file.
- After saving the file, the printout will be shown on the screen
- Login to your ShipStation account and click on the refresh button to update the orders