
By default, when the barcode module is enabled, AdvancePro uses the SKU as the default barcode scanning field. In this article, we demonstrate how to setup AdvancePro to read other pieces of information by default instead:
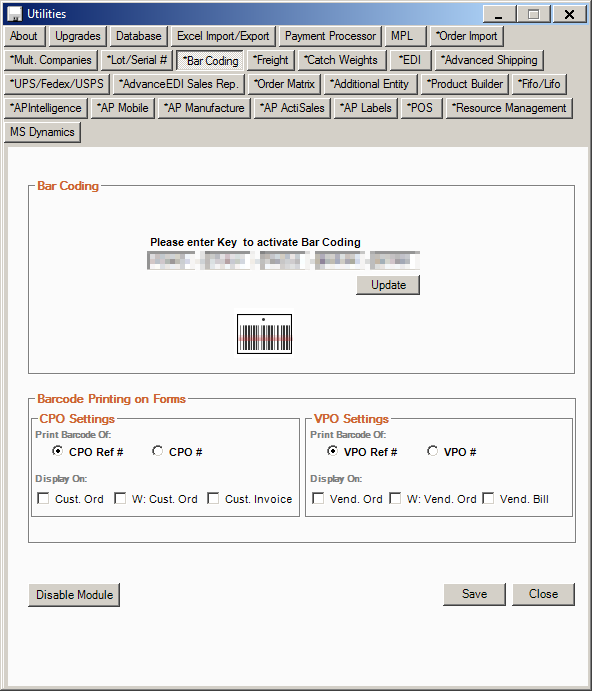
- Click on Admin > Utilities > Bar Coding, then double-click the image of the barcode to access the "Configure Vendor Barcode Schema" screen
- Select a vendor to create vendor specific barcode settings. To apply the same default barcode for receiving from all vendors, select the "Apply the below configuration to all active vendors" checkbox. There are 2 options for setting up custom barcodes:
- Delimited - This means that there is some identifier built into the barcode of where one piece of information ends and the next piece of information begins
- Non-Delimited - This means that there must be a fixed length for each piece of information on your barcode. The position should begin from 0, then count the number of characters to determine where the next piece of information begins.
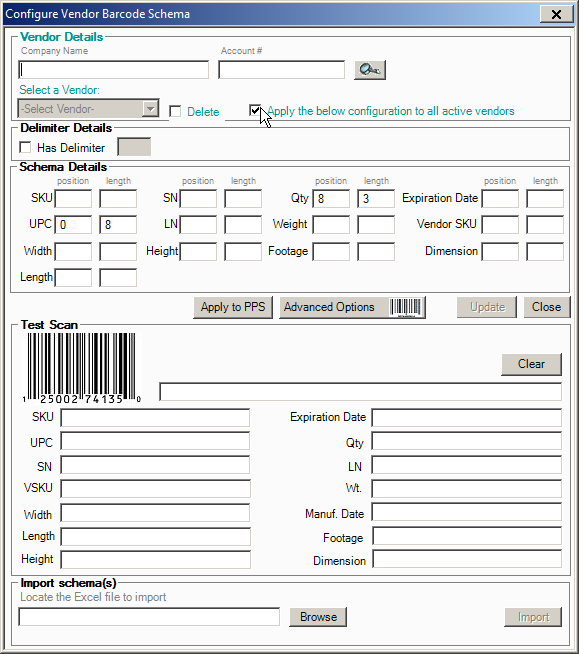
- Click on "Apply to PPS" in order to apply the selected barcode schema to your picking/packing/shipping stage. Click on "Update" to apply your changes.
Note: This method can be applied to configure AdvancePro to scan UPCs by default instead of SKUs. To do so, select the "has delimiter" option and specify that the UPC code is in position 0. Don't forget to apply this setting to all vendors and apply to PPS as well if you use UPCs all the time.