
Assembly items can be imported into AdvancePro from.XLS, XLSX and.CSV files, significantly reducing your data setup time of items that are manufactured.
How it Works
To use the assembly import feature, it is important to understand the following:
- The import feature is for the creation of new assemblies only, and does not allow for the update of currently existing assemblies
- To import an assembly, the components must exist in AdvancePro already.
- Multiple assemblies may be imported from a single file
- Multi-level assemblies can be imported by running multiple imports, starting with the lowest level assemblies first, then importing the higher level assemblies.
- Only one level of an assembly can be imported at a time.
The Import Process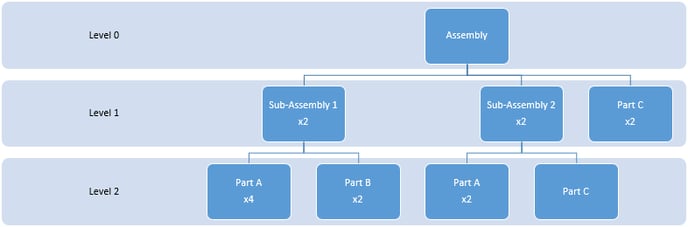
To import the assembly in the diagram above, we would use the following process:
- Create the lowest level of products in AdvancePro. These are products that are purchased and are not manufactured in house. In our example, Parts A, B and C are purchased products and therefore need to exist in AdvancePro prior to importing any assemblies. The purchased products can be created manually or using the products import. The spreadsheet below has been imported into AdvancePro for this example.


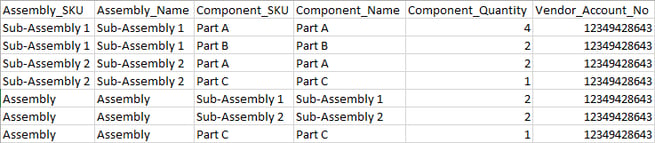
- Create an Excel sheet listing your assemblies and their components. Note that in the spreadsheet below, the six required fields are listed. Additional fields can be imported as well (described below)
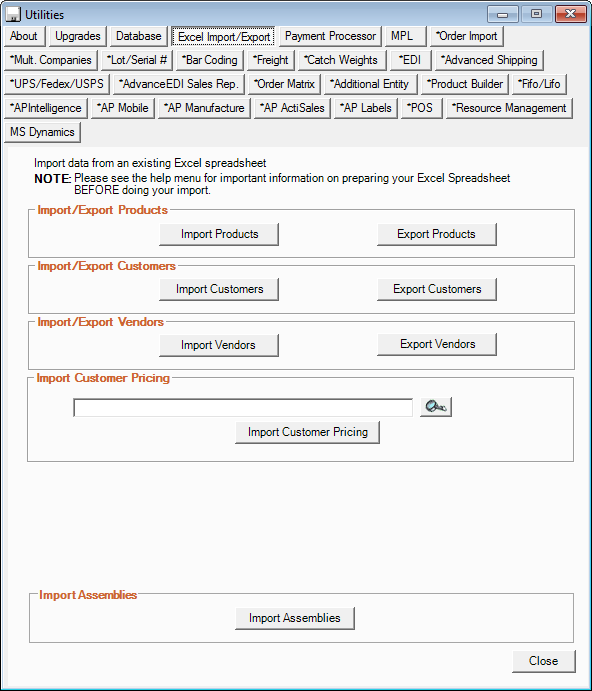
- In AdvancePro, click Admin>Utilities>Excel Import/Export>Import Assemblies
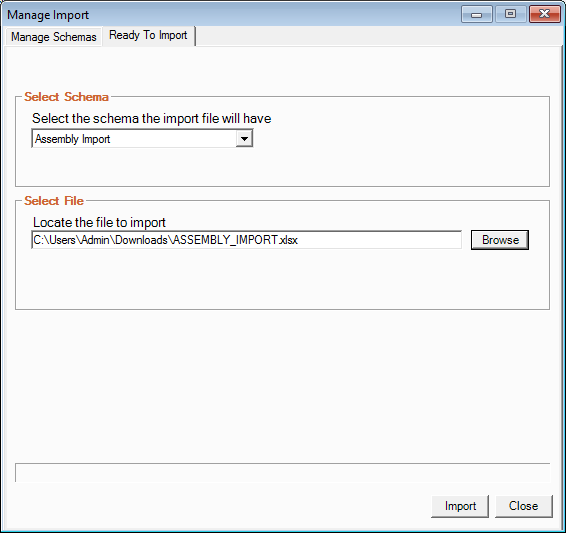
- Create an order import schema, identifying which headers appear, and in what order, on the spreadsheet that you will be importing. Indicate teh filetype that you will be importing. Note that multiple schemas can be created, with one of them being marked as "Default" so that selecting a schema is not necessary with each new import. Click on "Save" once you have mapped your spreadsheet. On the left hand side is a listing of all the fields that can be included on your assembly import spreadsheet.

- Click "Next" to access the "Ready To Import" screen. Select the schema that you will be using to import your spreadsheet. The schema marked as "Default" will be selected automatically. Browse for the file that will be imported and click "Import".
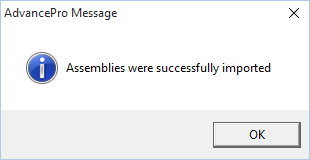
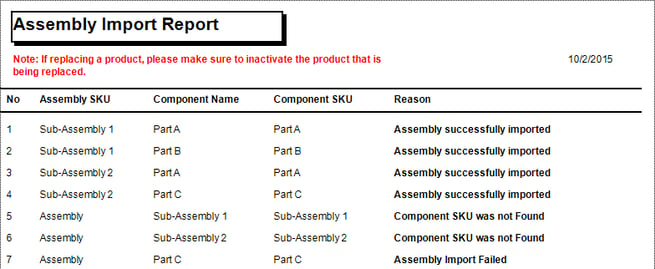
- You will see a notification indicating that your assembly has been successful, as well as a report indicating which assemblies have been successfully, and which ones have not. The assemblies that were not imported successfully will indicate the reason for their failure. In our example, Sub-Assembles 1 and 2 have successfully imported because the components were first created in AdvancePro. Assembly did not import because Sub-Assembly 1 and Sub-Assembly 2 did not exist yet at the time the import was done.
- We can now import the same spreadsheet again following the same steps as above, because Sub-Assemblies 1 and 2 now exist in AdvancePro as a result of our first import.

- The assemblies can now be seen in the product listing in AdvancePro
