How To Use The Landed Cost Freight Module
The landed cost freight module enables AdvancePro users to calculate their landed costs from products they bring in. Follow these steps:
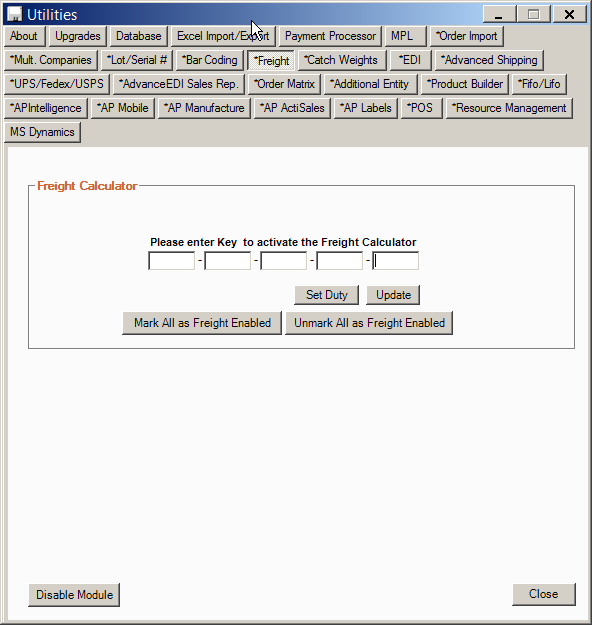
- Go to "Admin>Utilities>Freight" and enter your key to activate the module.
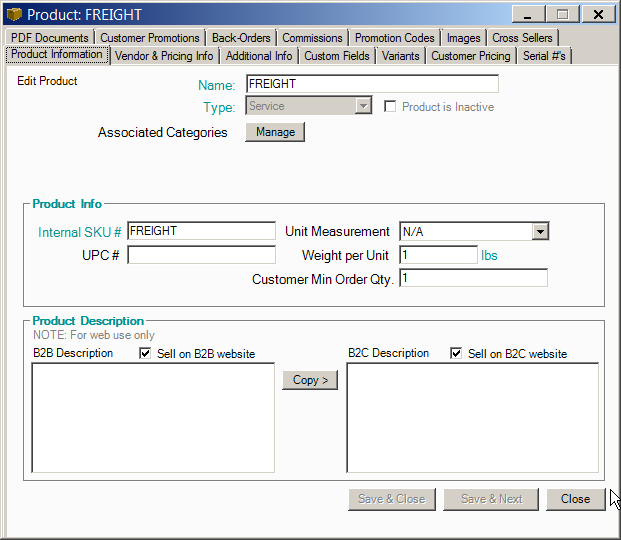
- Go to "Add New Product" and create a "Service" item that will be used when entering your freight bills.
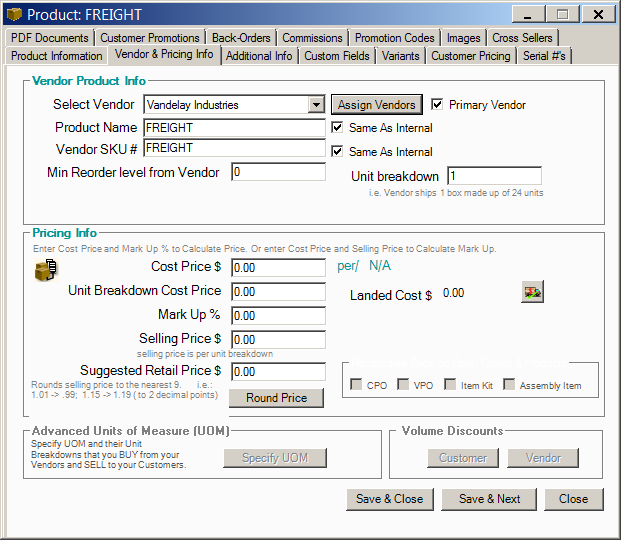
Then, click on "Vendor & Pricing Info" in and select the vendors that provide you with freight services, then click "Save & Close".
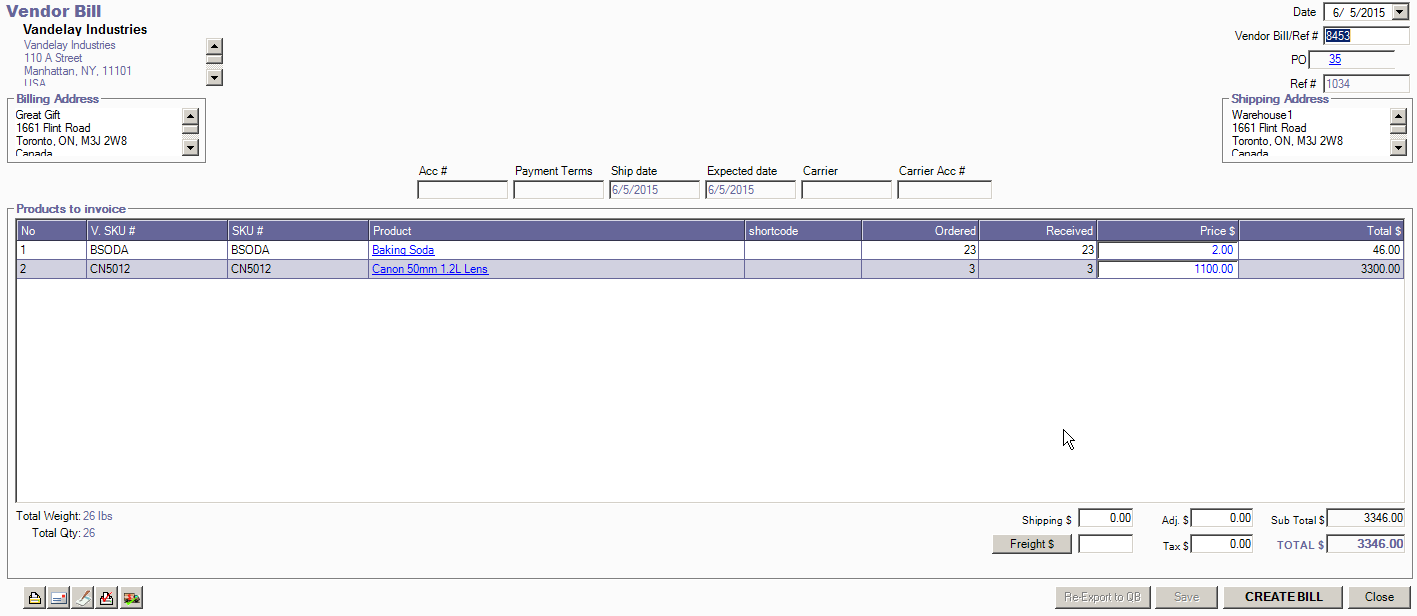
- After receiving a vendor order, go to "Vendors>View All Bills and Credit Memos" and select the pending bill for the order you have received/

- From within the vendor bill, click on "Freight $" near the bottom right of the screen.
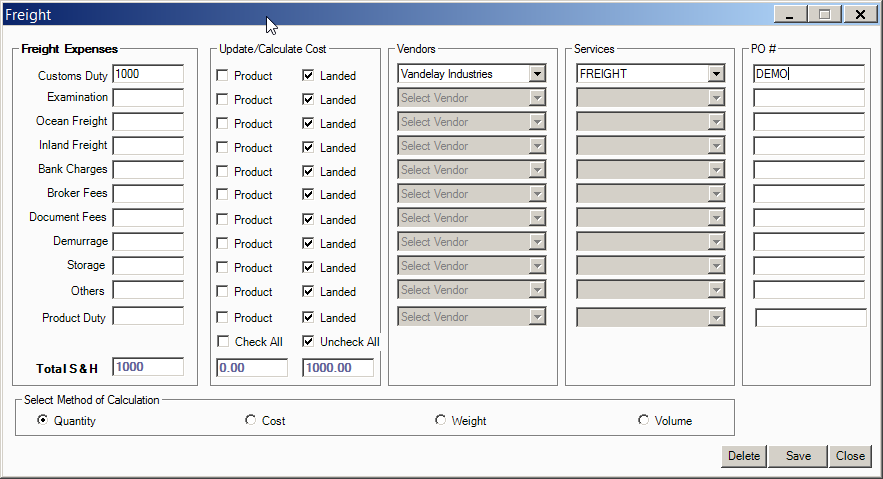
- Enter the expenses, select the vendors and services, and input PO numbers. Note that the "Landed" option is selected by default. This will provide you with a landed cost calculation on each product, without updating your purchasing cost from your vendor. Finally, at the bottom of the screen, select whether to apply landed costs by quantity, cost, weight or volume and click "Save" and "Close".
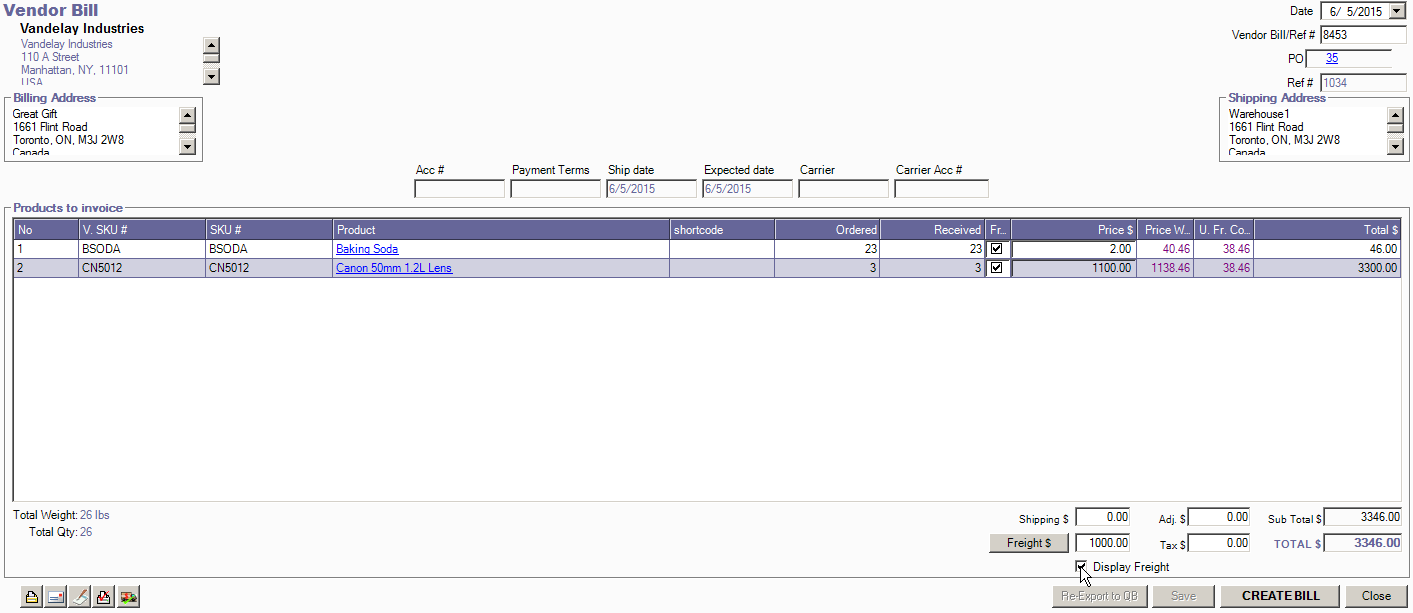
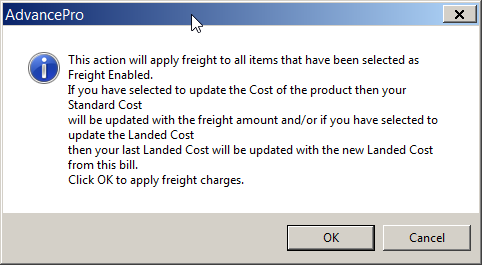
- Now, click the "Display Freight" checkbox at the bottom right of the screen to view your price with freight and your unit freight cost. Click "Create Bill" and your vendor bill and freight bills will be created after clicking "OK" on the confirmation screen
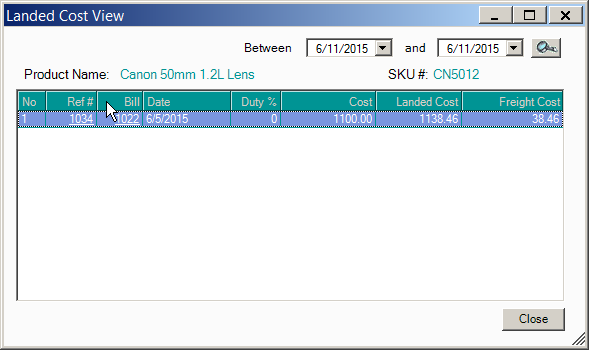
- To view your landed costs at any time, click "View All Products" and click the edit button at the far right of the screen on the product line. Then click on the "Vendor & Pricing Info" tab. Here you will see your landed cost.
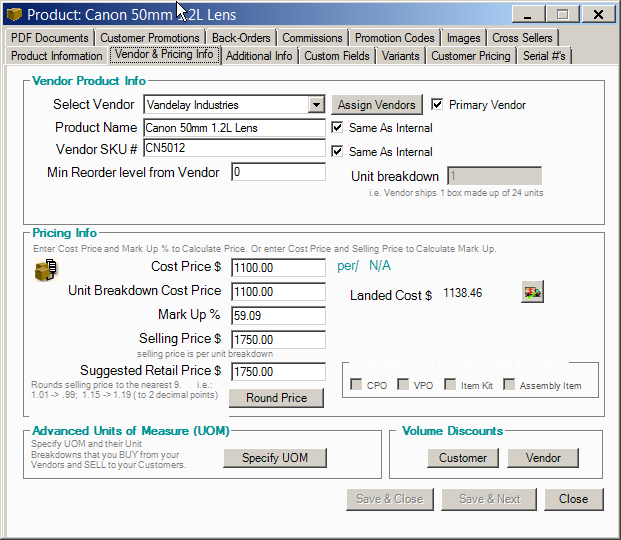
Clicking the truck icon will show you the landed cost history.