Set up and use class tracking in QuickBooks Desktop and AdvancePro.
1. First, turn on class tracking in Quickbooks Desktop
Windows
- Open your company file.
- Go to the Edit menu, then select Preferences.
- Select Accounting, then go to the Company Preferences tab.>
- Select the Use class tracking for transactions checkbox.
- If you want a reminder when you haven't assigned a class, select the Prompt to assign classes checkbox.
- Select OK.
Mac
- Go to the QuickBooks menu, then select Preferences.
- In the Workflow section, select Transactions.
- Select the Use class tracking checkbox, then close the Preferences page to save the changes.
2. Then, Set up class categories for expenses and accounts
Windows
- Go to the Lists menu, then select Class List.
- From the Class ▼ drop-down menu, select New.
- Enter the class name.
- If it's a subclass, select the Subclass of checkbox and find the class it's under in.
- Select OK to add it.
Mac
- Go to the Lists menu, then select Classes.
- Select Create (+).
- Enter the class name.
- If it's a subclass, select the Subclass of checkbox and find the class it's under in.
- Select OK to add it.
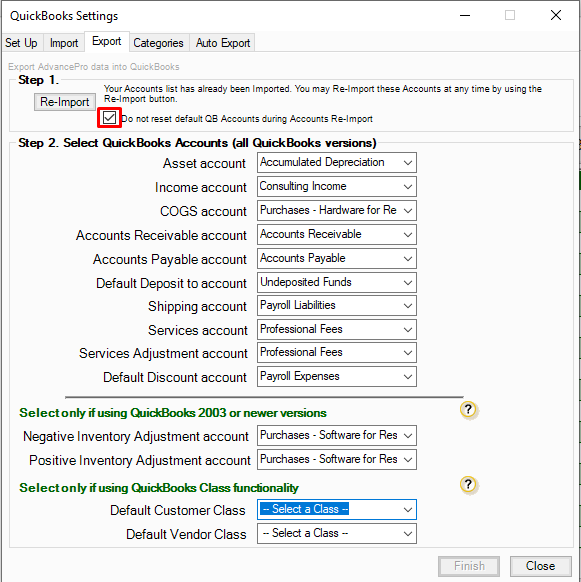
3. Go to the Quickbooks Menu in AdvancePro > Settings > Export
*Important! Make sure the "Do not reset default QuickBooks Accounts Re-Import" is checked.
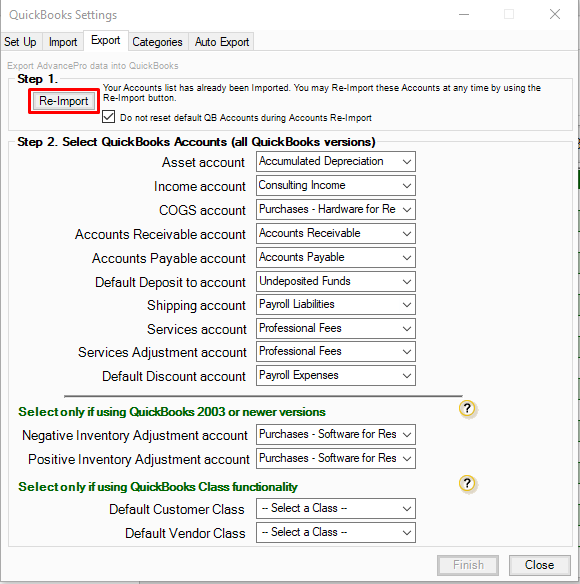
4. Click Re-Import
5. Once done, the classes set up in Quickbooks should now reflect in AdvancePro.
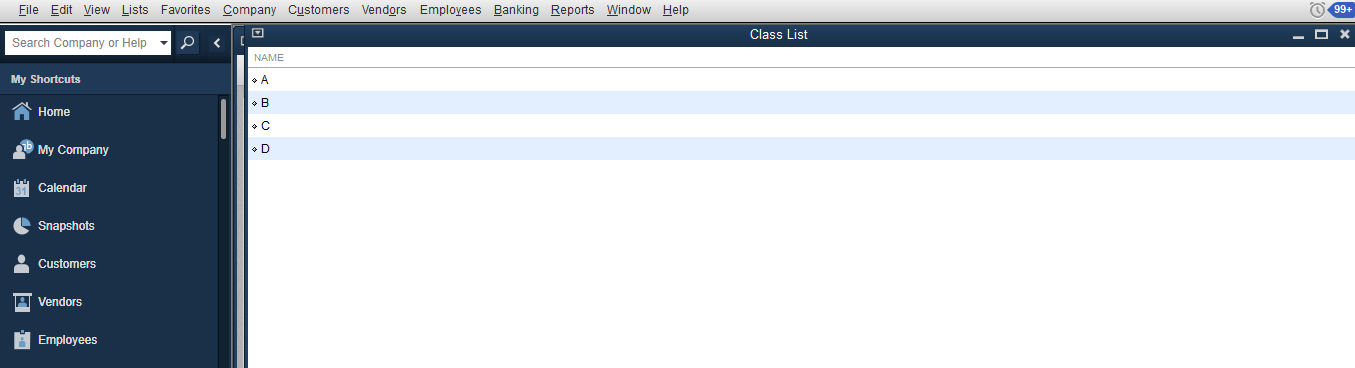
Sample classes created in Quickbooks.
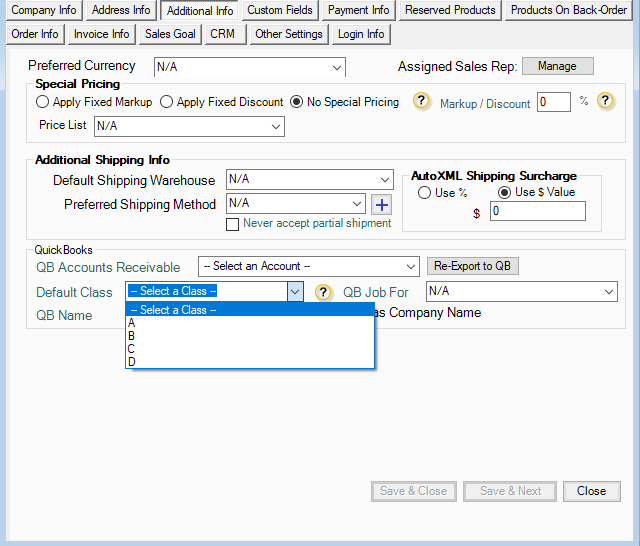
Under Edit Customer > Additional Info
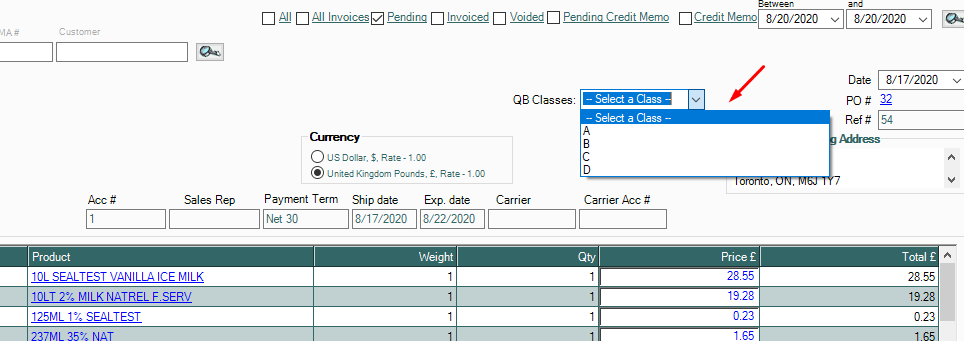
Should also reflect in the invoices in AdvancePro.