This document serves as a guide in setting up Advanced Units of Measure for Inventory Items
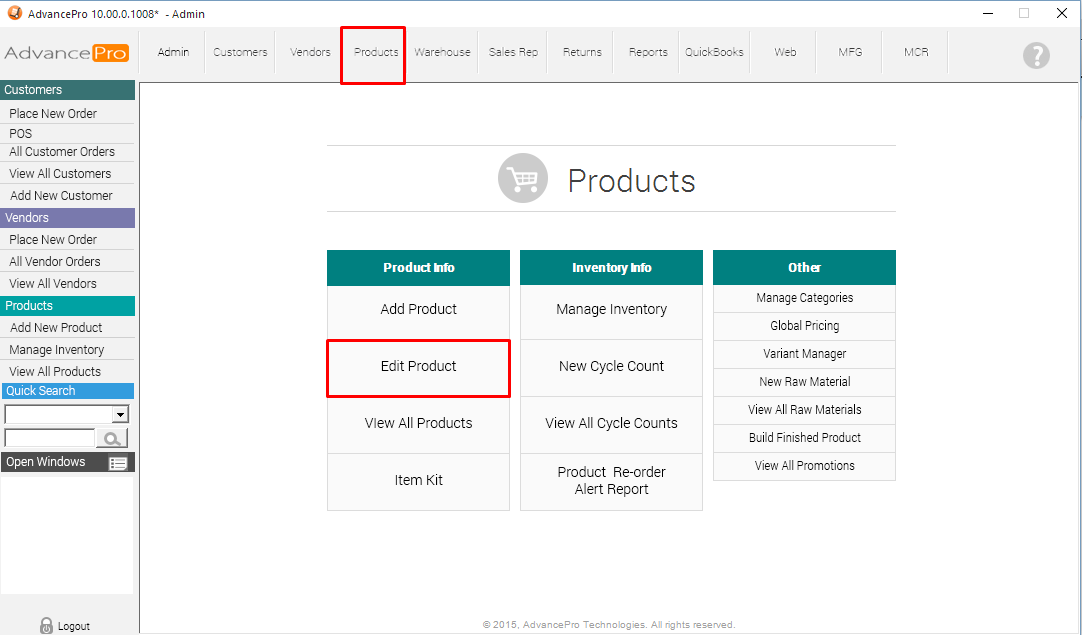
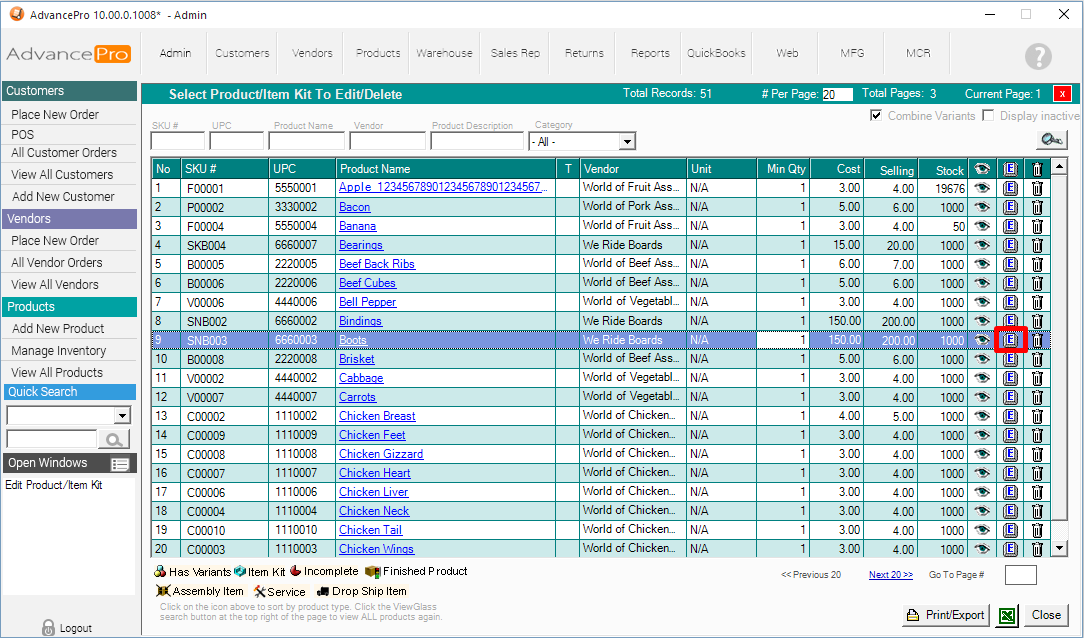
1. Go to Products > Edit Product
2. Click the [E] Edit Icon of the designated product.
3. Click Vendor & Pricing info Tab, and Hit Specify UOM under Advanced units of Measure (UOM) screen
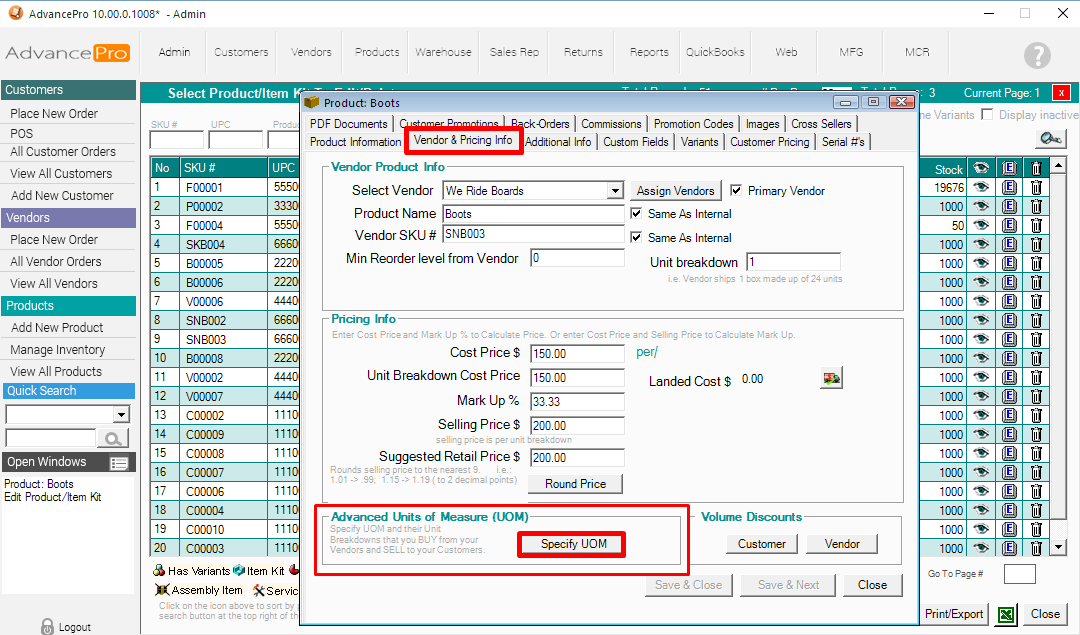
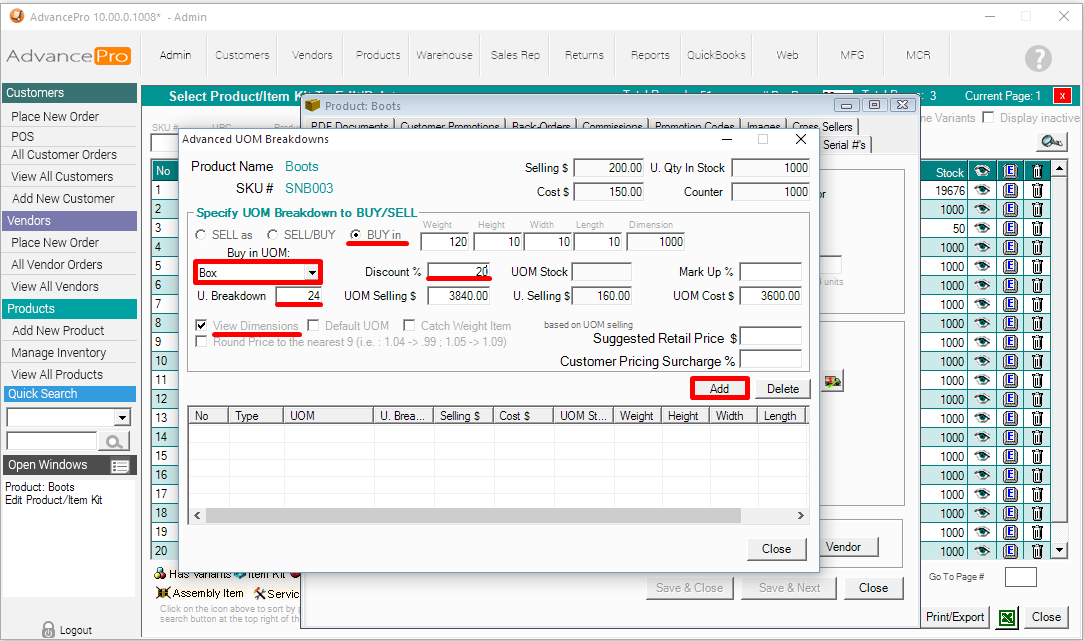
4. Set the necessary options.
- SELL as
- SELL/BUY
- BUY in
- Set the Unit of Measurement (You can add or remove unit labels under Admin > Product Unit Management)
- Dimensions, Discount %, Mark Up %, Pricing and other options
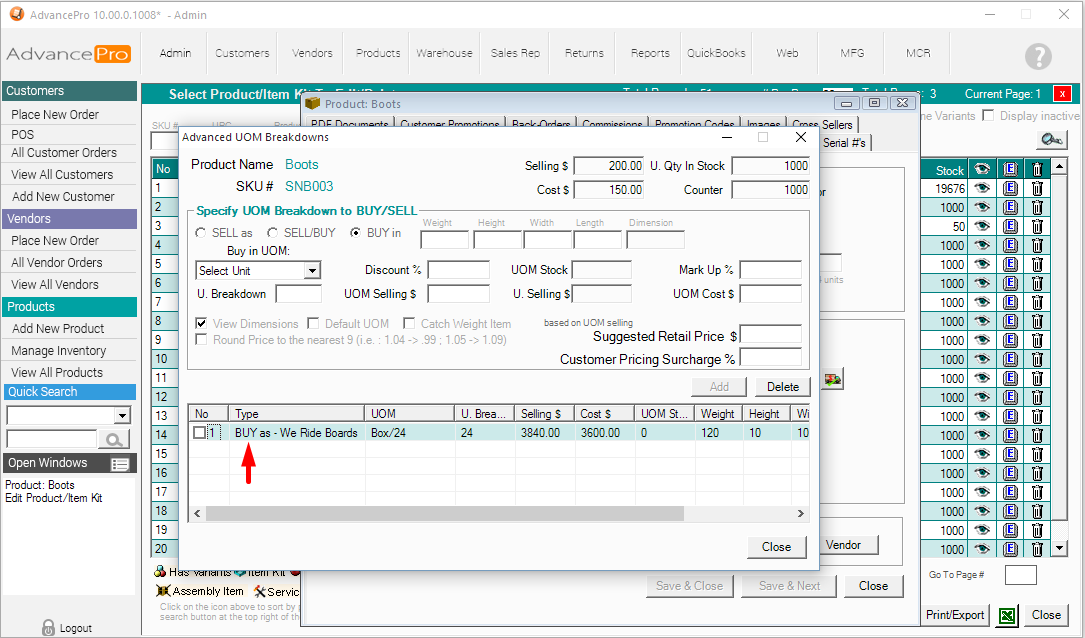
And finally click Add once you are finished.
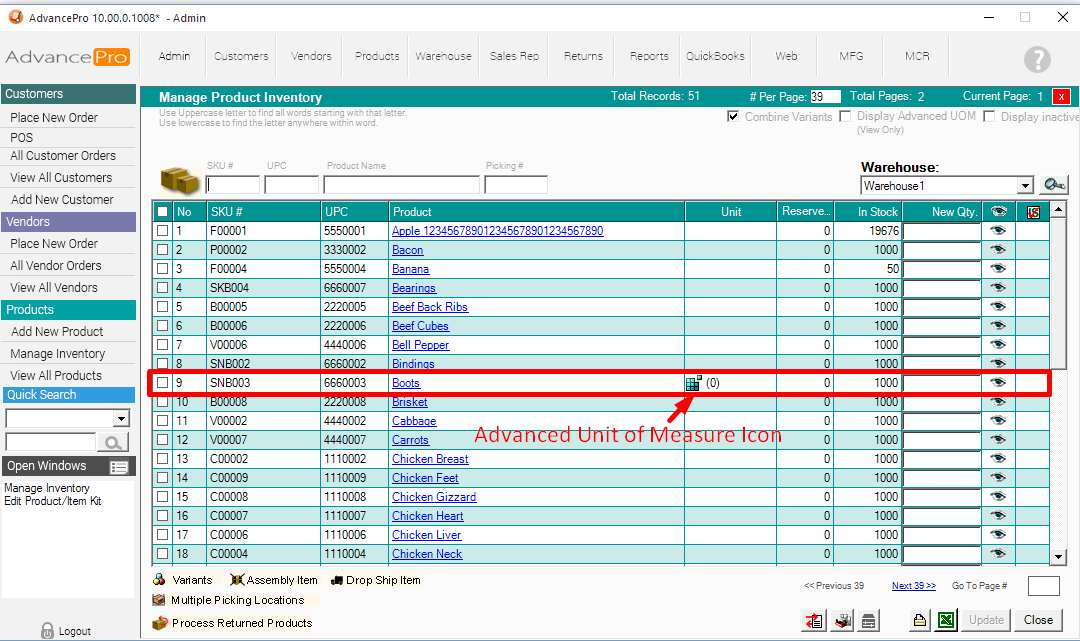
5. Go to Products > Manage Inventory screen and look for the item that was set up for Advanced UOMs
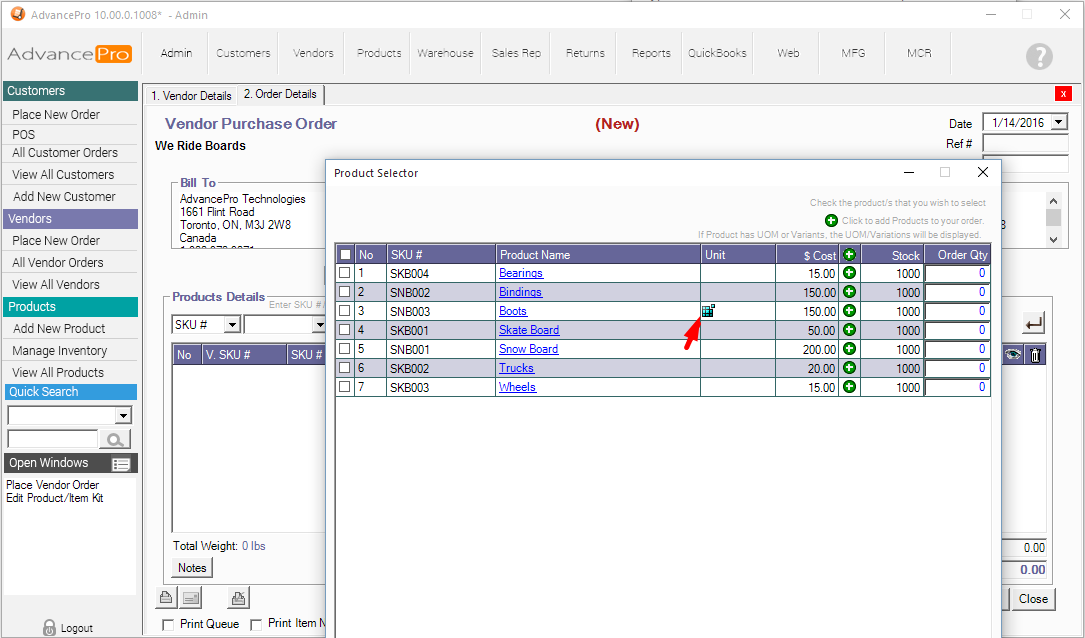
6. When placing a Vendor Order (since in this example, we have selected "BUY in Boxes of 24") click the green "Plus" icon [ + ] to see the Advanced UOM
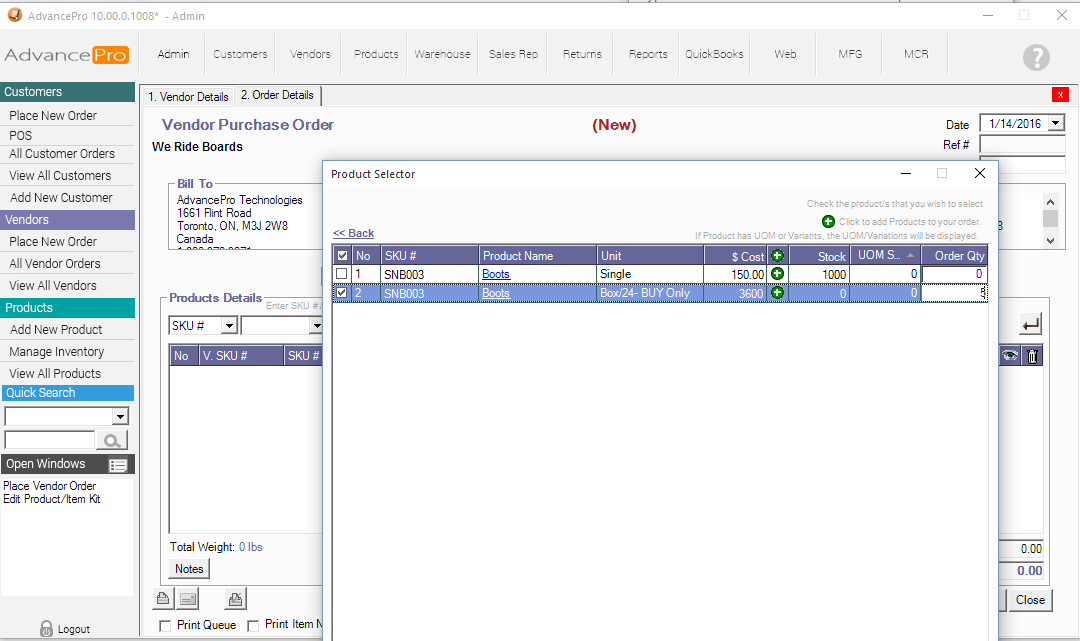
Setting 5 boxes of 24 units to BUY from the vendor
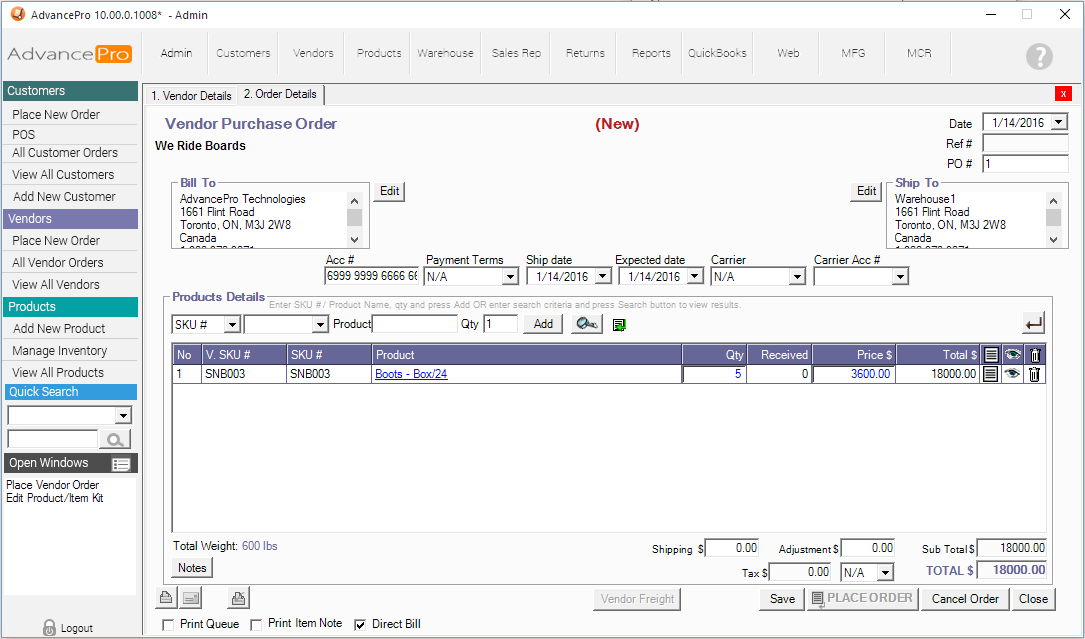
This is how it appears on the vendor order screen
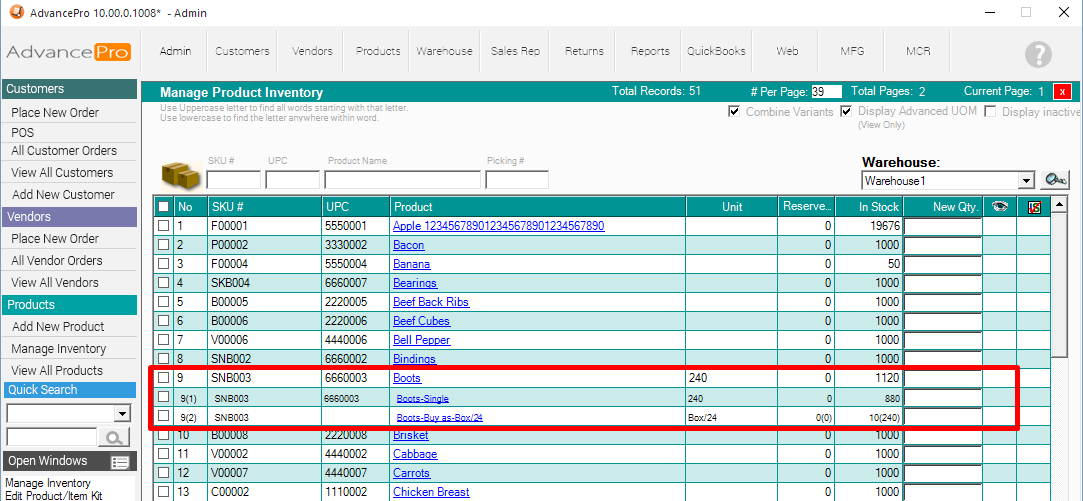
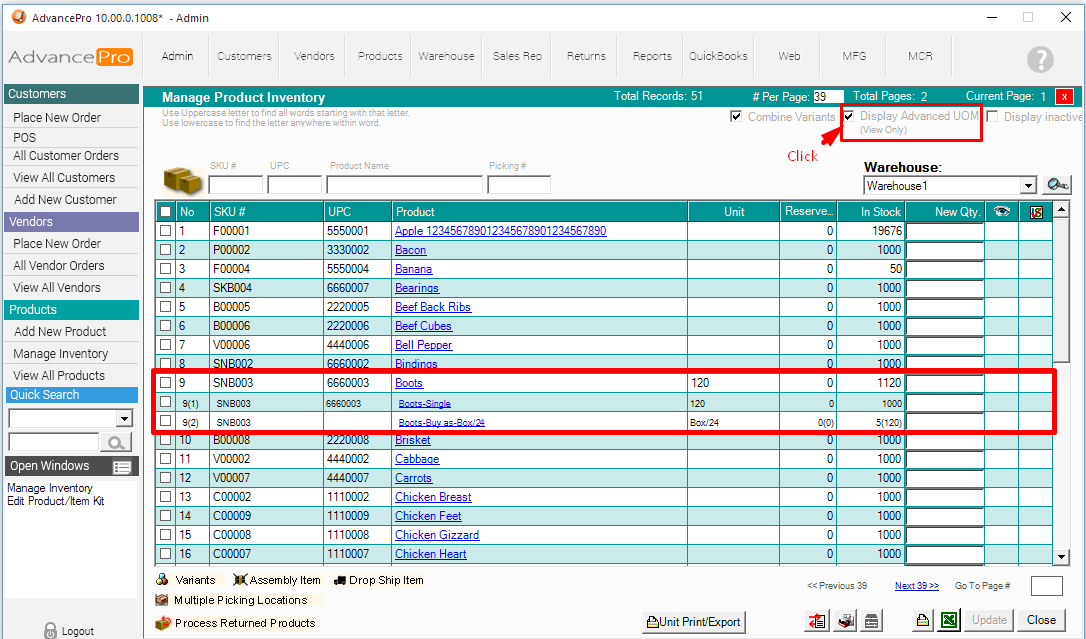
7. Go back to Manage Inventory Screen again and CHECK the box for "Display Advanced UOM (View Only)", it will display the products with Advanced UOM as an indented list.
To set up your individual items for the Advanced UOM, follow the instructions below:
1. Go to Products > Manage Inventory
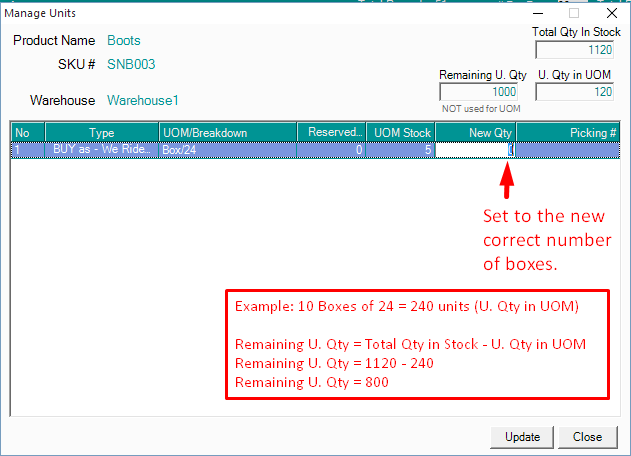
2. Click the Advanced UOM Icon  of the designated product
of the designated product 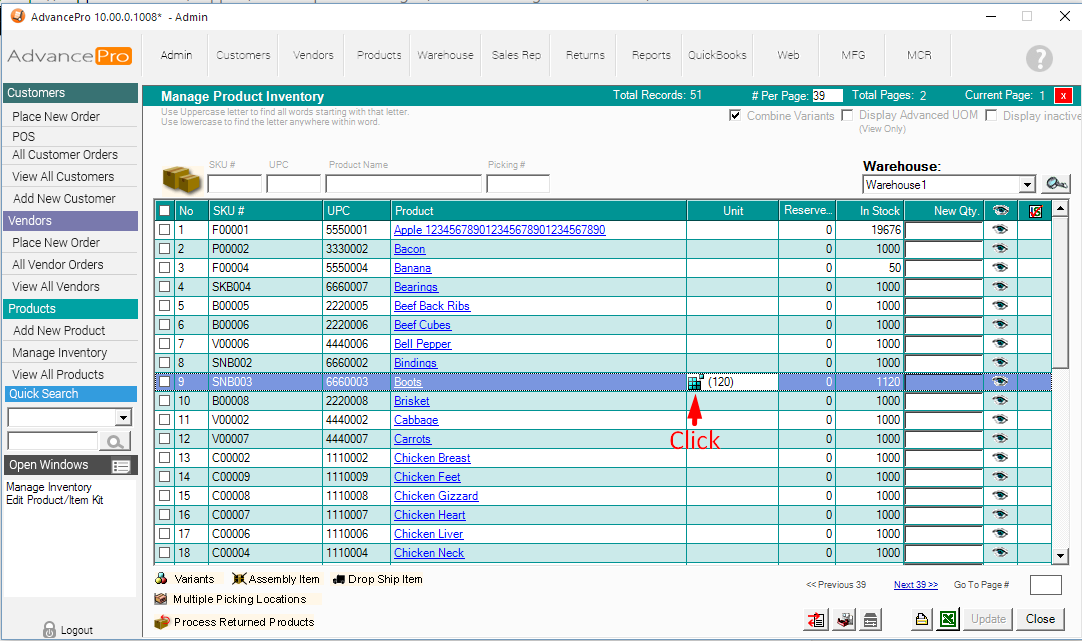
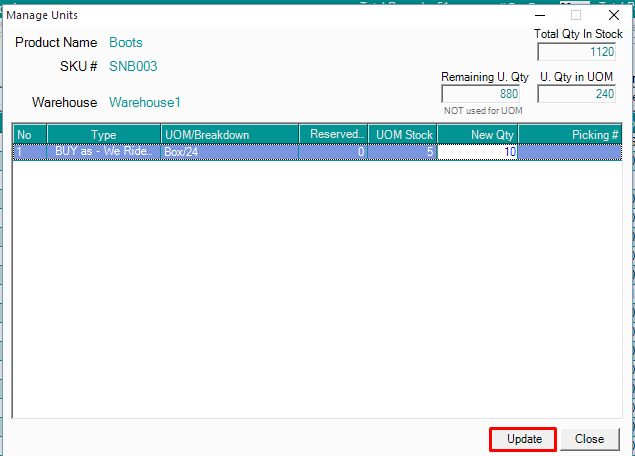
3. Set the new quantity of boxes and hit Update when ready