How to Create a Picking Location
- Go to Warehouse and click 'Picking Location Manager'
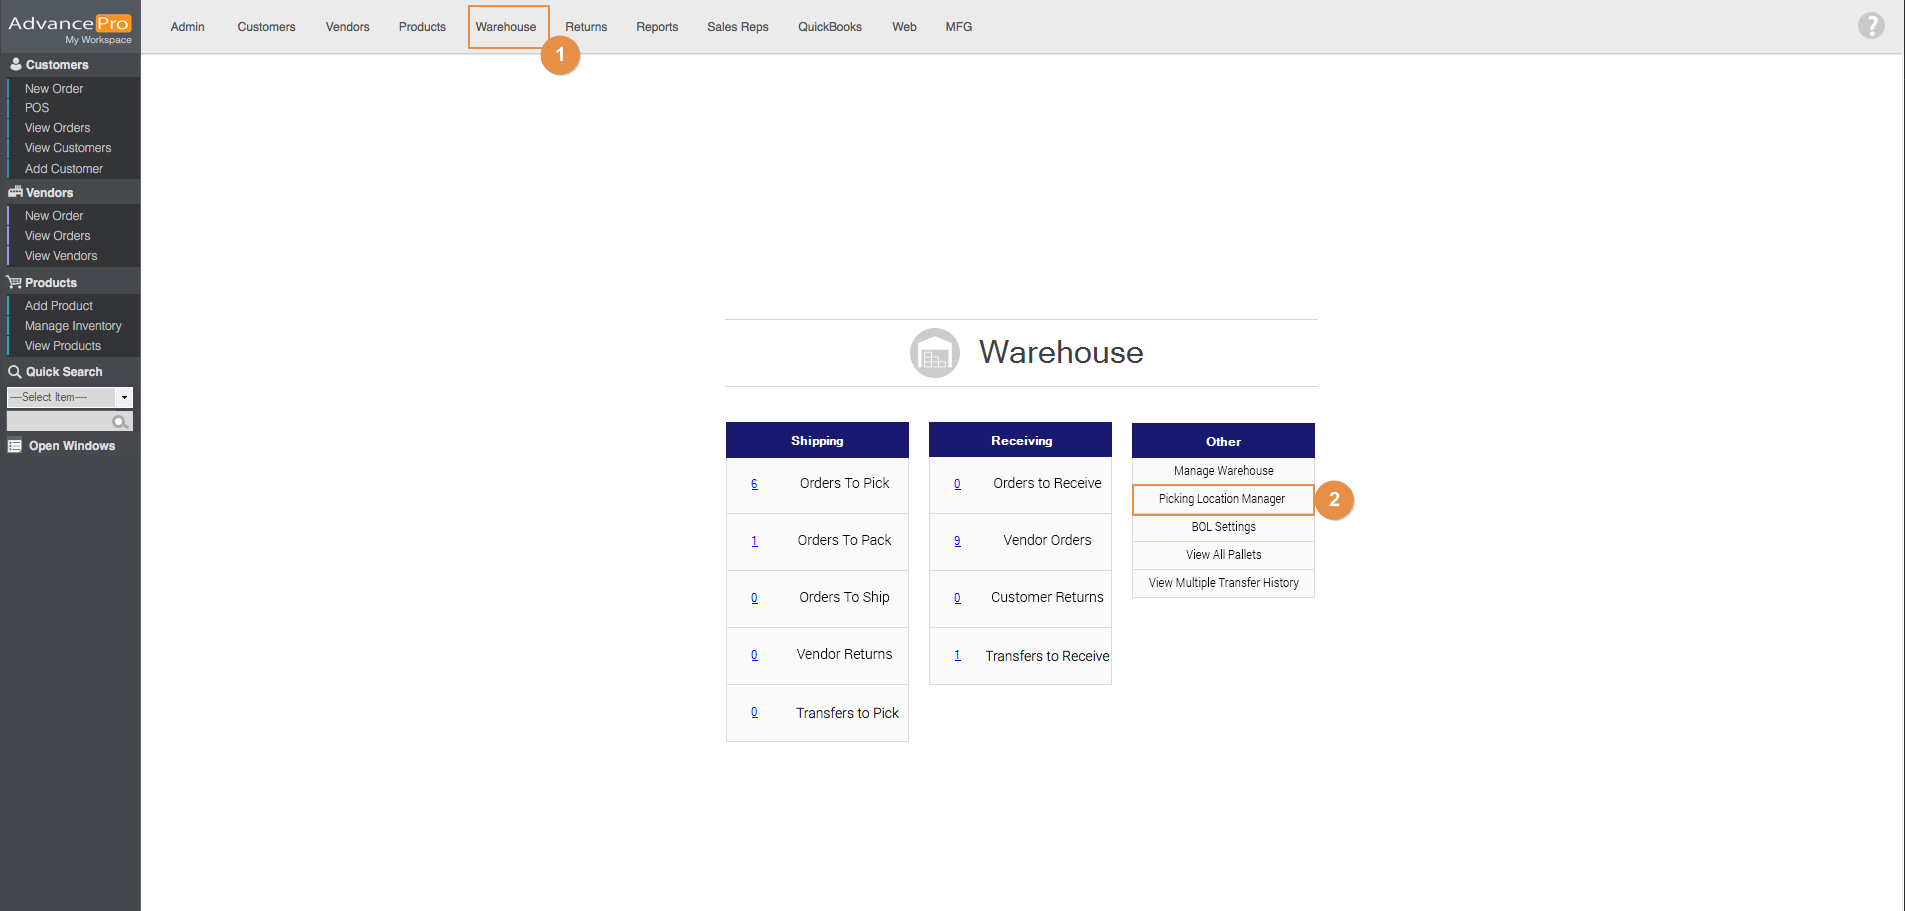
- Select the warehouse from the warehouse drop-down

- In this example, we'll select Warehouse 3, you'll need the following information
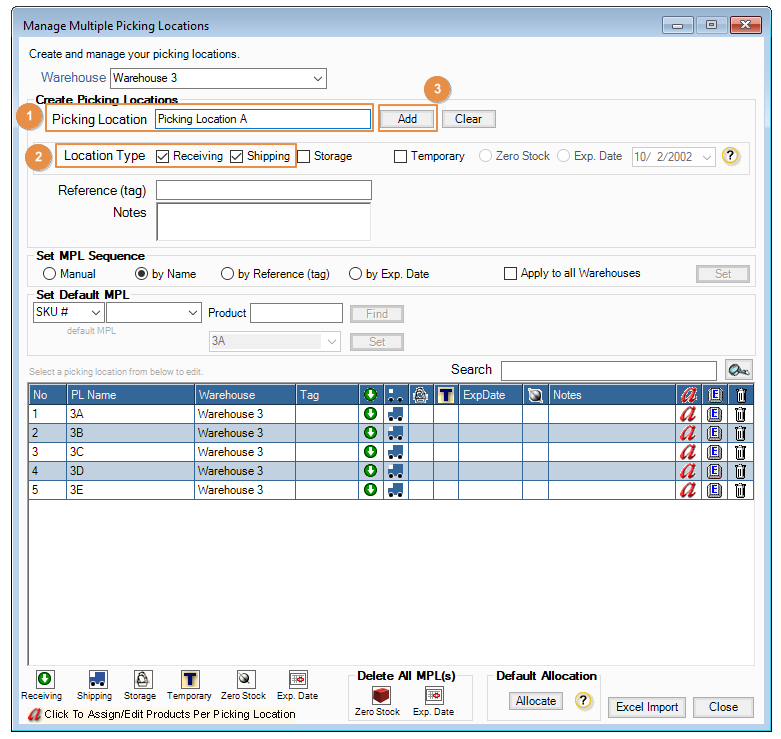
- Picking Location name
- Location type
- Receiving - If this option is selected, you can only receive on this picking location
- Shipping - If this option is selected, you can ship from this picking location
- Storage - If this option is selected, you can only transfer to this or from this location.
- Temporary - This will be a temporary picking location. There are two options: Zero stock and Exp.
- Set MPL Sequence - Sequence is useful when processing a warehouse order. It will sort the products in the warehouse order by the following sequence:
- Manual
- by Name
- by Reference
- by Exp. Date
- After providing all the information, you may click on Add
- Picking Location is automatically added in the grid. To assign products to the location, just click on
 to open the Products selection screen.
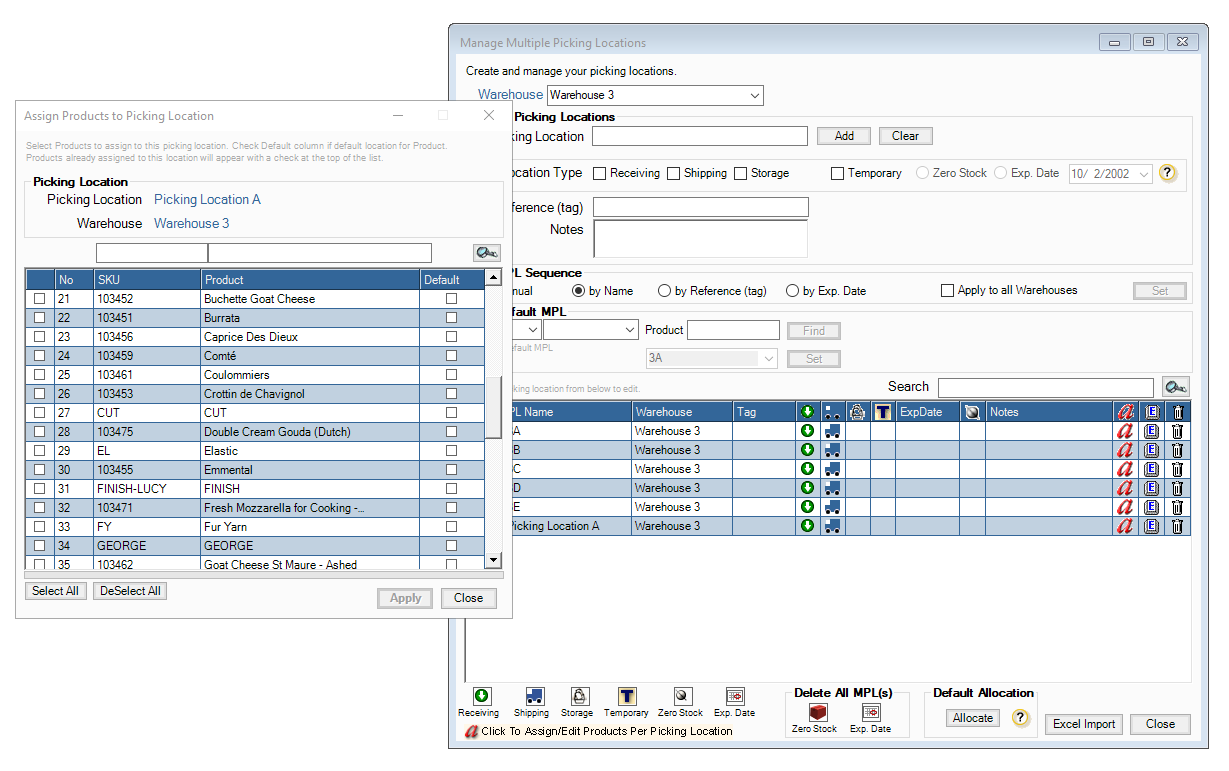
- After selecting a product, it will automatically be defaulted to the picking location then click on Apply

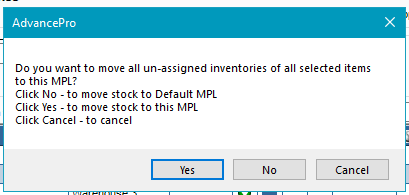
- There will be a prompt message, just click on Yes
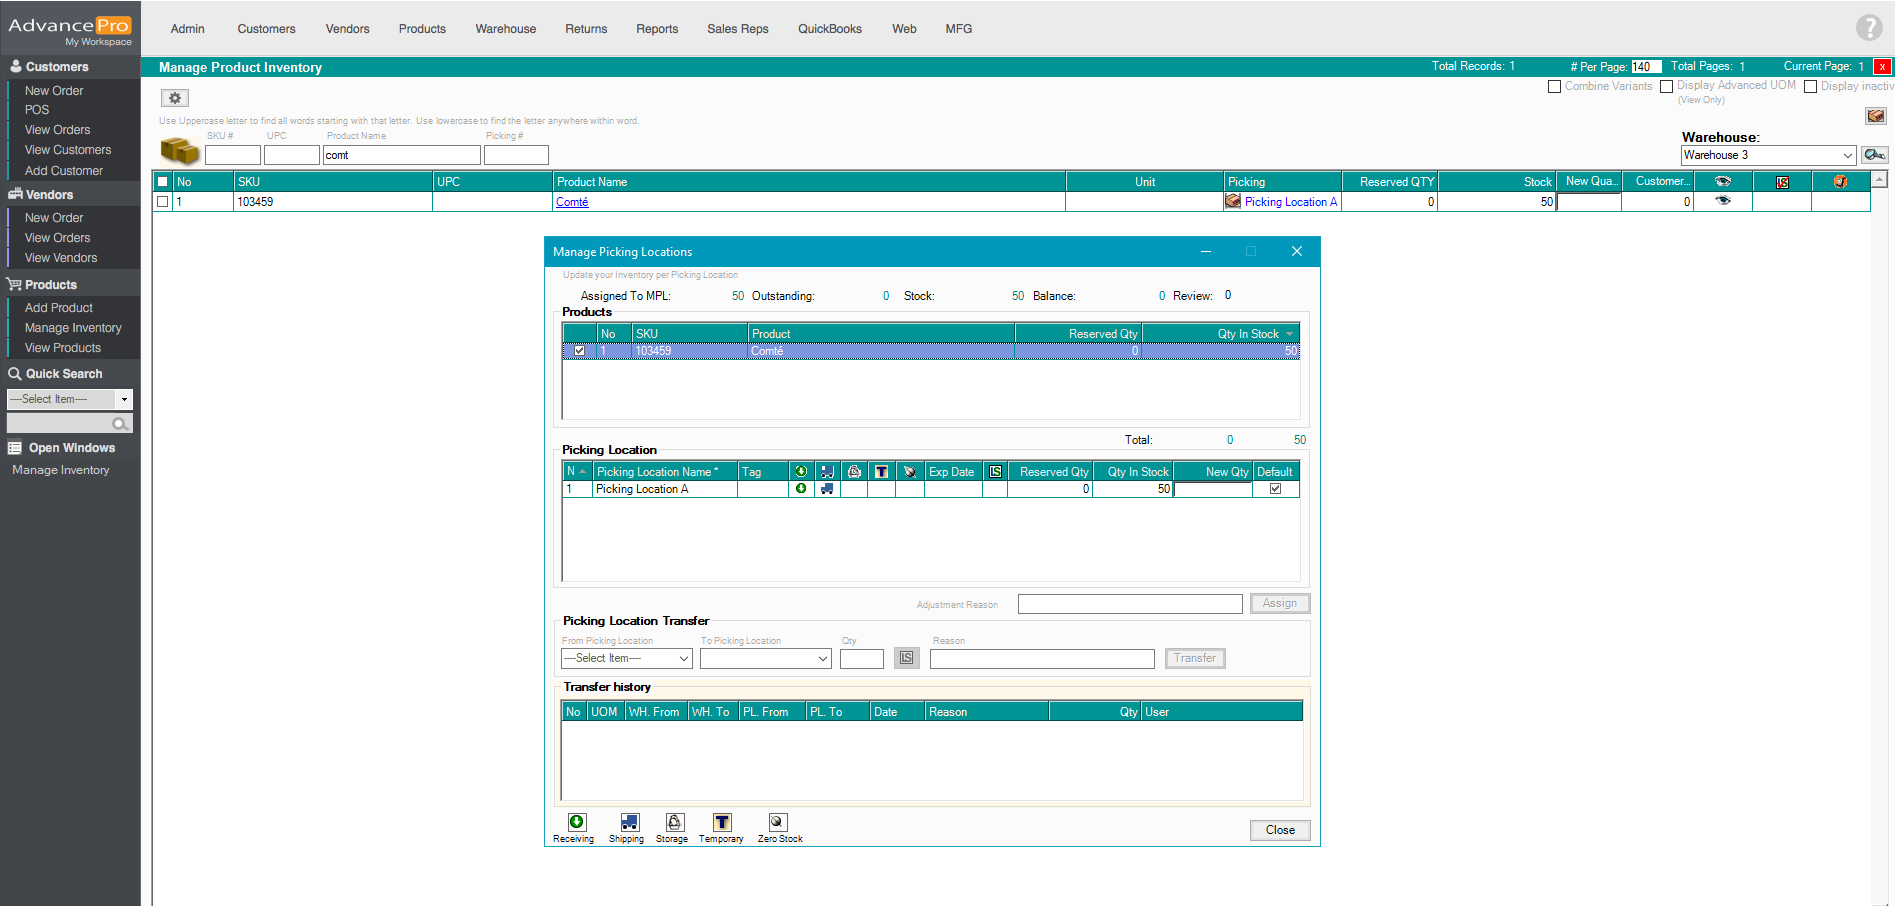
- To check, go to Products > manage inventory, Select the warehouse and search for the product