First, Setup the path location to pull up the documents.
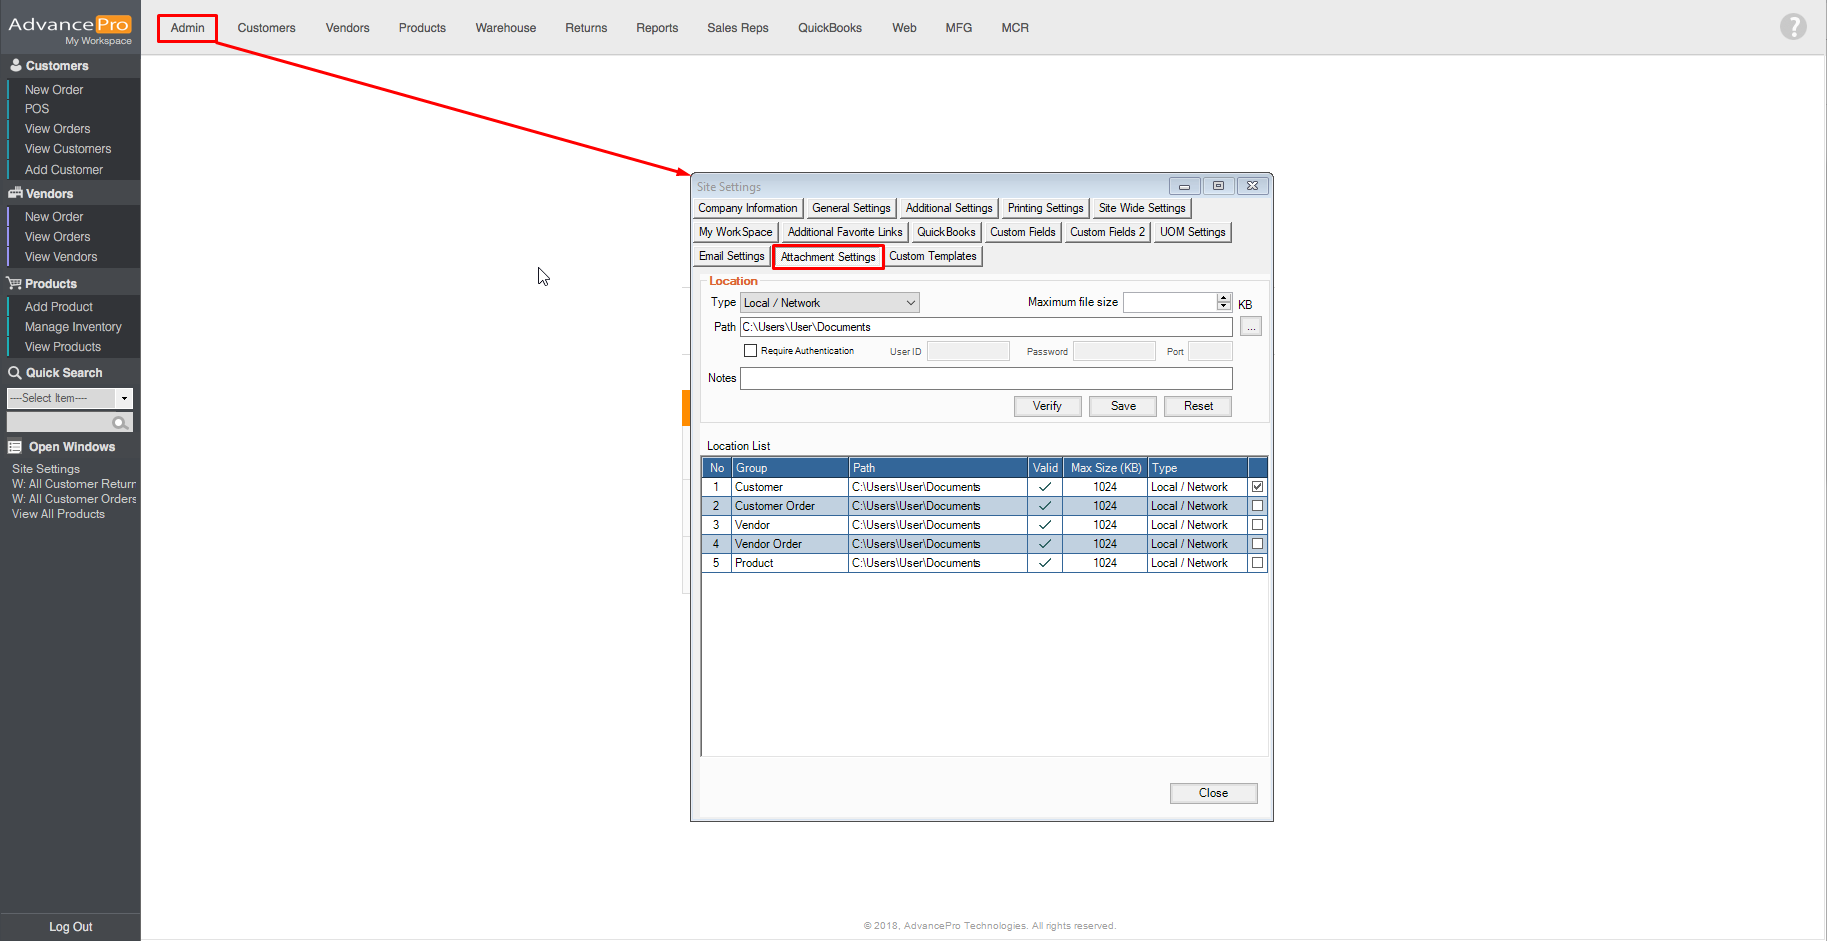
1. To setup the path location, Go to Admin > Site Settings > Attachment Settings
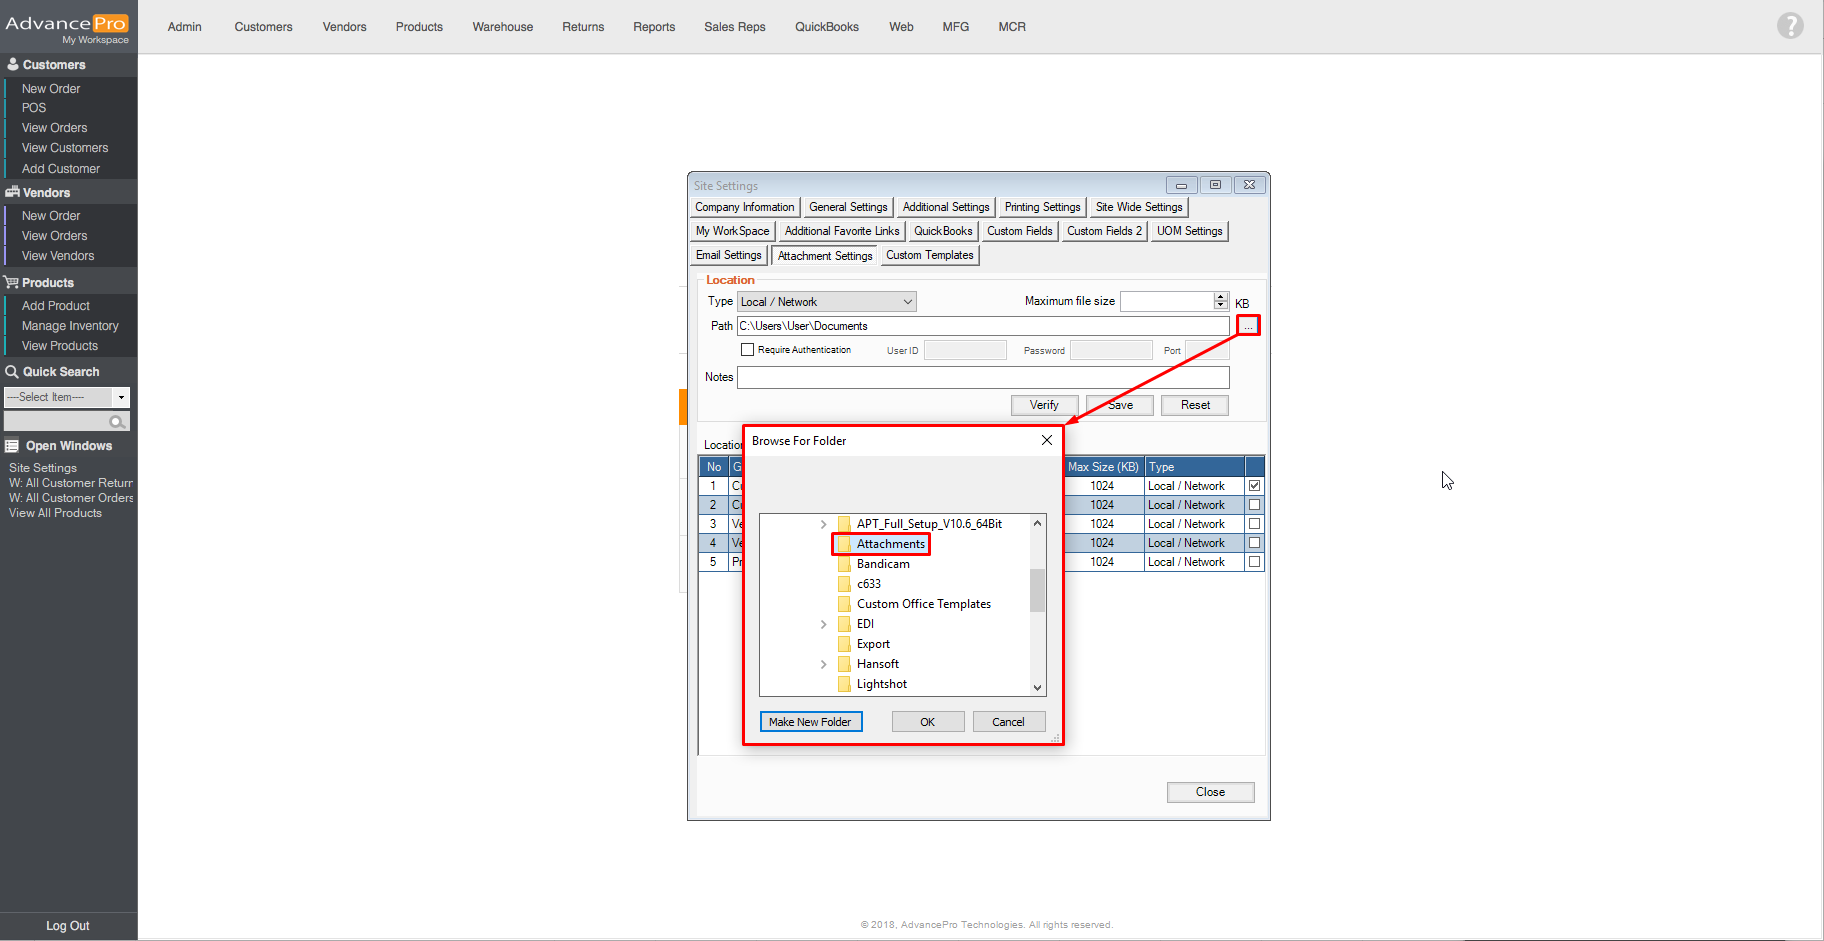
2. Click on this icon  to browse for your desired destination and press OK
3. Once the path has been selected, the user can verify the destination folder. Select the group by clicking on the checkbox and click on verify
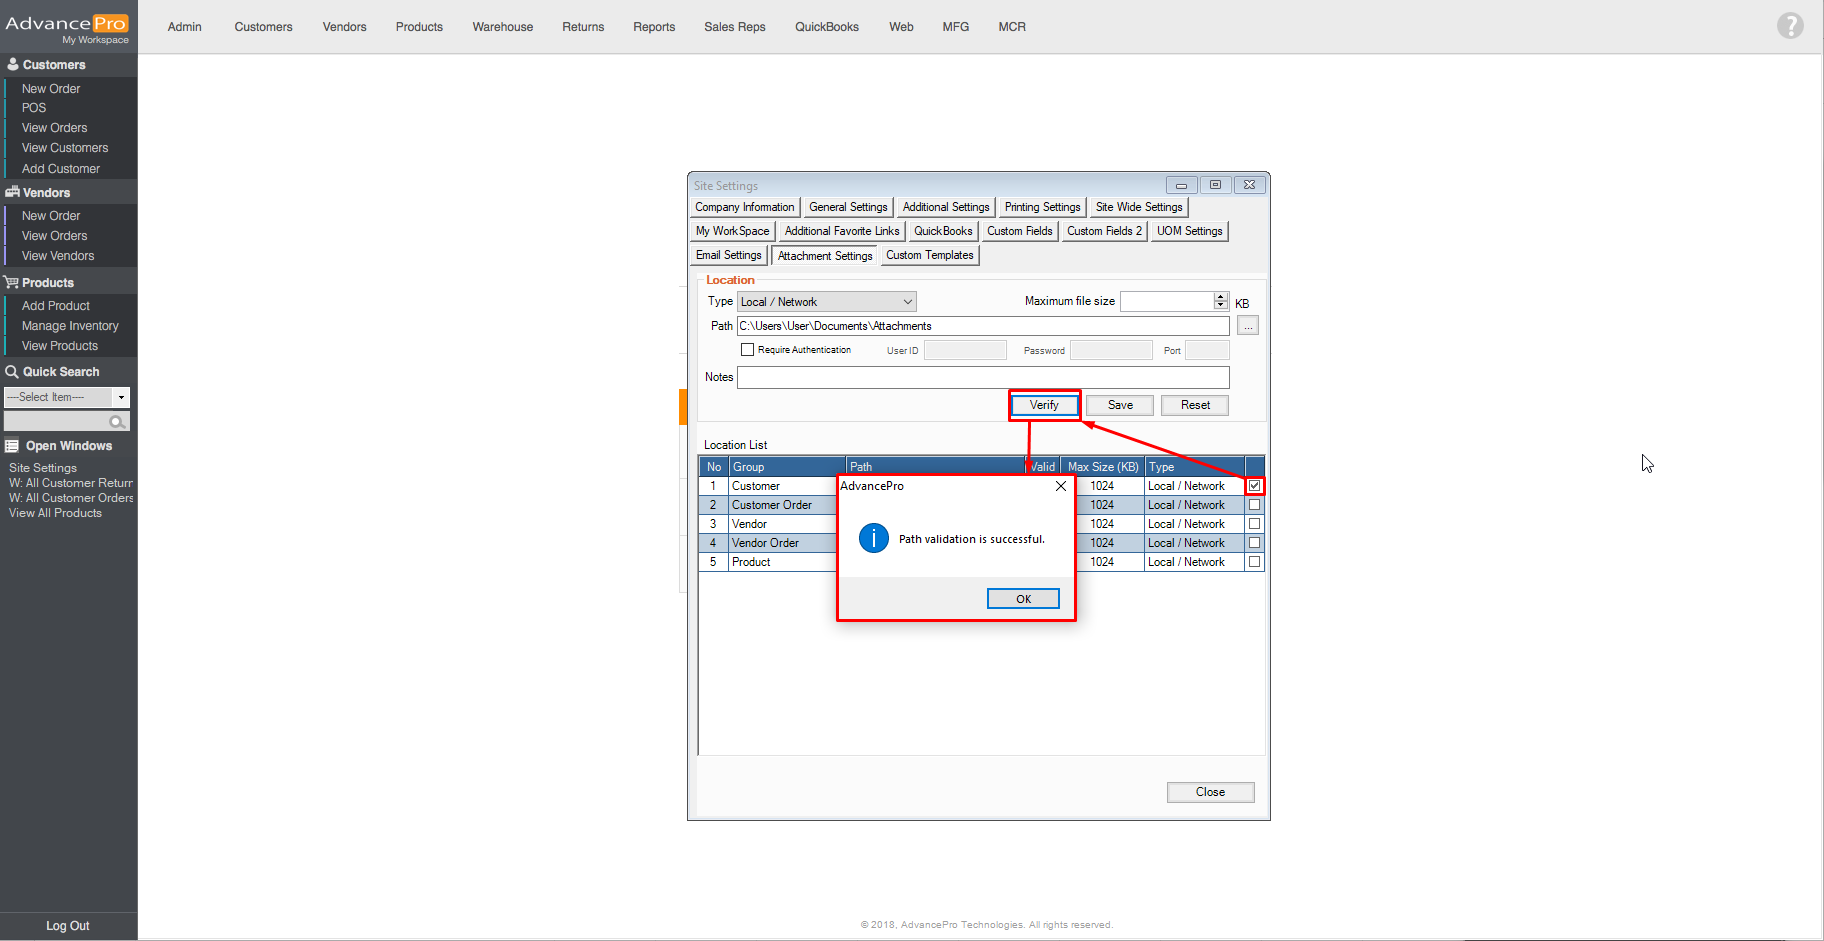
Note: to know that the file path has been verified, users can see a check on Valid column
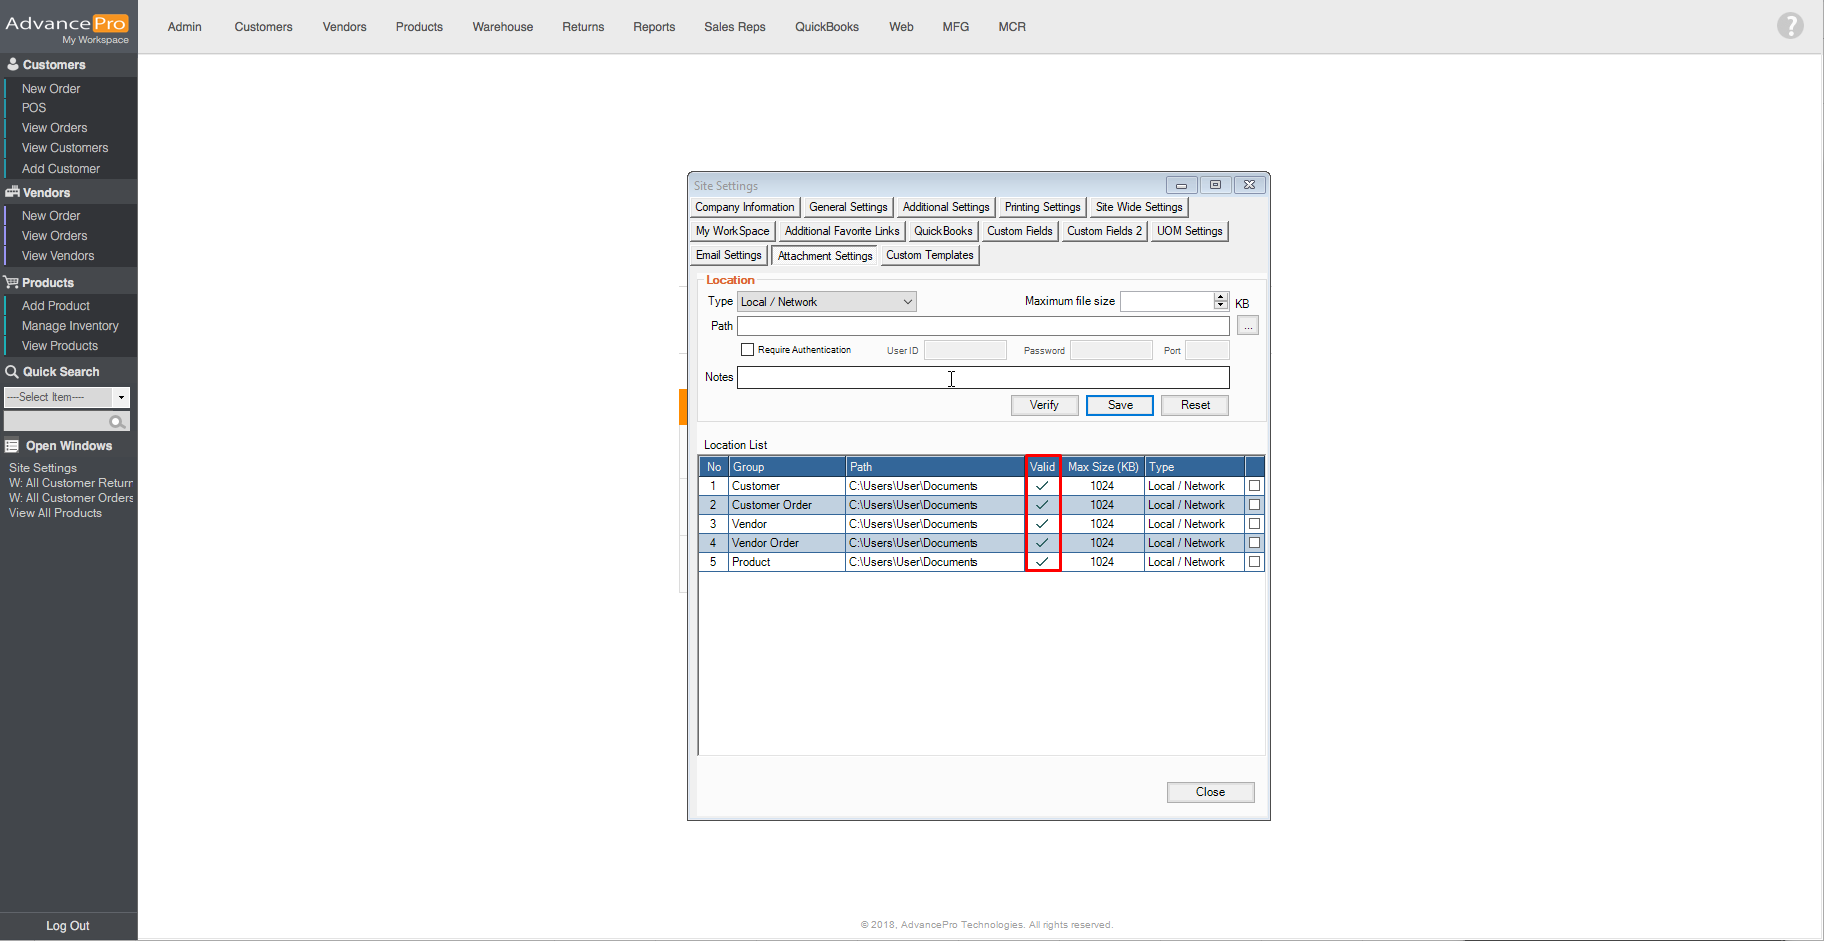
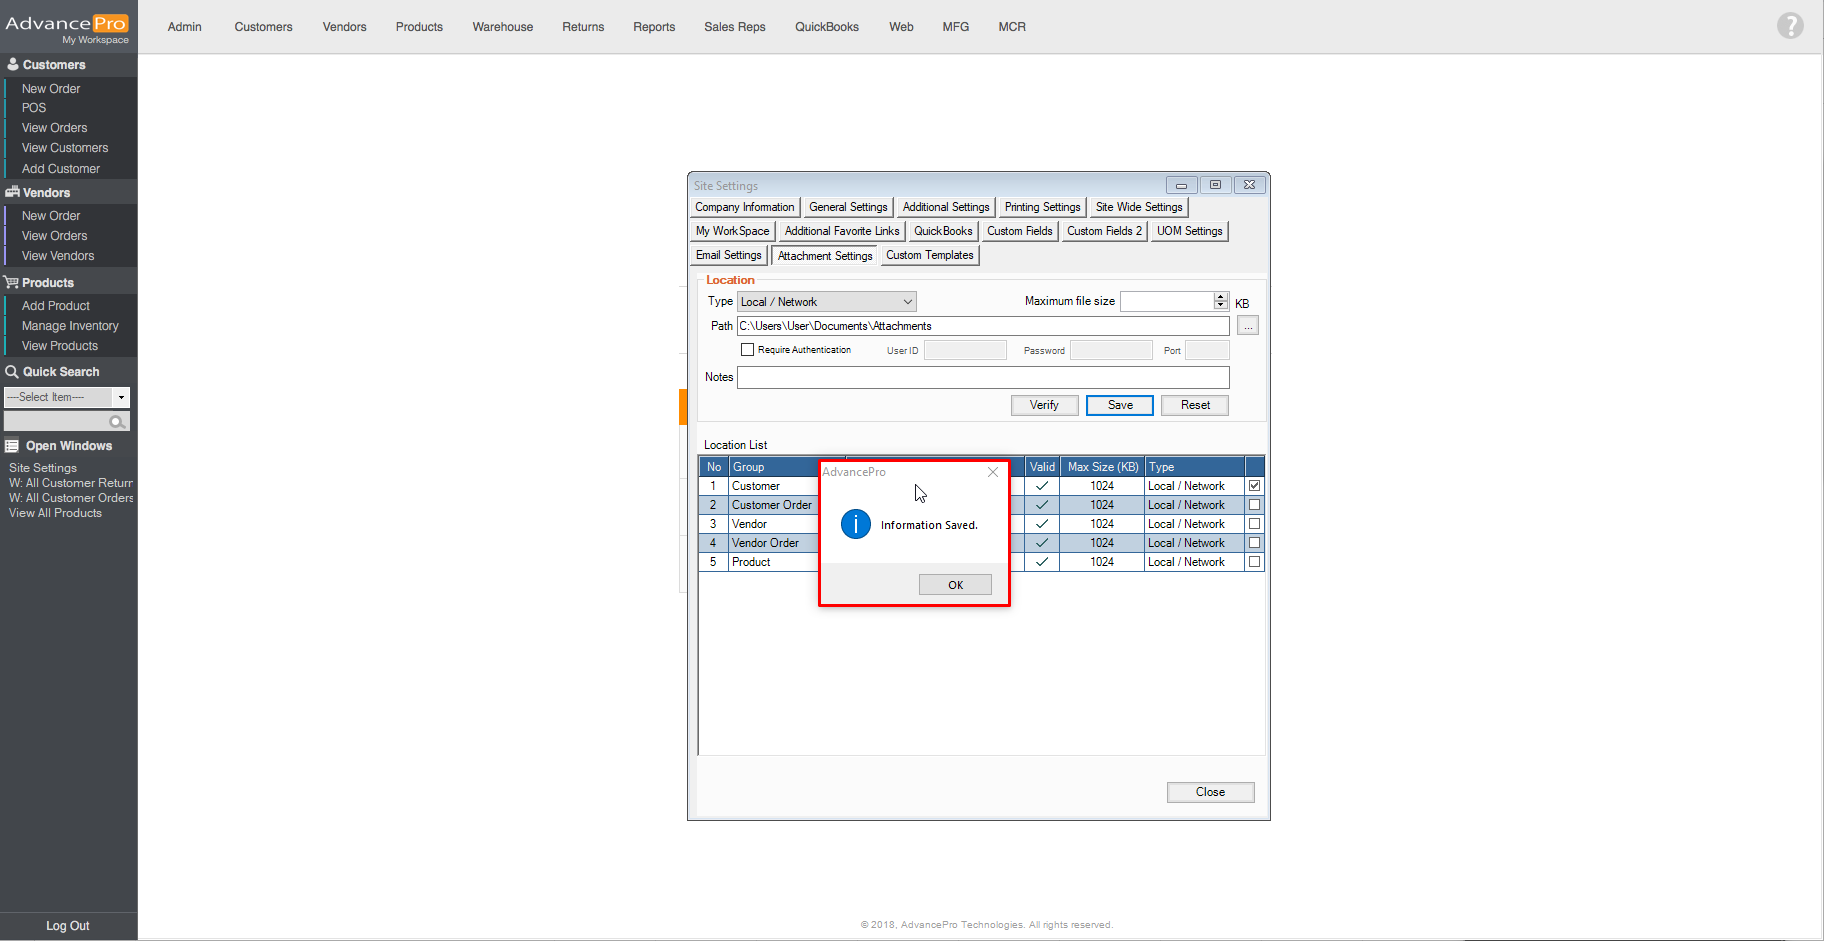
4. To save the information entered on the selected group, click on Save.
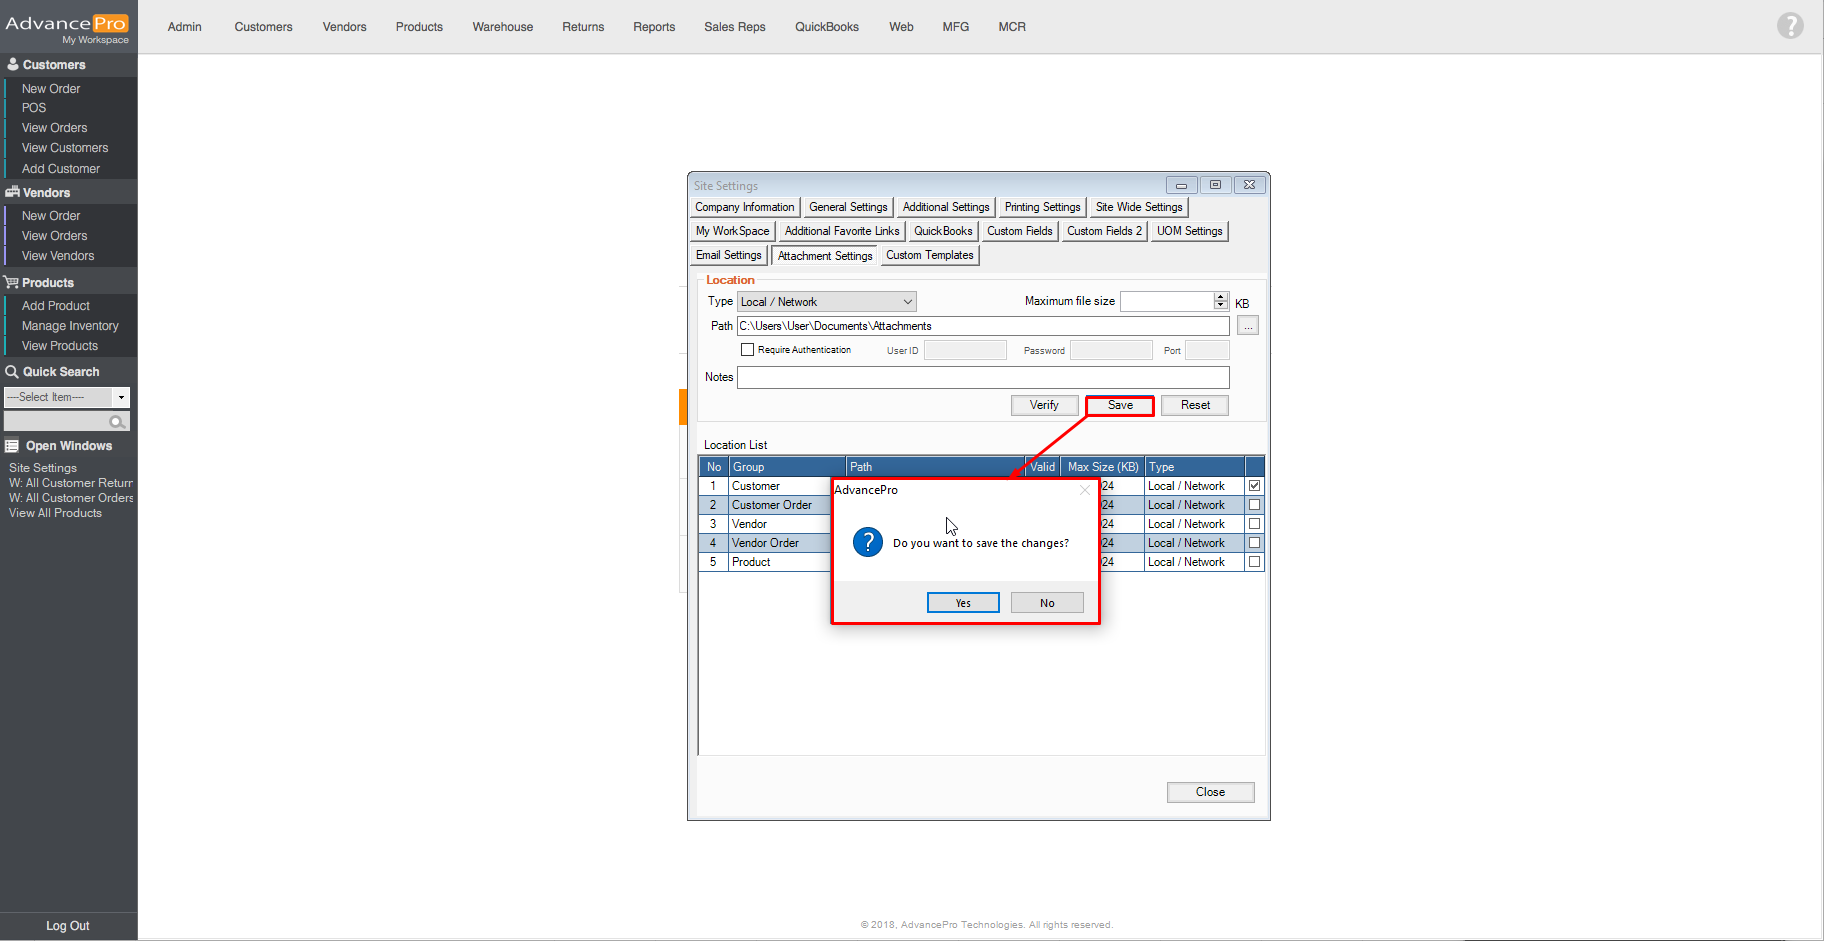
User will be notified once the item has been saved.
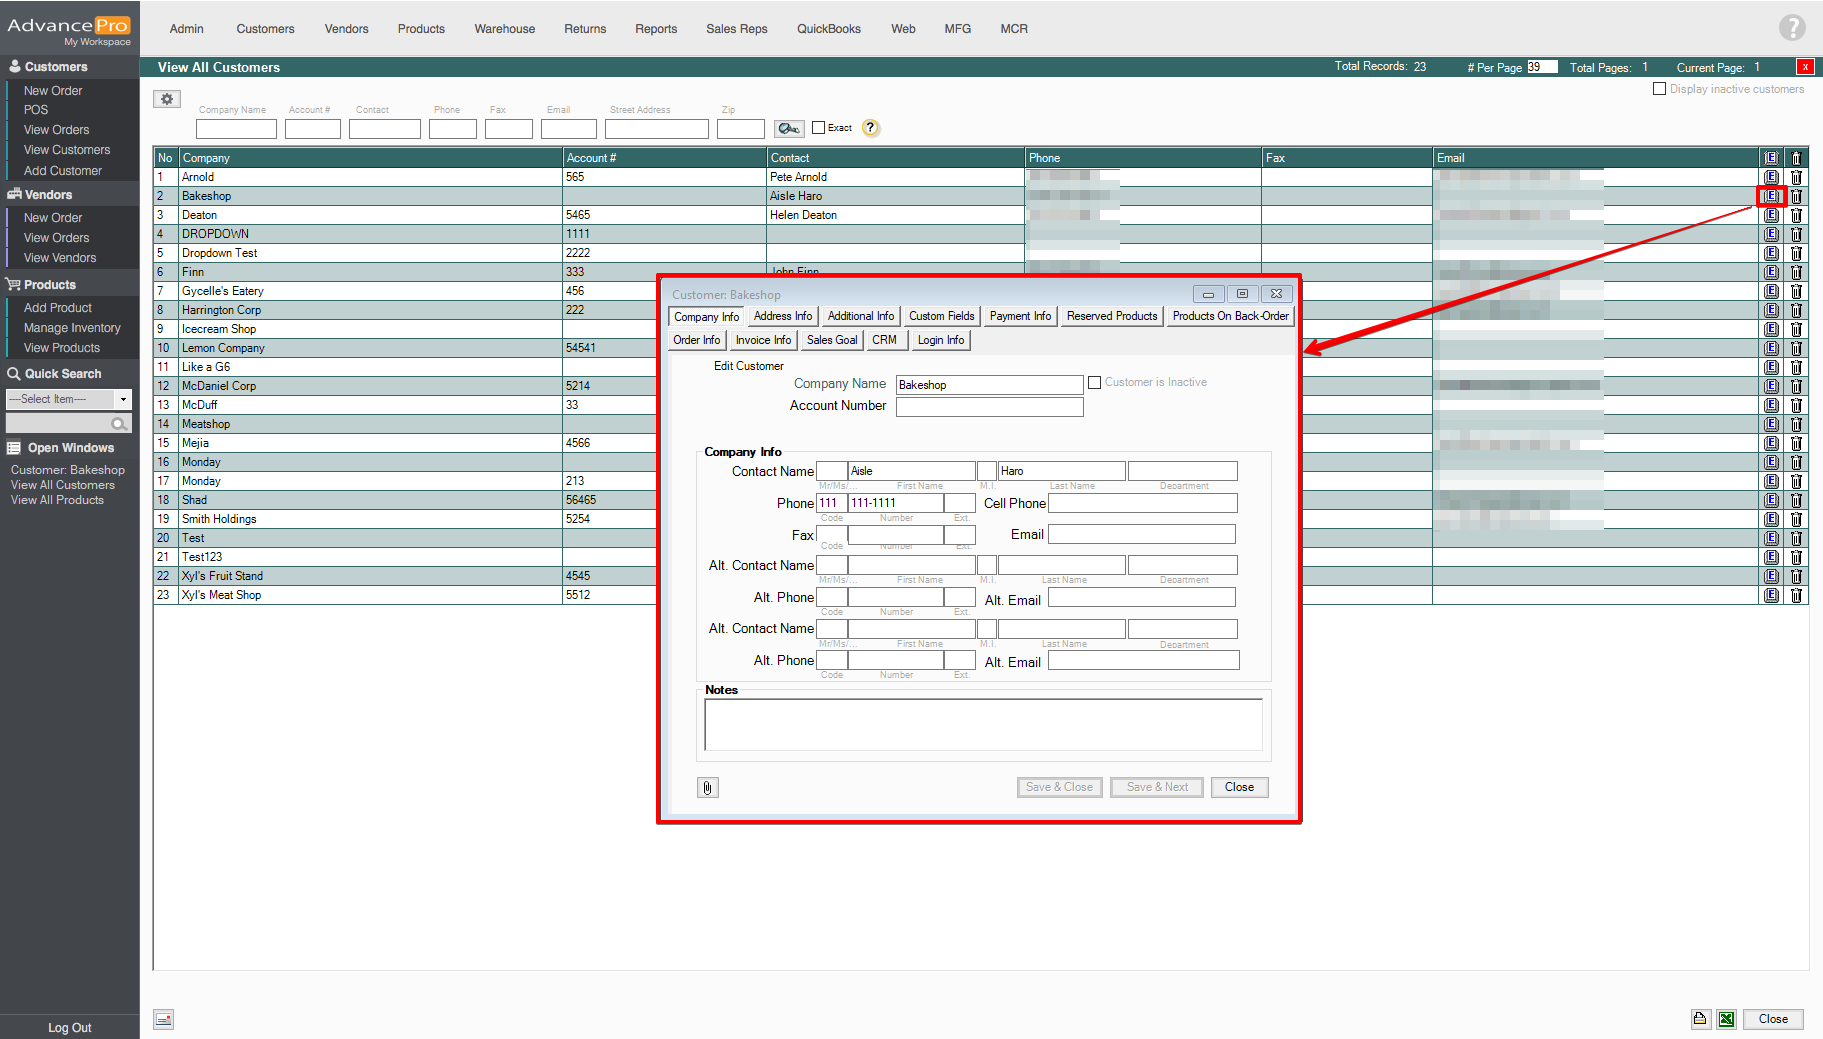
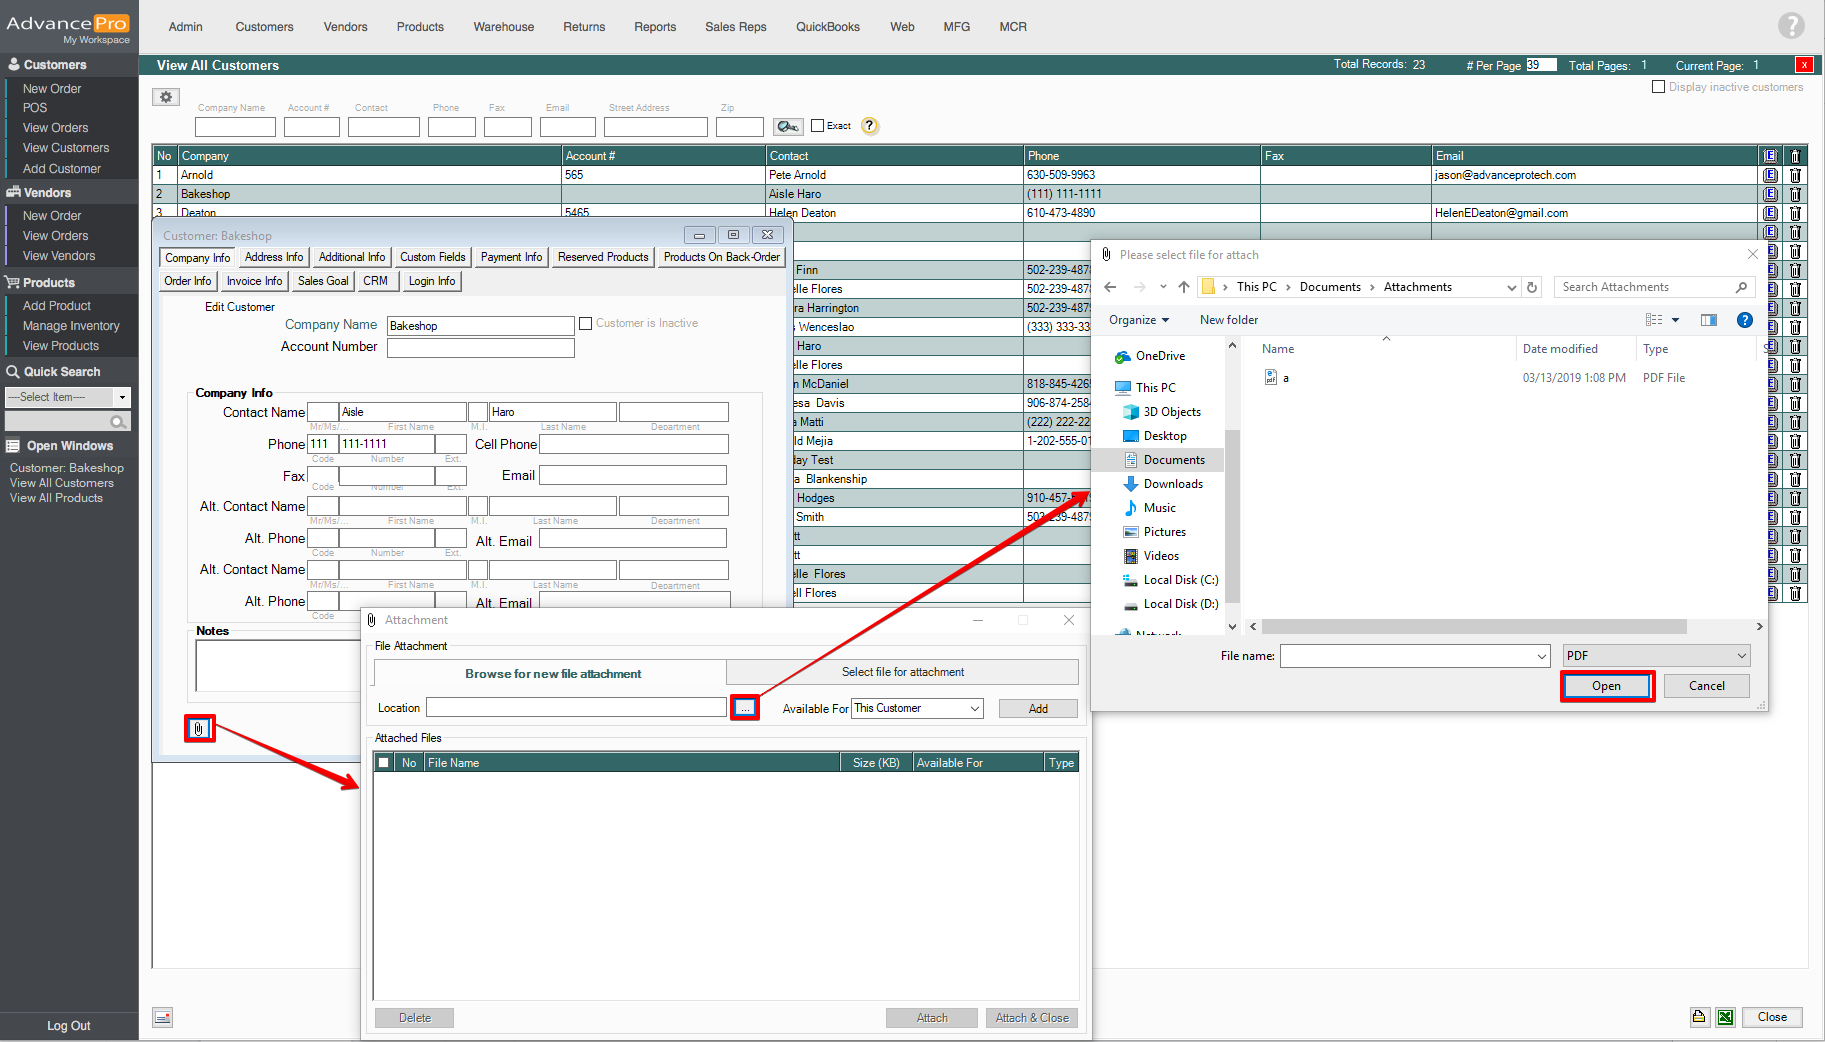
5. To attach documents, go to Customers > View All Customers

6. Click on Edit[E]
7. Click on the paper clip icon > click on browse > select the file and Open
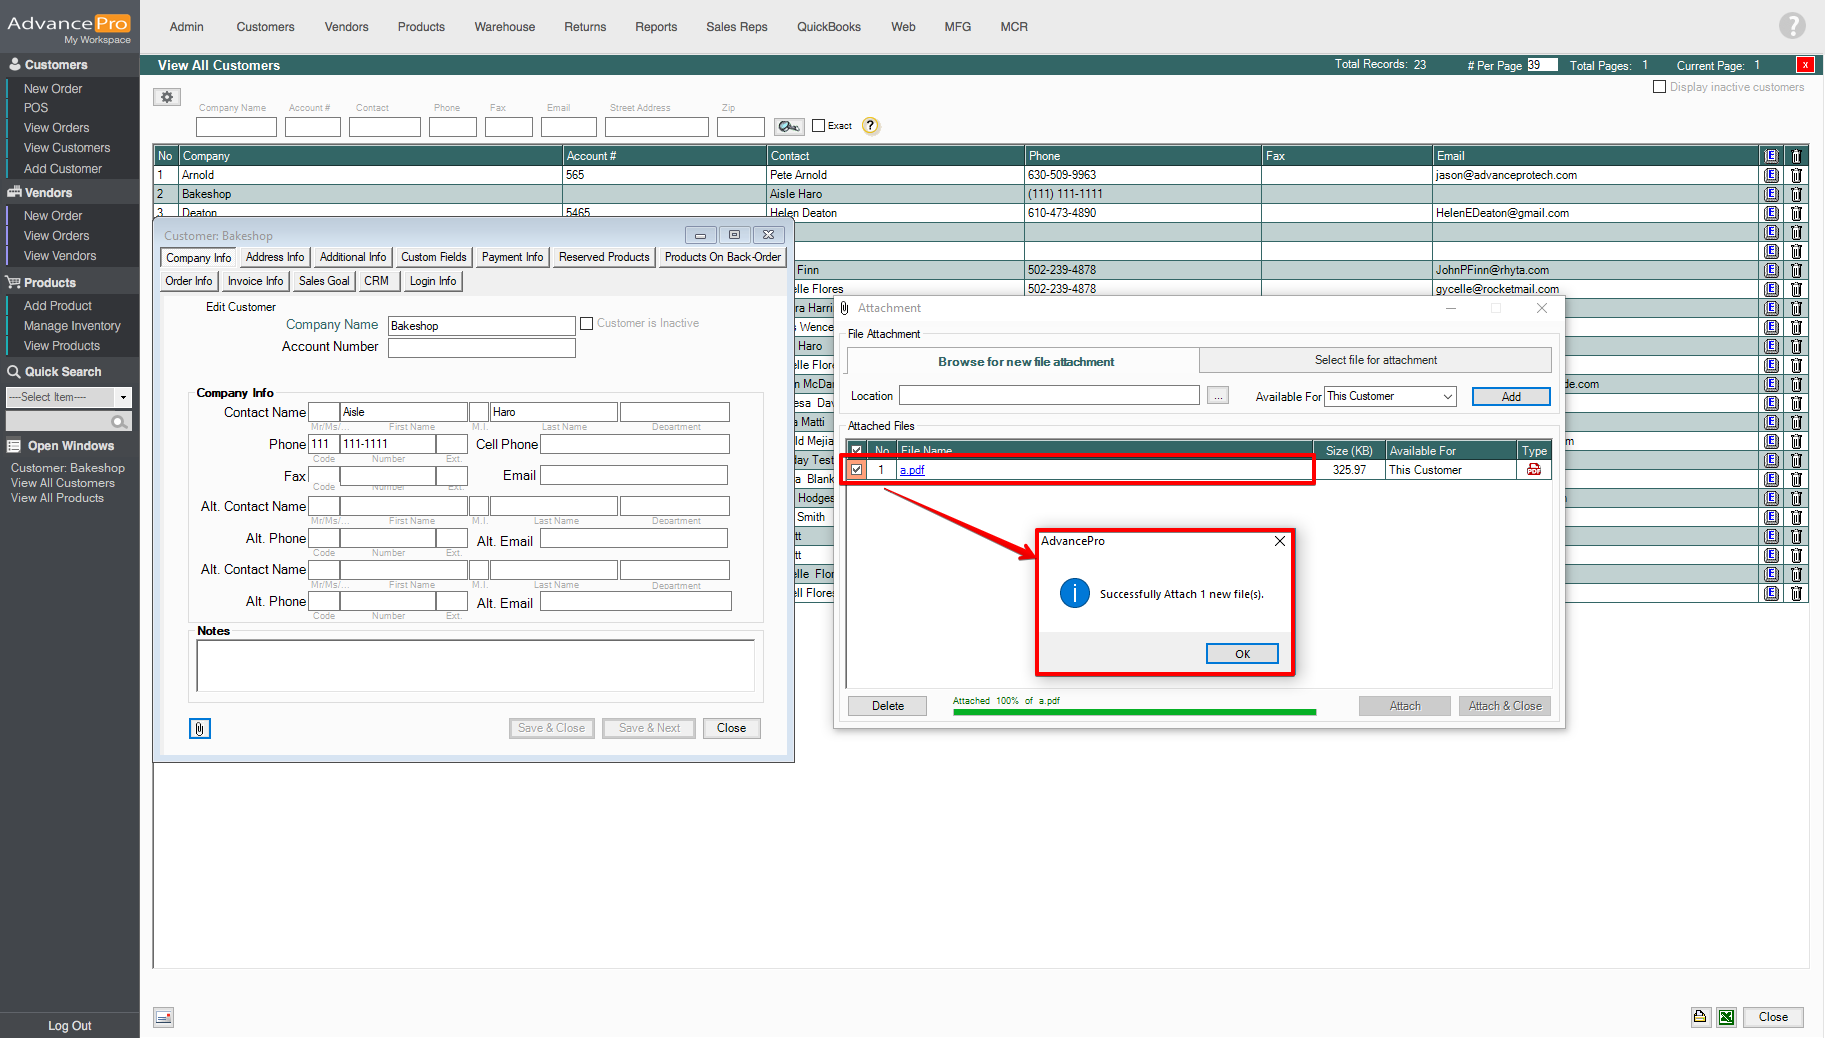
8. After selecting the file to be attached, tick the checkbox and user will be notified once the file has been successfully attached.
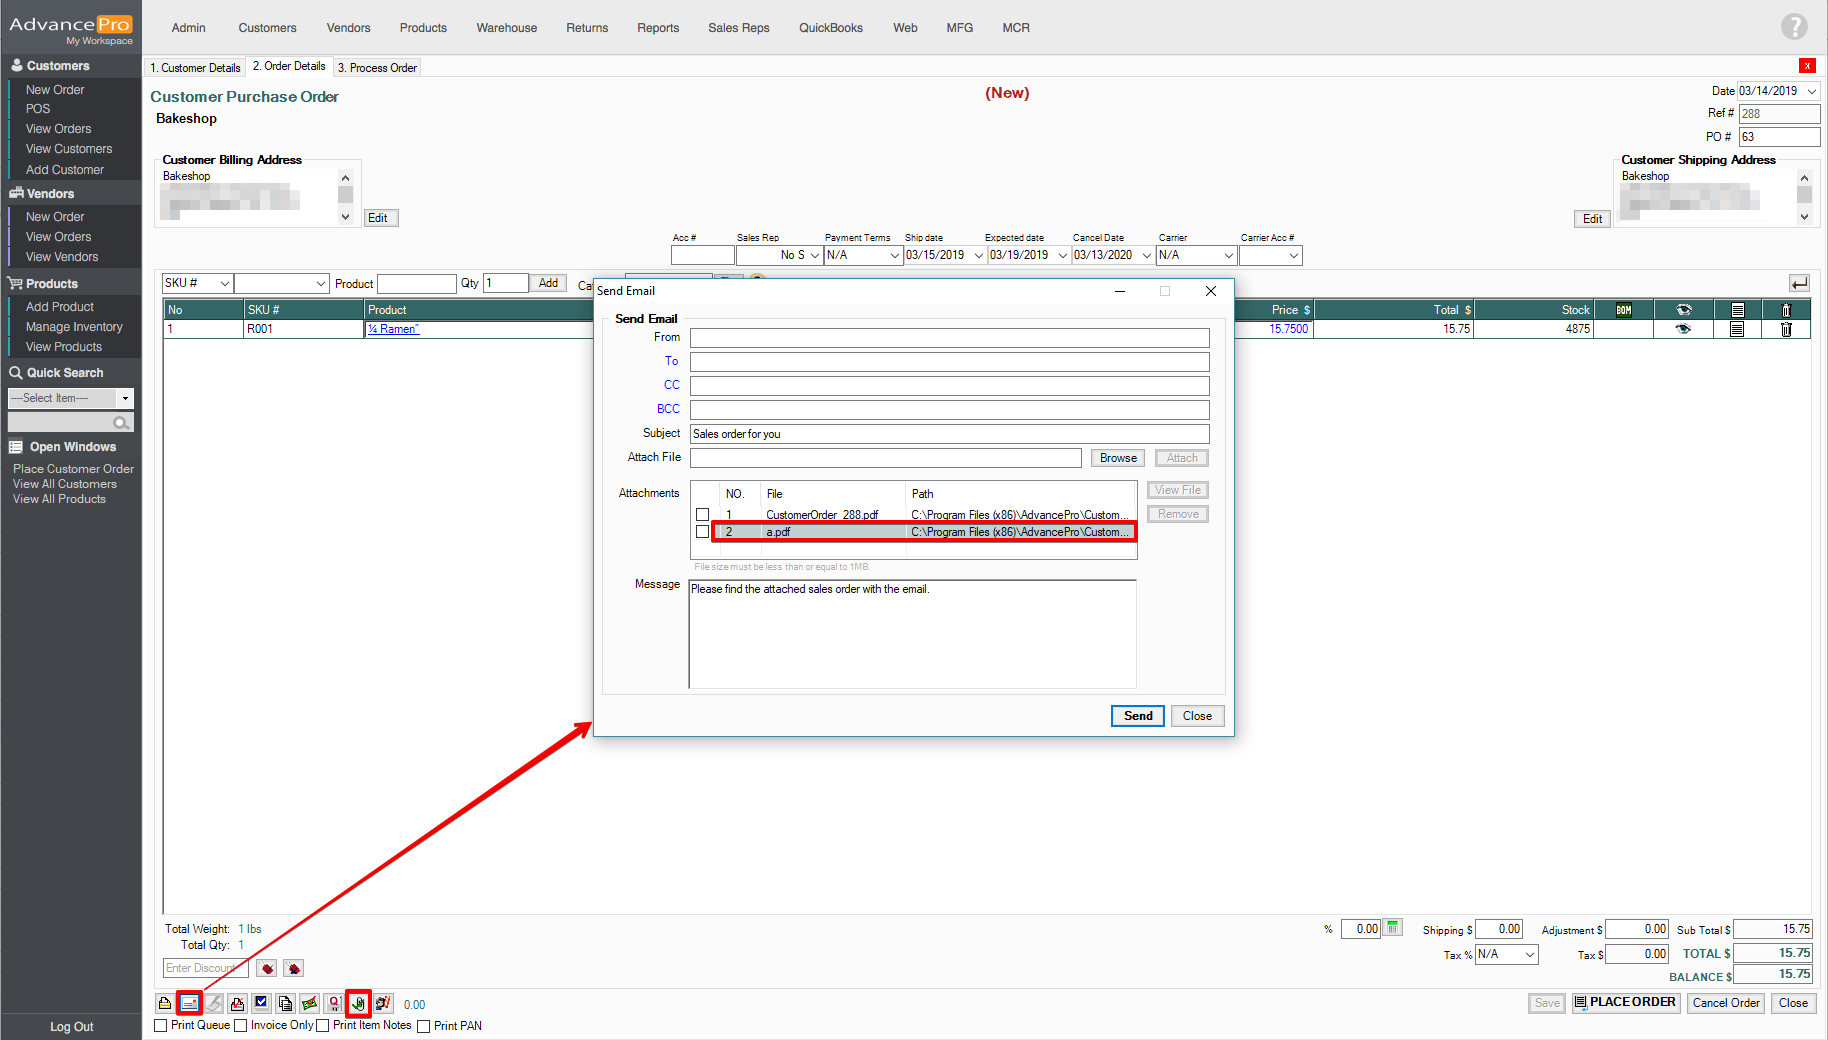
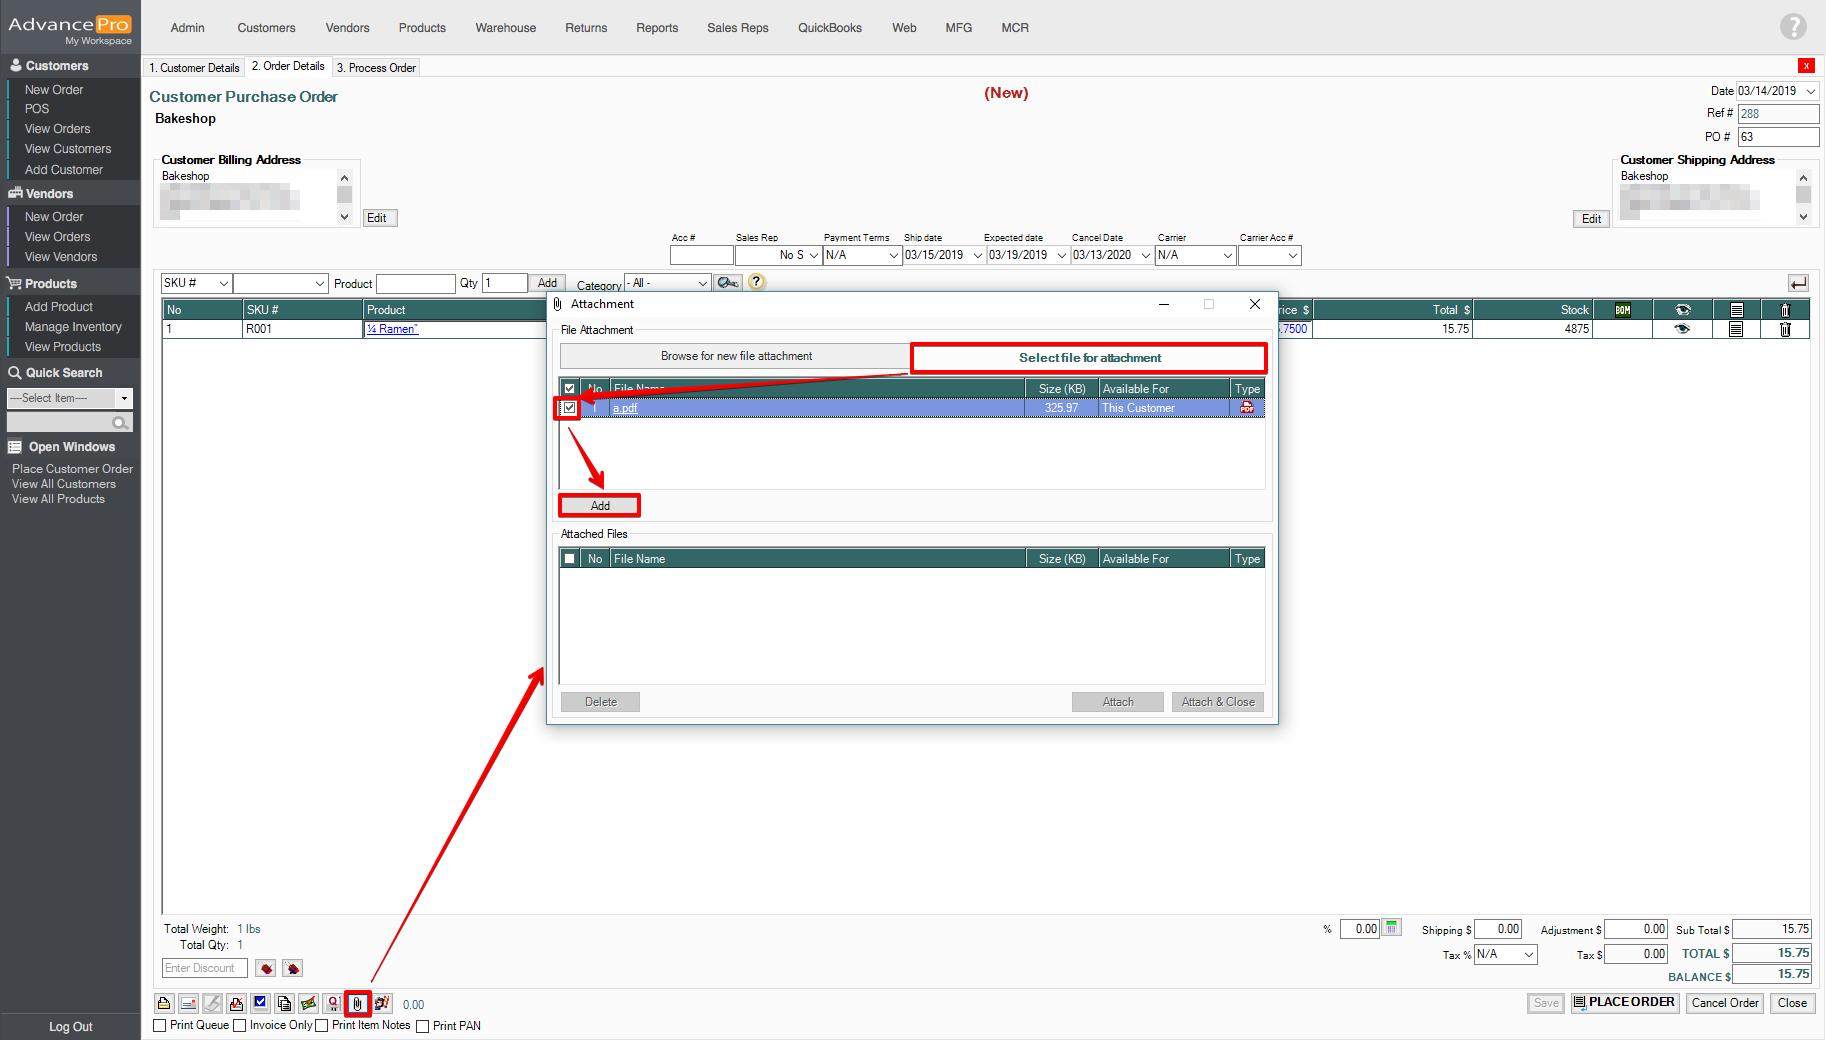
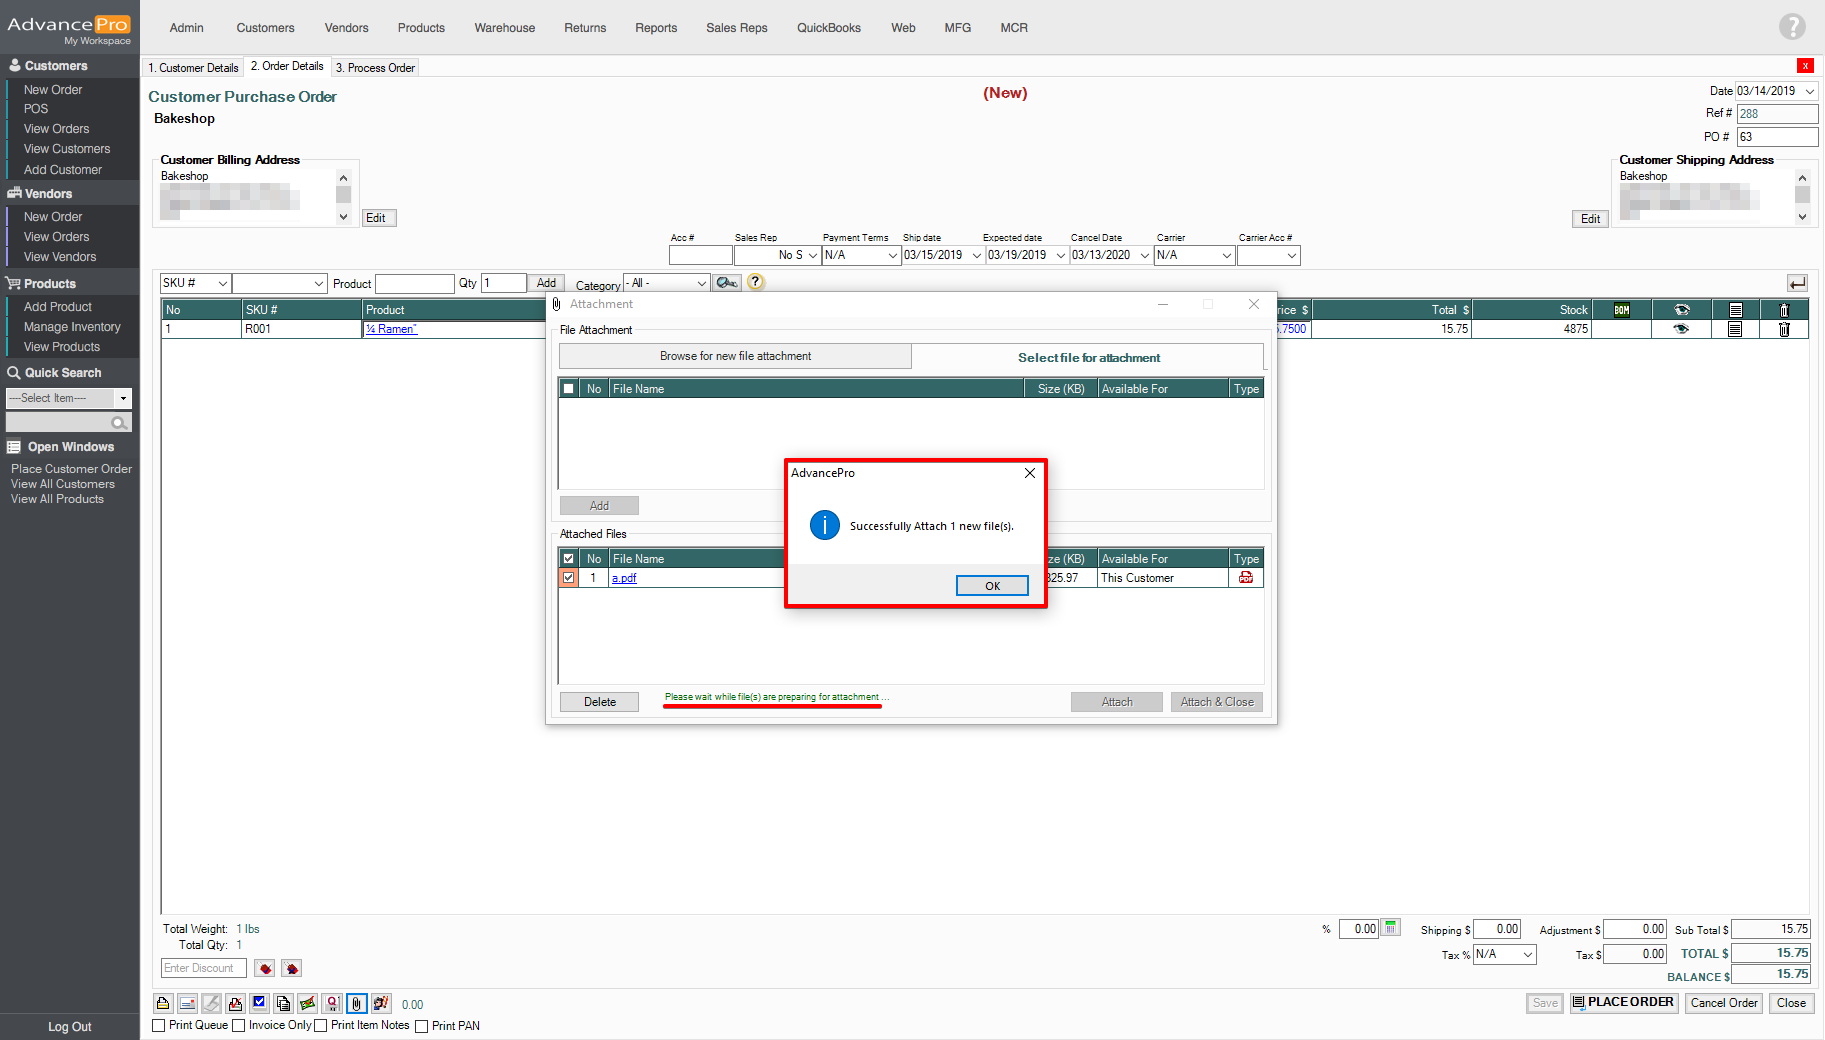
9. The file can now be attached to a specific order for that customer. Go to Customers > Place Order > Select the product. To attach the file, user needs to click on the paper clip icon on the bottom left side of the screen. Click on "Select file for attachment" tab, tick the checkbox and click Add
10. Under Attached Files, tick the checkbox to select the file and click on Attach
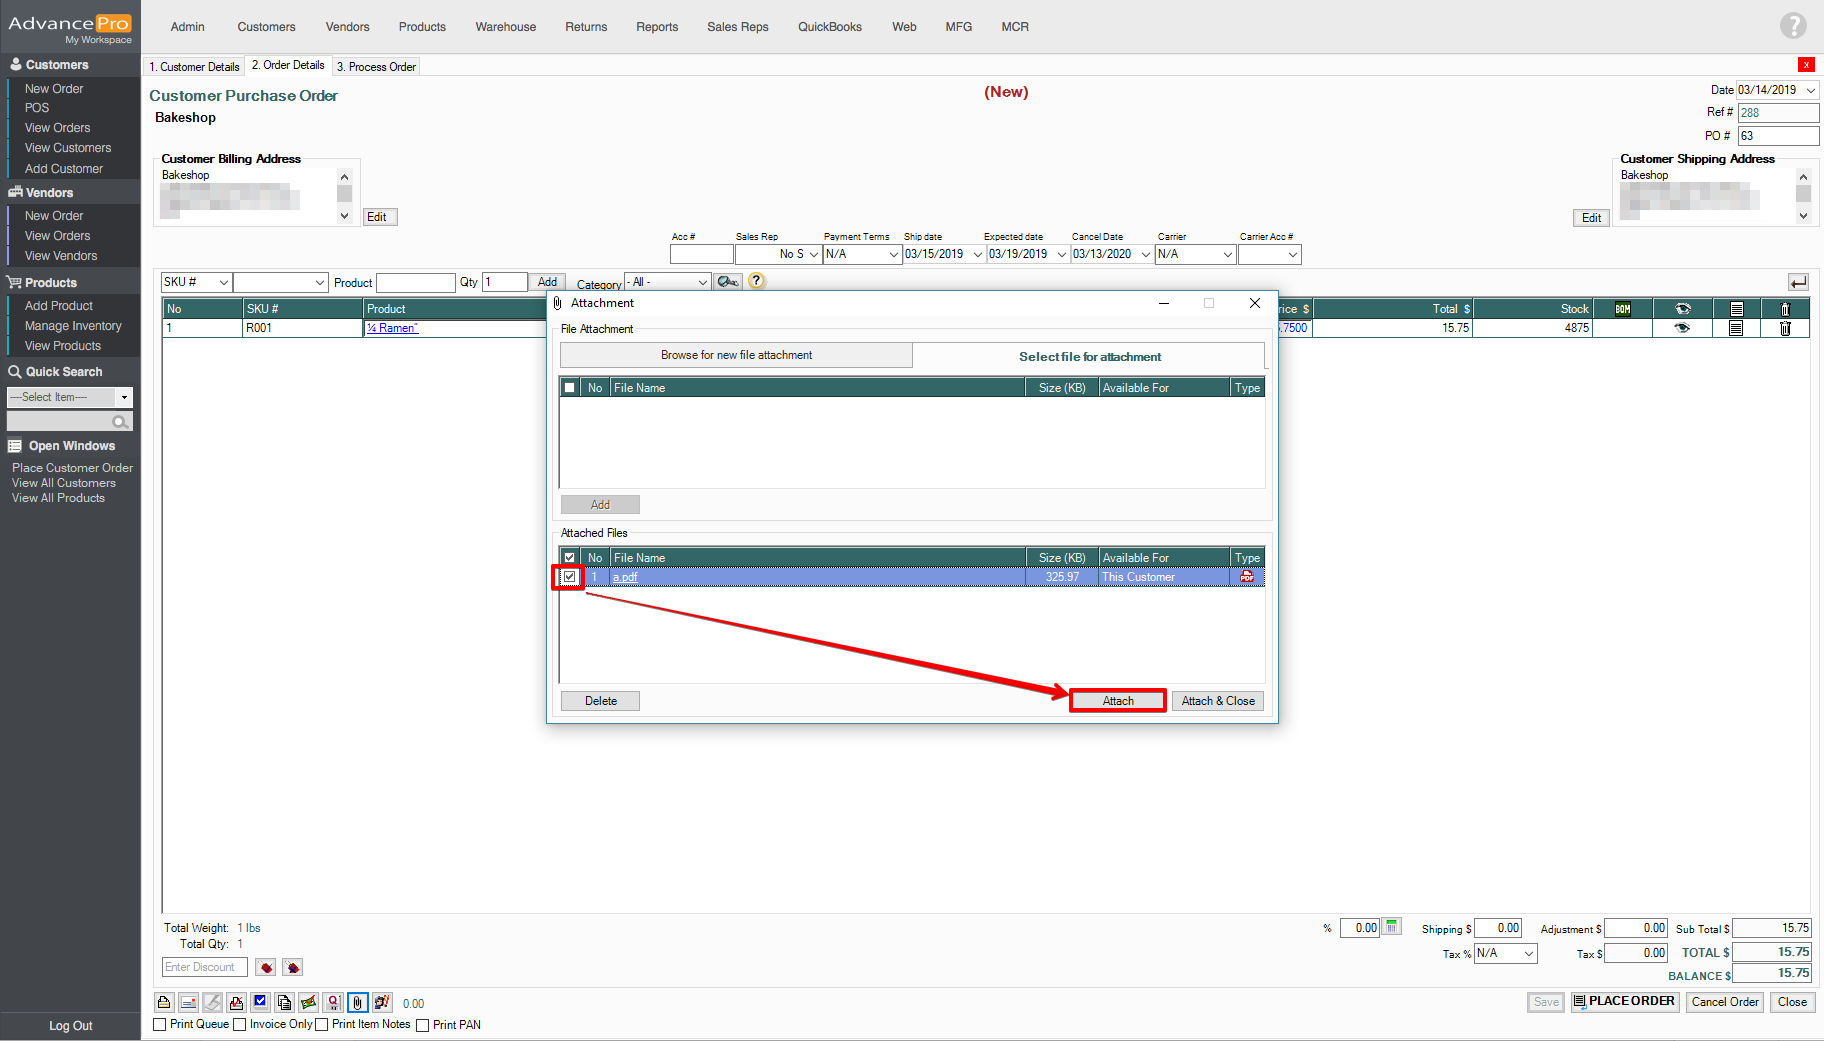
AP will notify user that the file was successfully attached.
11. A check mark can be seen on the paperclip icon. The attached file can be viewed on "Send mail" icon