
- In AdvancePro go to Products > Global Pricing.
NOTE: To apply the Price List to customers and products you will need to make sure that the products have been associated to a category and customers have been associated to a customer group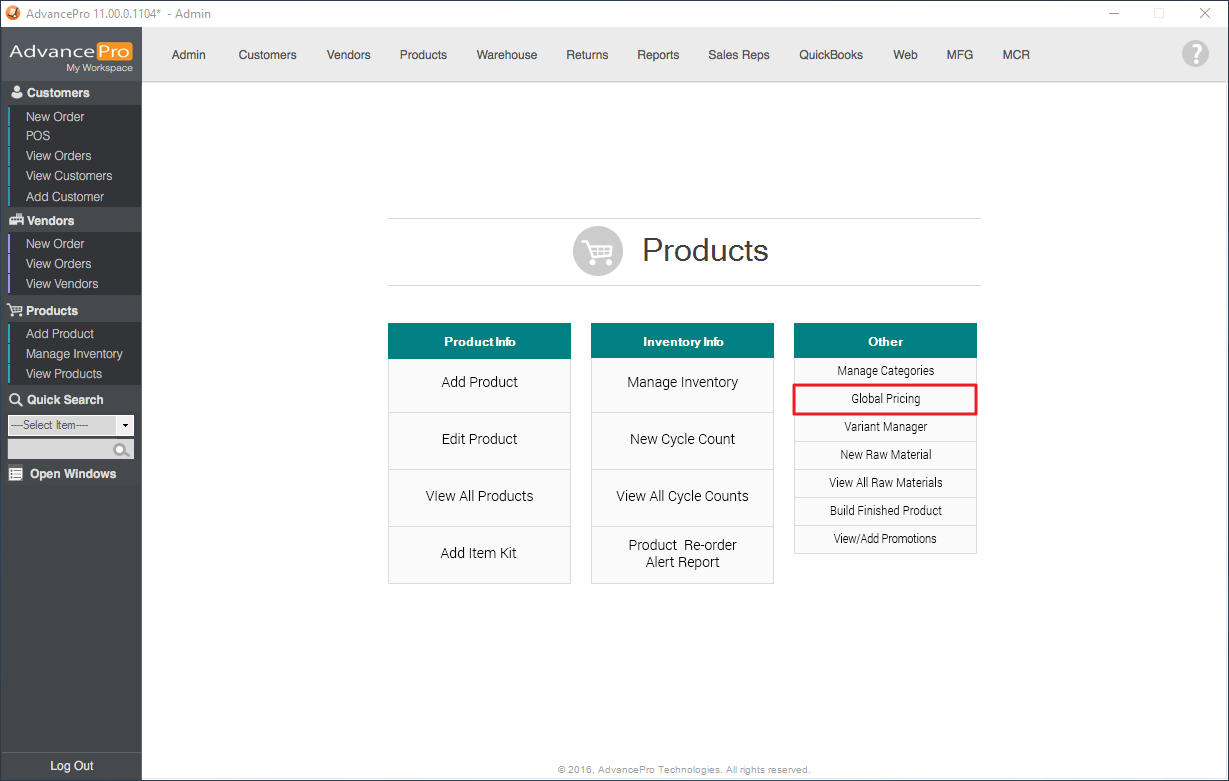
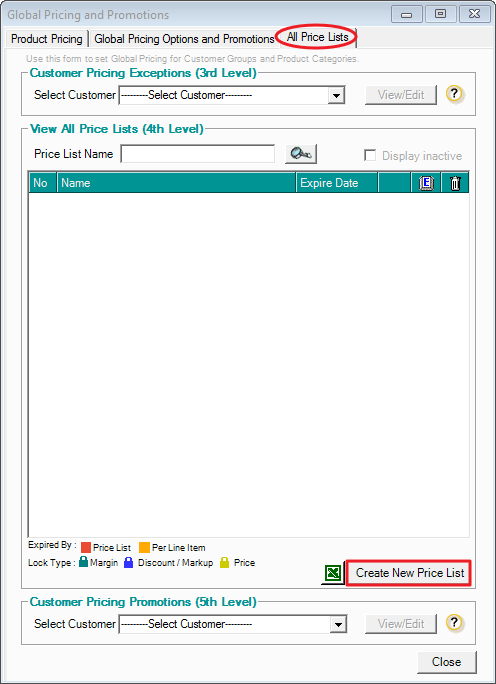
- Click on the All Price Lists tab and on this screen you will be able to create your price list by selecting the Create New Price List button near the bottom
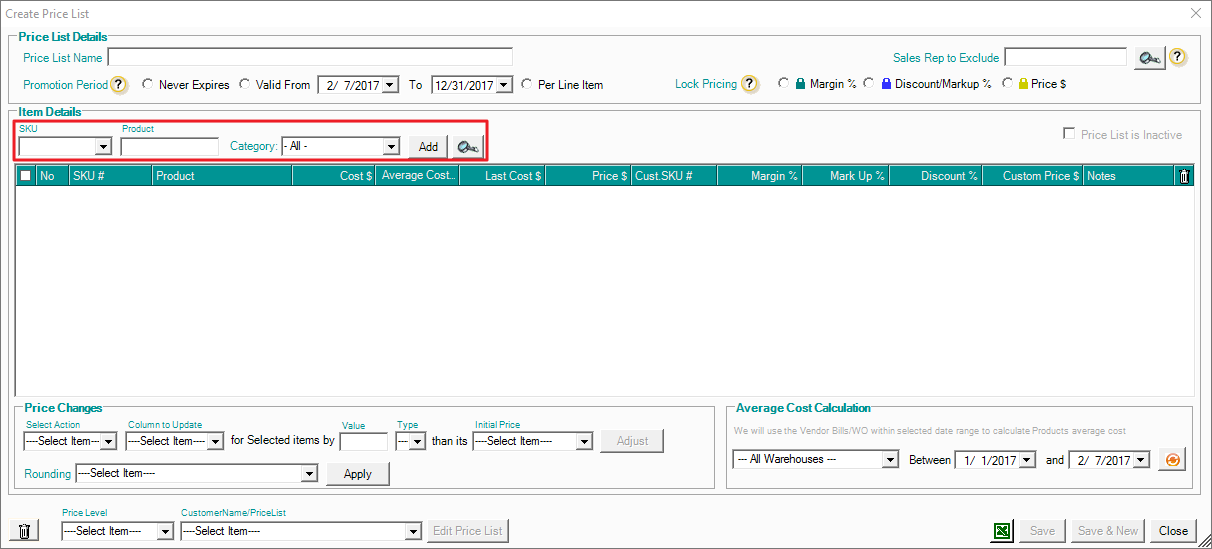
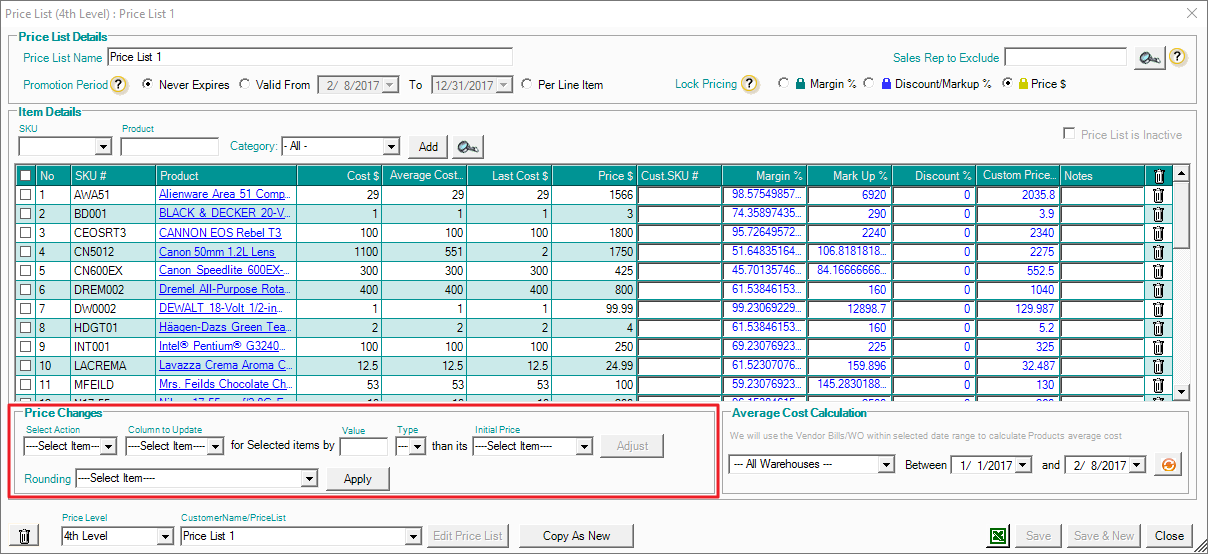
- On this screen you can start adding products to the price list through manual entry or through the product selector (magnifying glass).
COLUMNS DISPLAYED ON LIST:
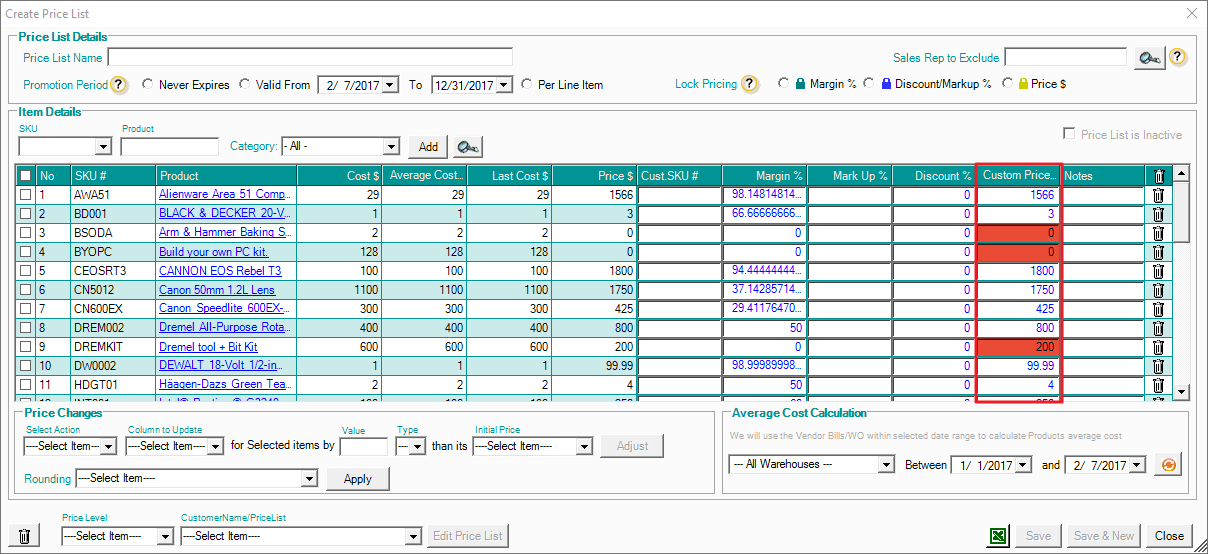
No. - Line number on the list
SKU # - SKU in AdvancePro
Product - Product name in AdvancePro
Cost $ - Cost of the product from the primary vendor assigned to it
Average Cost $ - The average cost of that product on all created vendor bills
Last Cost $ - The last cost price for that product on a created vendor bill
Price $ - Product selling price (Without pricing rules)
Cust SKU # - This is the SKU that will be associated to the customer assigned to this price list
Margin % - The difference in percentage between primary vendor cost price and the selling price
Mark Up % - The custom price (Custom Price $ column) increase from the primary cost price (Cost $)
Discount % - The percentage decrease on the selling price (Price $ column)
Custom Price $ - The new selling price for that product. This will automatically recalculate the markup field if the custom price exceeds the standard selling price and if lower than the selling price it will recalculate the discount field
- Products will appear on the list as they are added. If you see cells highlighted in red under the Customer Pricing $ column - this indicates that the selling price (Price $) is less than the cost price (Cost $)
NOTE: On the very top of the screen in the Price List Details section, you will need to specify a Price List Name, Promotion Period, and a Pricing Lock Method to be able to save the list. - To make the same changes to multiple products on the list, you can check off the boxes for those products on the left-most side of the screen. Once you’ve selected a set of products to update you can go into the Price Changes section and specify the adjustment. Click Adjust to apply the changes and click Save or Save & New to finish creating/saving the list.
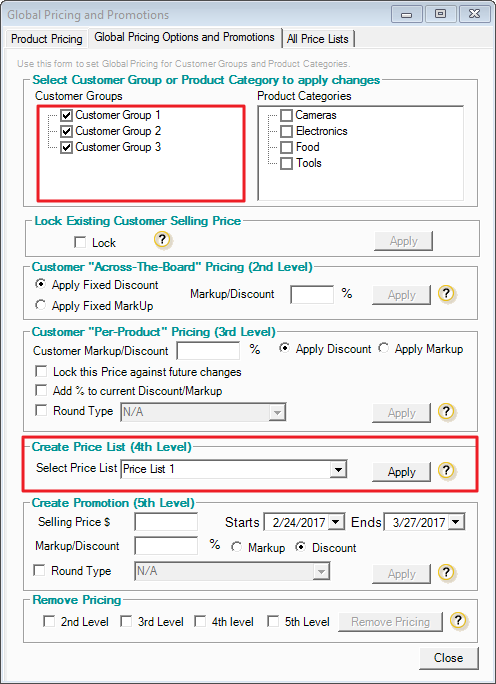
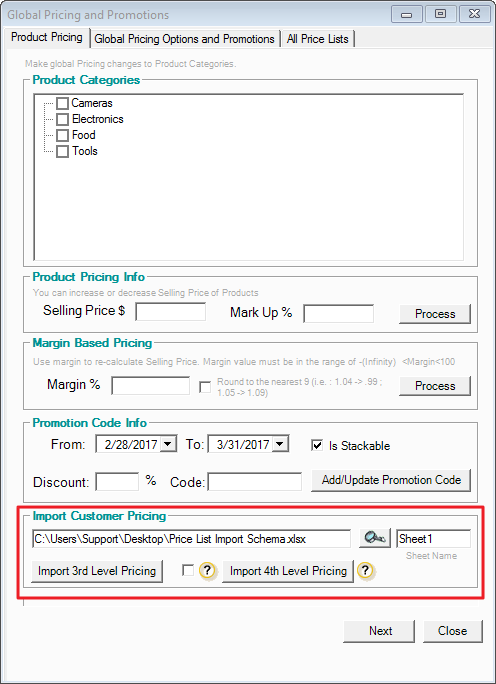
- To apply the price list to customers and products, go to Products > Global Pricing > Global Pricing and Promotions tab
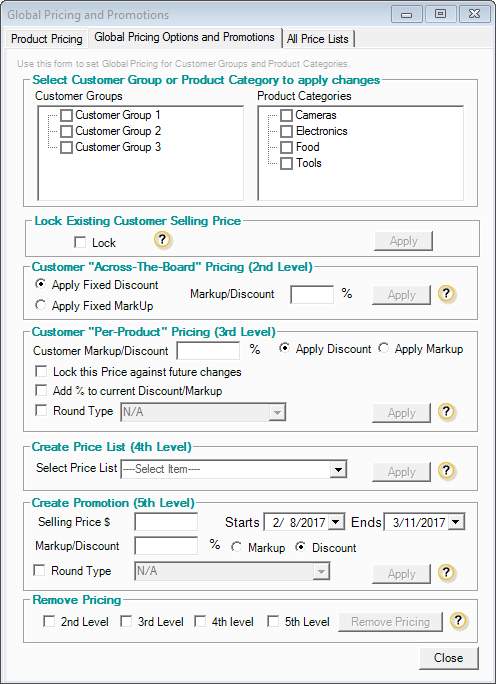
- Check the boxes at the top for the customer group(s) that you want to apply the price list for. Next, select the price list from the Create Price List (4th Level) section and hit Apply to update. If your price list does not appear on the drop down, closing and reopening the screen should get it to appear
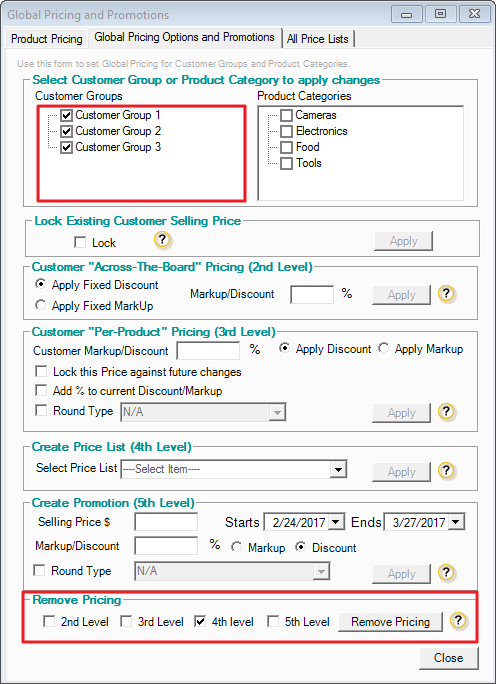
- If you want to remove the pricing that has been set, you can do that on the bottom of the same screen. Again you select your customer groups(s) and on the Remove Pricing section you select the price level(s) to remove. In the case of price lists, you need to select the 4th level checkbox. Click Remove Pricing to delete the pricing
Importing Price Lists
- When creating the import file for price lists, column headings on the import file need to properly named in order for the import tool to capture the information
COLUMNS FOR IMPORT:
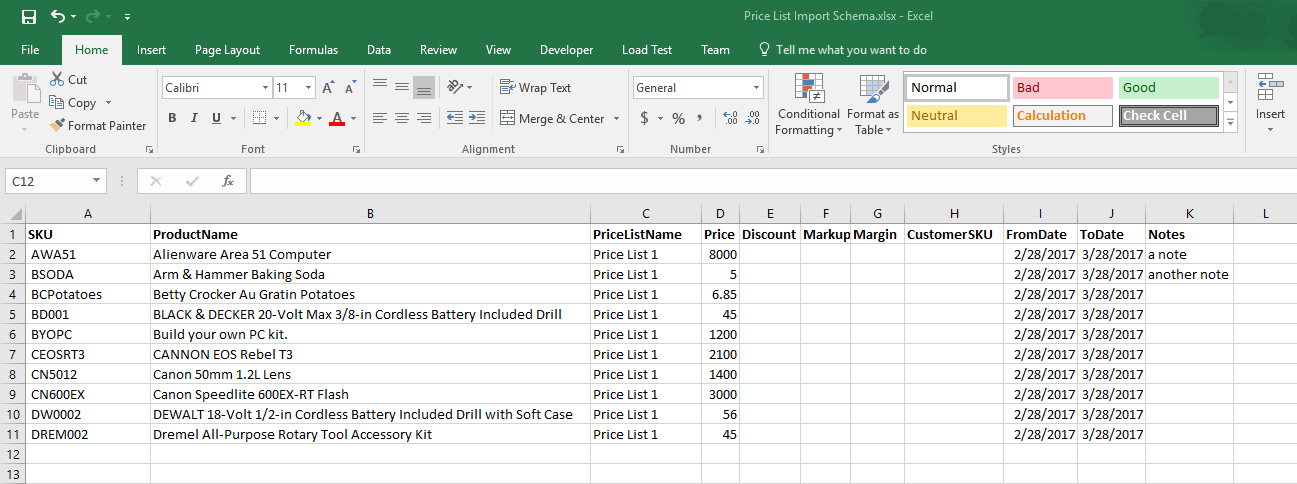
SKU - AdvancePro SKU
ProductName - Name of product
PriceListName - Name of the price list
Price - The selling price (overwrites the current pricing for the customer unless they have 5th level pricing applied)
Discount - The percentage decrease on the selling price (Price $ column)
Margin - The difference in percentage between primary vendor cost price and the selling price
Markup - The custom price (Custom Price $ column) increase from the primary cost price (Cost $)
CustomerSKU - The customer SKU for the product when the list is assigned to them
FromDate - The start date from which the price list takes effect
ToDate - The end date for which the price list loses effect
Notes - A note for each product. Only affects price list
MINIMUM COLUMNS REQUIRED FOR IMPORT:
- SKU
- PriceListName
- One of the following: Price, Discount, Margin, Markup
NOTE: If you want to exclude date ranges on the import you need to remove those columns from the import file. This will make it so the price list will never expire
- In AdvancePro Go to Products > Global Pricing. The price list import section can be found at the bottom of the Product Pricing tab. You have the option to import either 4th level price list or a 3rd level price list. There is also a checkbox beside the buttons which needs to be checked if updating an existing price list
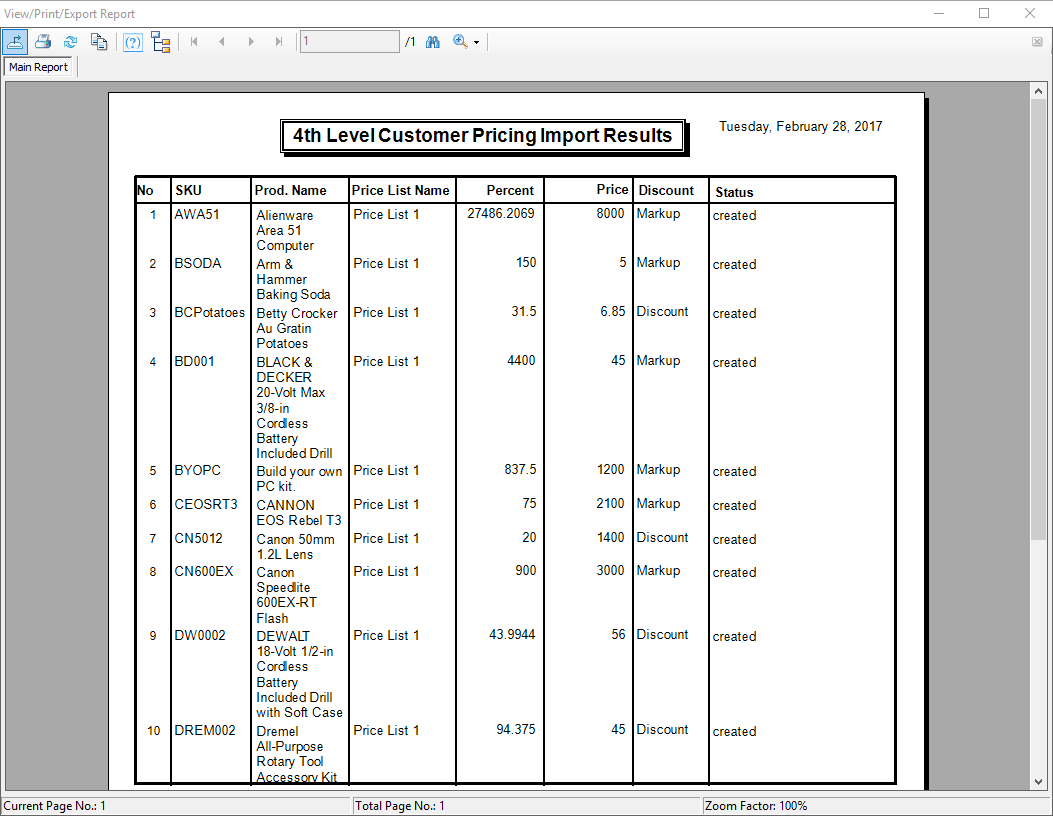
- After running the import, a report will be generated outlining the status of each line-item on the price list.
- To check the price list go Products > Global Pricing > All Price Lists tab. The price list should now be visible on this screen and if not you can click the search button to refresh the list

Editing/Saving 3rd and 5th Level Pricing as a Price List
You also have the ability to edit/save your 3rd and 5th level pricing rules to a 4th level price list. If you have 3rd or 5th level pricing set, you will be able to view a list of those products and their price information with respect to their price level rules.
- Go to Products > Global Pricing > All Price Lists tab > Click Create Price List
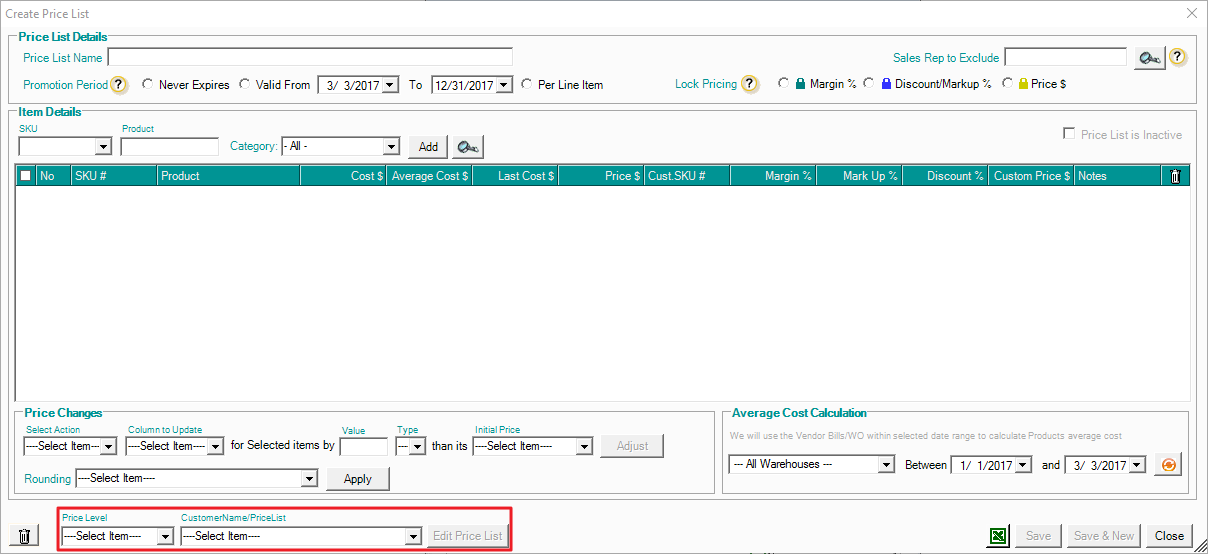
On the bottom-left area of the screen there are two drop down boxes available:
Price Level - Changes the view of the screen depending on the price level selected.
CustomerName/PriceList - Allows you to select a customer if you are editing a 3rd or 5th level price list otherwise you select a price list if 4th level is selected
- Select a Price Level > Customer > Click Edit Price List.
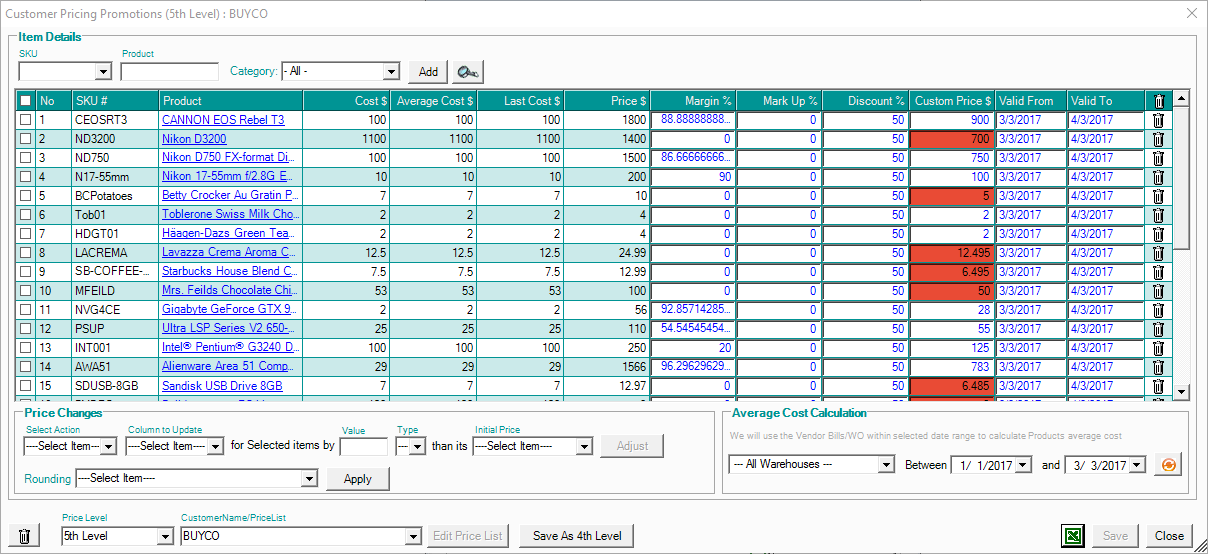
If you have any 3rd or 5th level pricing set for any products for the selected customer, they will appear on the list and you can modify them as needed. 3rd and 5th level rules can be updated on this screen instead of having to do it through the other methods. This allows for more flexibility and control in the event particular products need to be adjusted.
- Once all changes have been made, click either Save to the apply the update for the pricing rule or Save as 4th Level to convert it. This will NOT remove the pricing rule, it just converts it into a price list that can be saved and applied as needed.
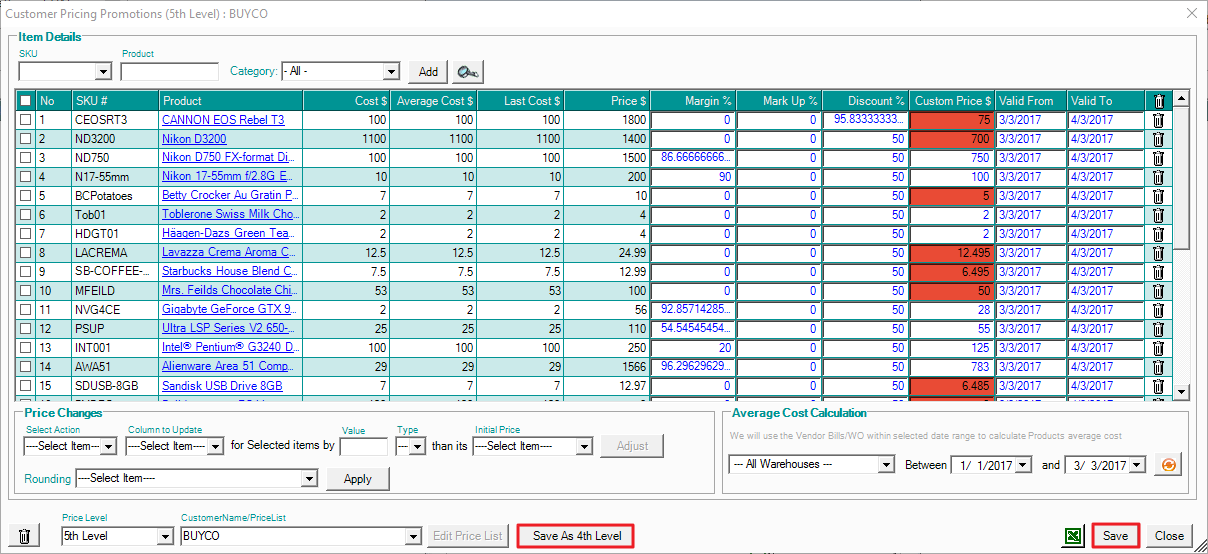
If you have chosen to convert it to a 4th level price list then you will be taken back to the Create Price List screen where you will need to enter a name in order to be able to save the list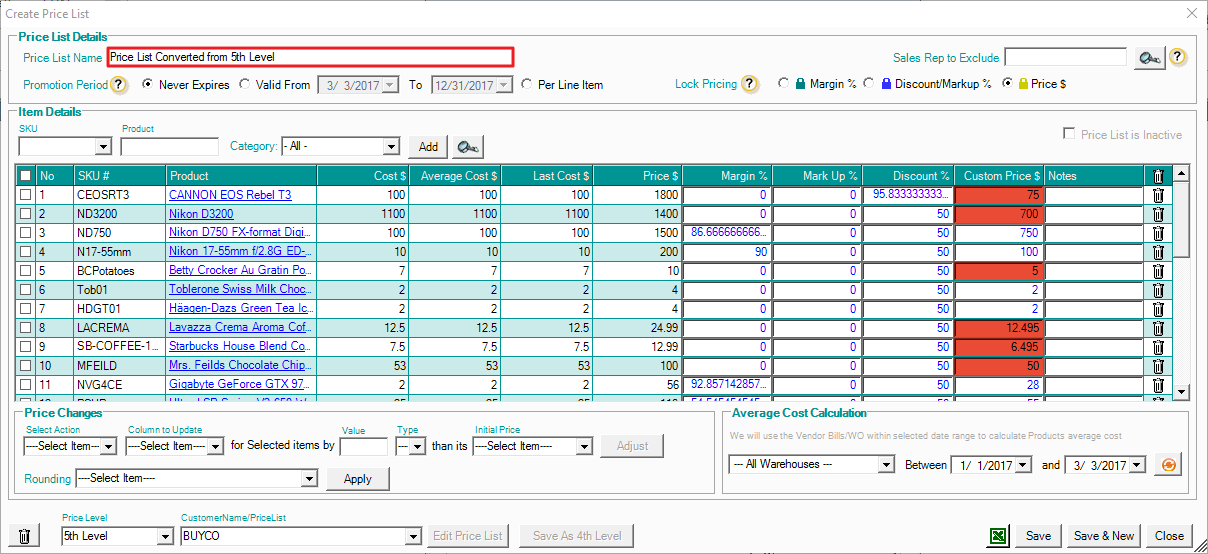
Additional tips
Price lists can also be edited through the customer edit screen and the CPO product selector screen. The product selector can also filter products to show only product contained in the assigned price list.
If the customer you are editing is assigned to a customer group that has been assigned to a price list, you can go into Customers > View All Customers > Click the edit button for a customer > Click the Additional Info tab > Click the Edit button beside the price list drop down box

Alternatively, when placing an order or editing an open customer order you can click the product selector button and from the product selection screen you can edit the price list and even filter to only show items from the assigned price list.
