
This guide will instruct you on the basic implementation and usage of the POS sales module
Setup
- Click on Admin Switchboard, click on Utilities and find POS module

- The following settings affect how your customer transactions will print
- If you wish to use AdvancePro with a POS Cash drawer, enable the User POS Cash Drawer option.
- If you wish to print the cashier's name (user's name setting once a POS user has been created) on the transaction printout/receipt, enable the Print Cashier's Name option
- If you wish to print a note on each transaction/receipt, enable the Print Note option and write the test in the note field.

- After you have completed the above settings, click the save button on the right-hand side of the POS module settings window
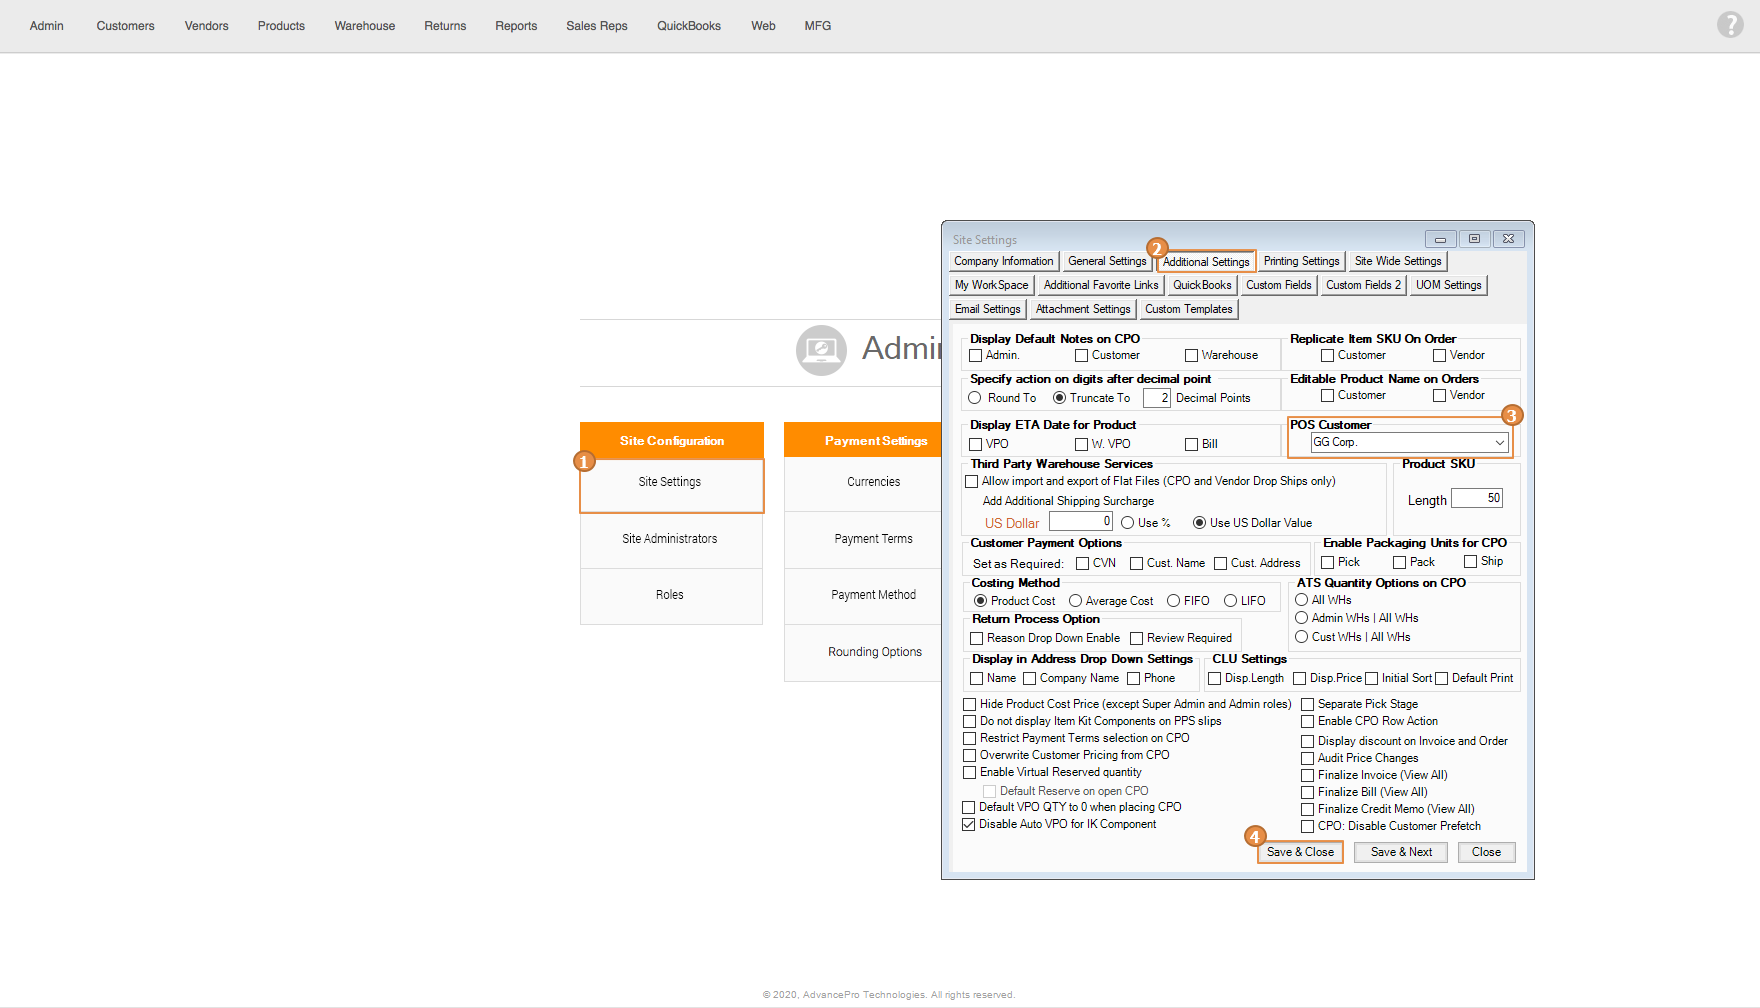
- Next, Set a default POS customer by going into Site Settings, Additional settings, click on the drop-down to select a POS customer and finally click on Save & Close
Register Setup
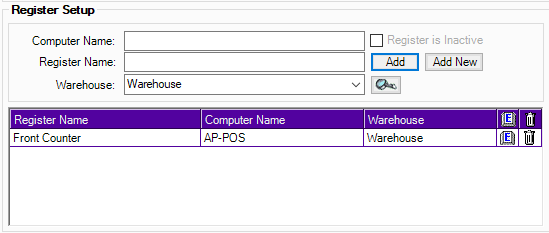
Note: Computer Name is the name of the device, you can find this information in the Control Panel of the system. if you are using a cloud device or running a VPN connection, this is the device name assigned to the cloud server or VPN server device.
- Now for the Register Setup, enter the computer name that will be running AdvancePro POS
- Next, enter the register name associated with the above computer name. An example would be 'Register 1' or it could be 'Front counter'
- Then, select the warehouse where the POS will reside using the warehouse drop-down menu. The stock sold using the POS register will be taken from the quantities at the warehouse that was specified in this setting.
- When you have finished the above settings, click the add button to add the register to the list.
Creating a POS User
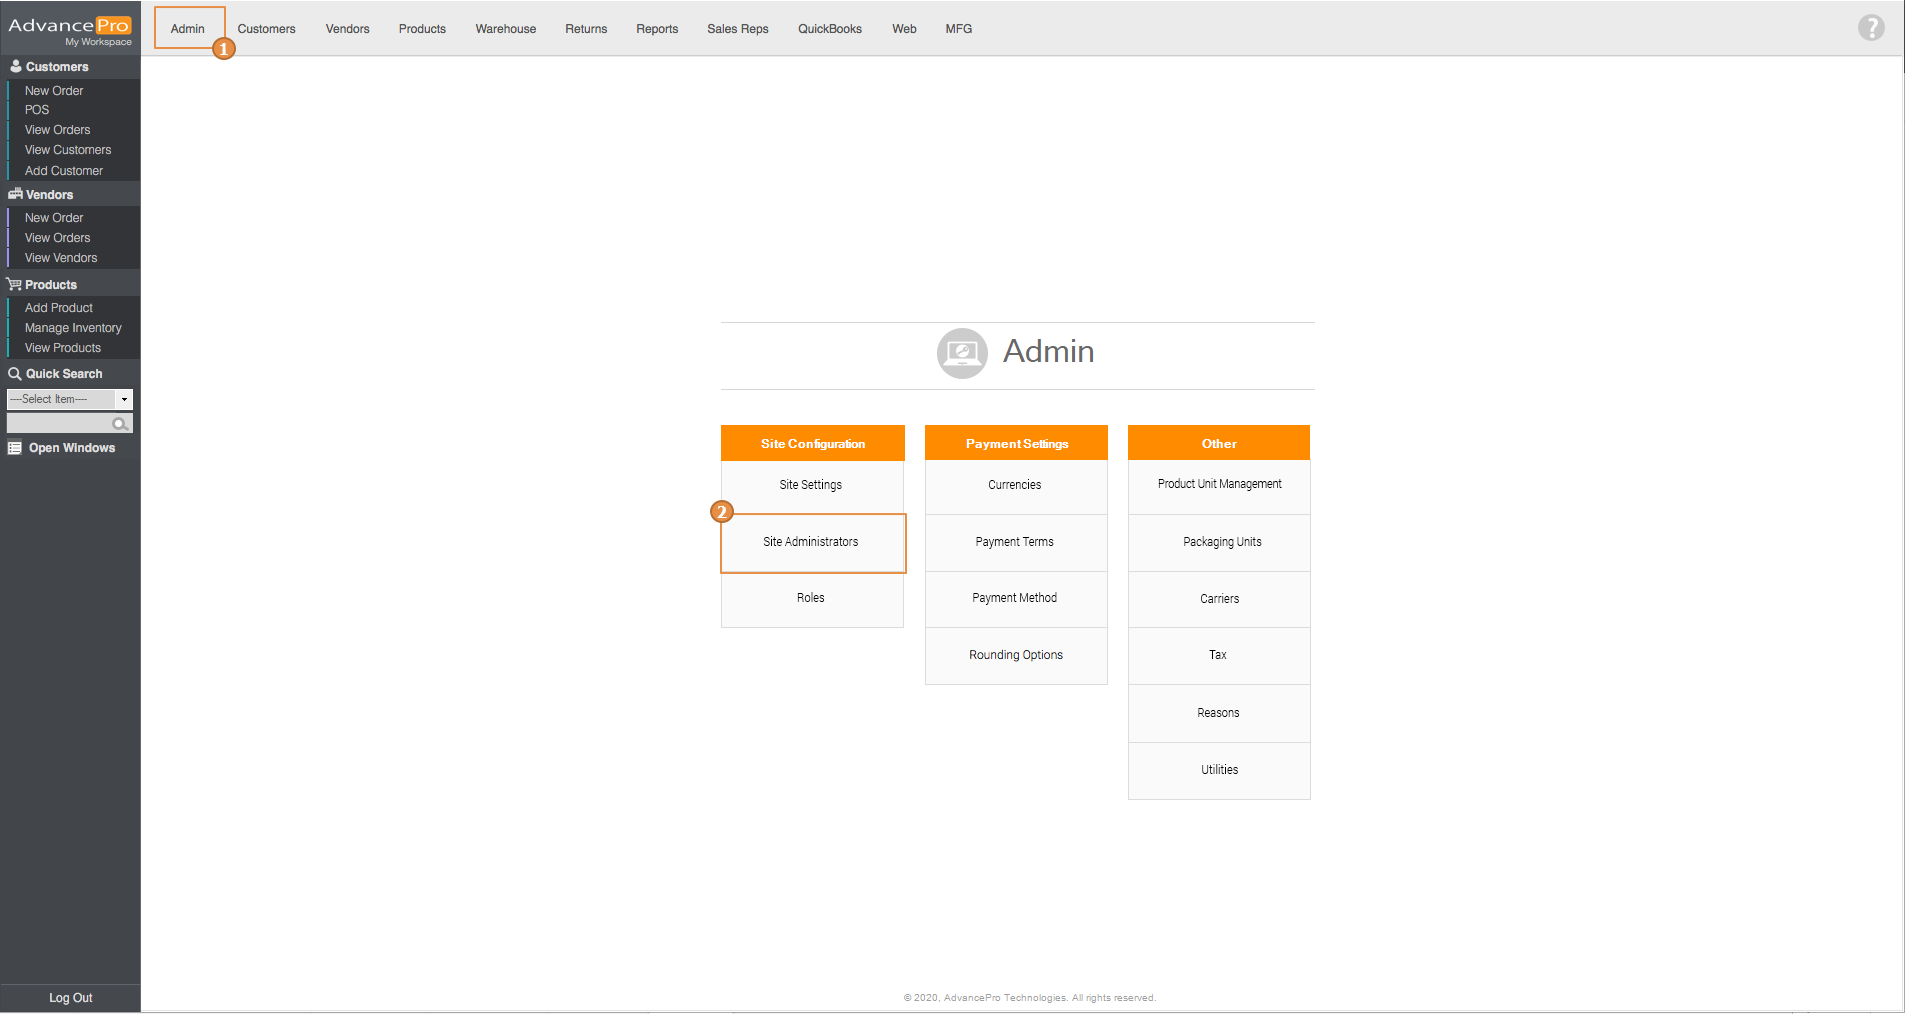
- Go to Admin switchboard and click on Site Administrators
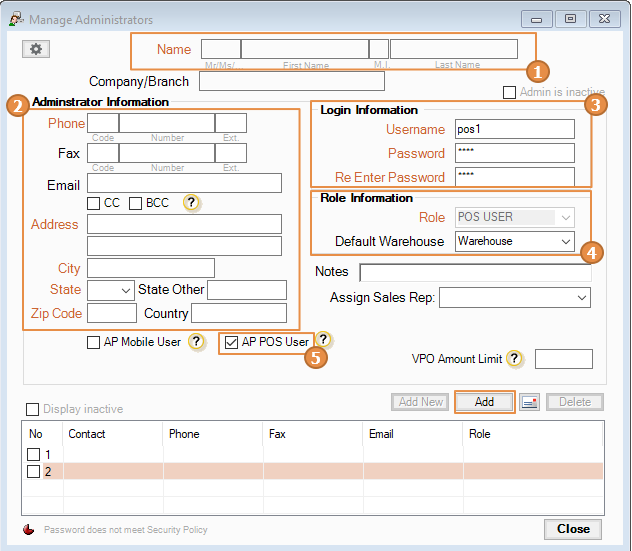
- Next, click on Add new and provide the necessary information needed. Required fields are in Orange.
- Set Role to POS user and select a default warehouse.
- Select a username and password and enter that in the field provided under Login Information
- Enable AP POS User
- After you've finished filling the information in the form, click on Add
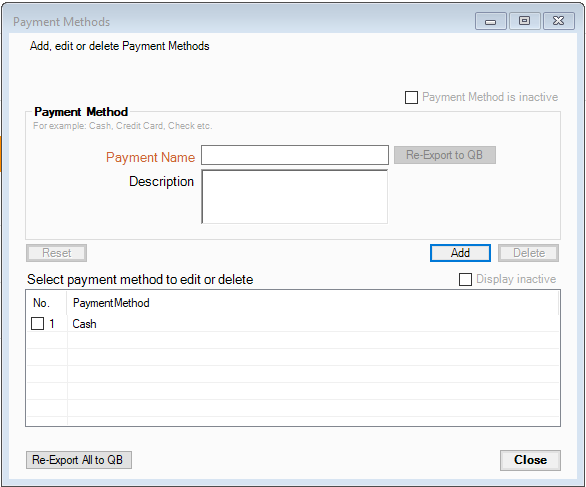
Payment Method
- Go to Admin and click on Payment methods

- Add a cash payment method
Using the AdvancePro Point of Sale
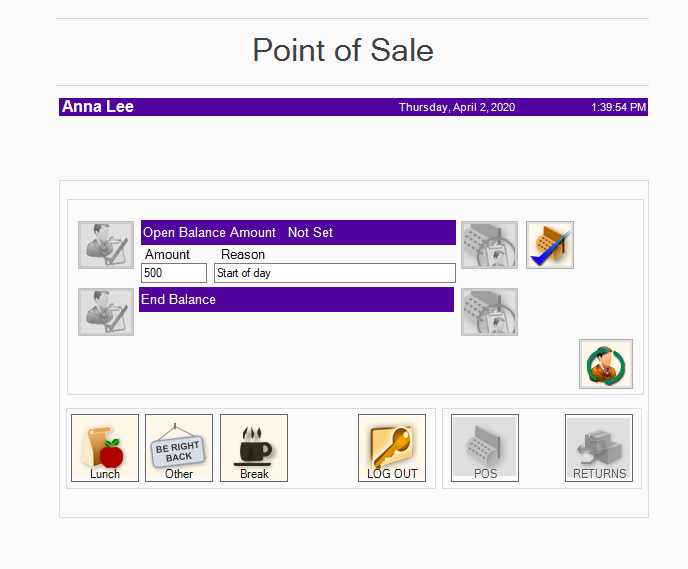
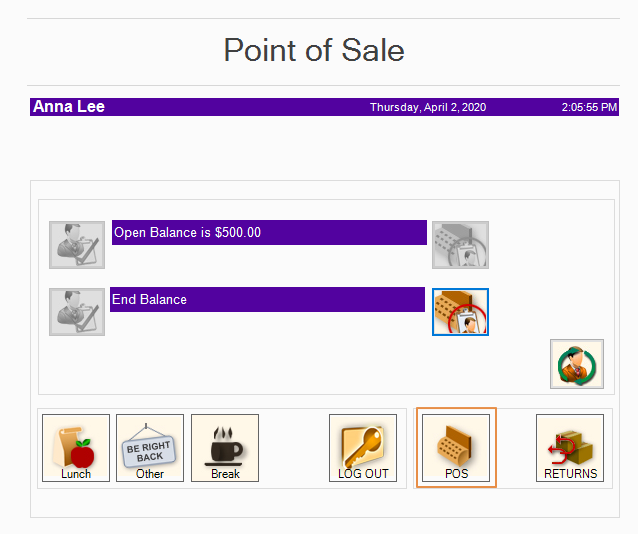
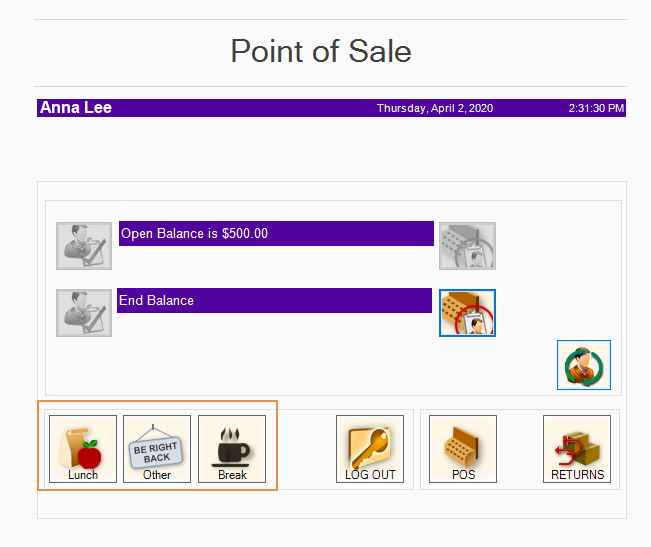
- Log in using a POS user, enter the opening balance for the cash drawer, and enter a reason, then click the button with the large blue checkmark to begin your shift.
- To begin an order, click the POS button.
- In the POS screen, you can add an item by scanning either SKU, UPC or other options available; by typing the SKU or UPC directly on the field provided and click on Add(F7) button; or by searching the product using the Search(F6) button in the right side of the screen.
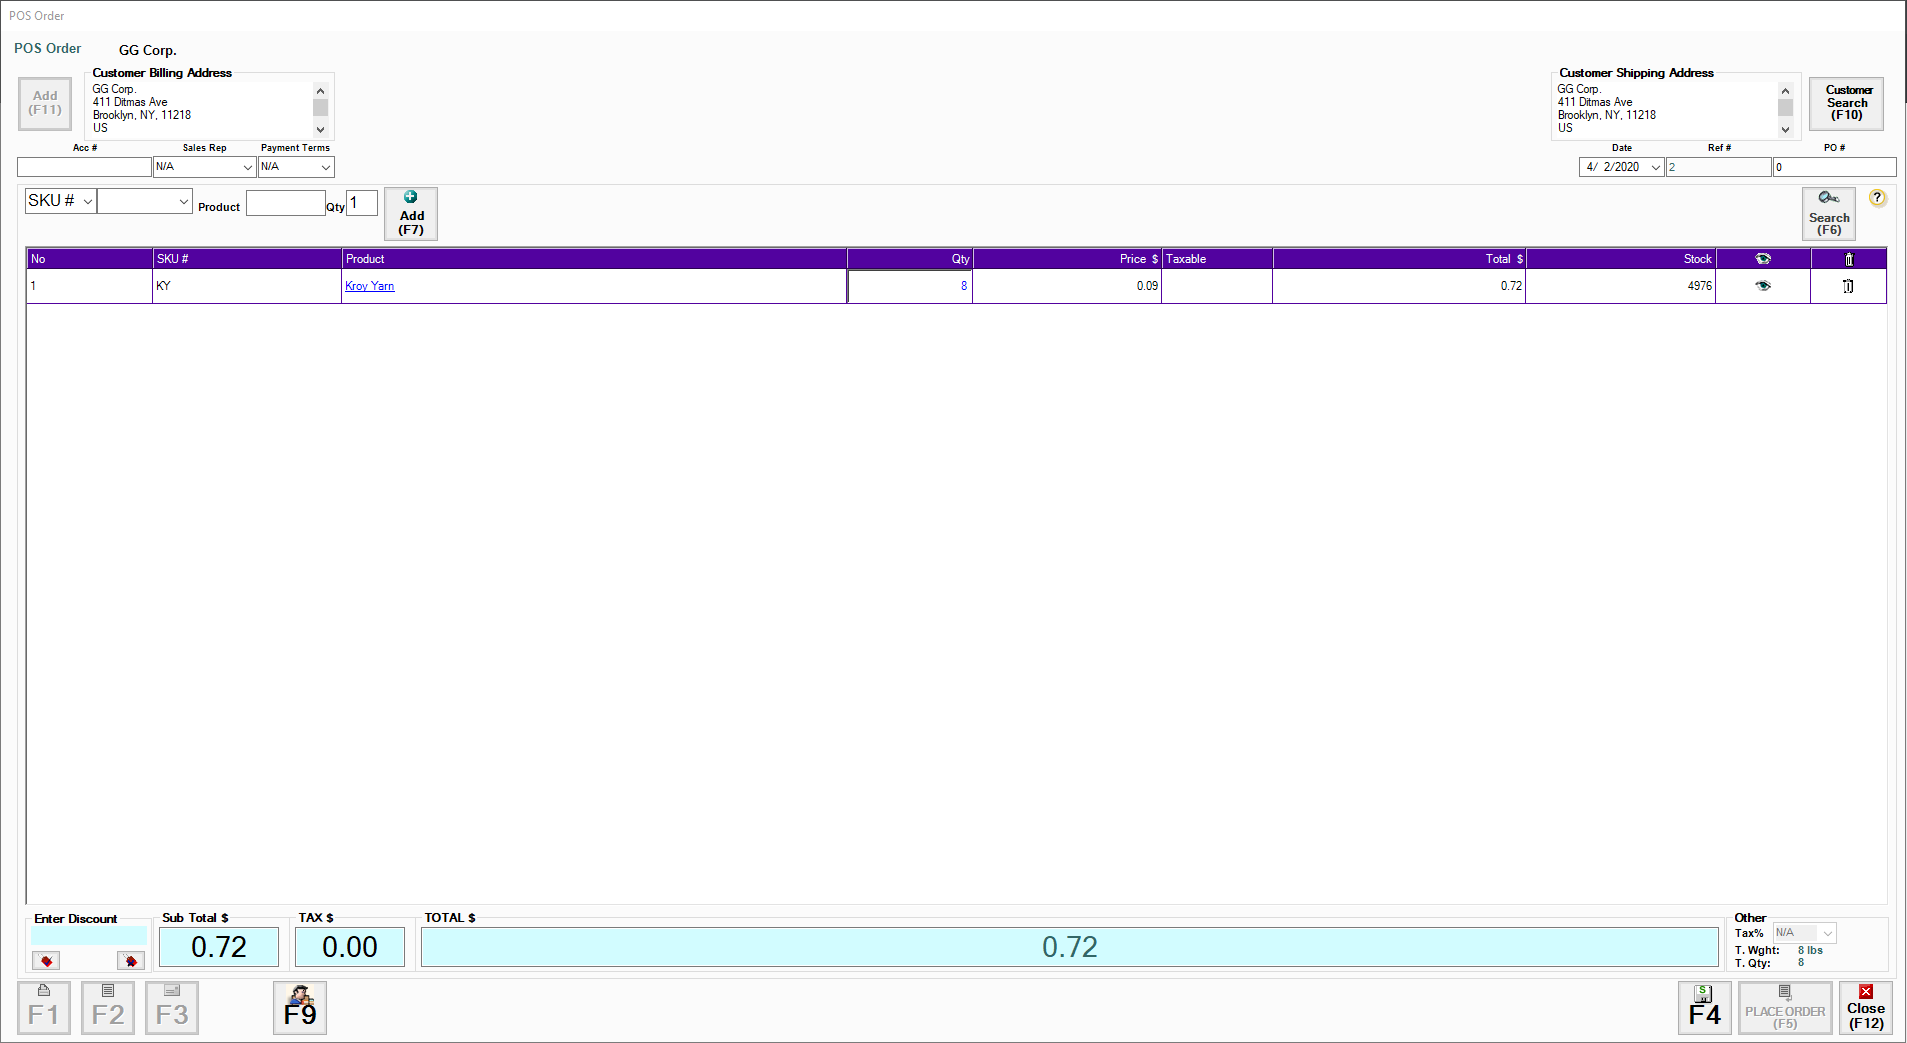
- Here are some of the functions found in the POS screen
- Print (F1)
- Notes (F2)
- Email (F3)
- Save (F4)
- Place Order (F5)
- Search (F6)
- Add (F7)
- Enable Administrator rights (F9)
- Customer Search (F10)
- Add Customer (F11)
- Close (F12)
- Use the Lunch, Break, or Other to temporarily log-out without ending shift
- Please note POS prices are fixed.
- Coupon can be entered or scanned in coupon field in lower left
- If the product is in stock, you can accept payment by clicking the ‘place order’ button in the lower right.
- Select the correct method of payment, and click the process payment button to accept payment.
- If you have a payment gateway configured, you can process credit cards with AdvancePro.
- Once you have processed payment, you may begin another order.
- POS orders do not ship from the warehouse, stock levels decrease automatically.
- At the end of the shift, click on Log-out to access the End of day calculator.
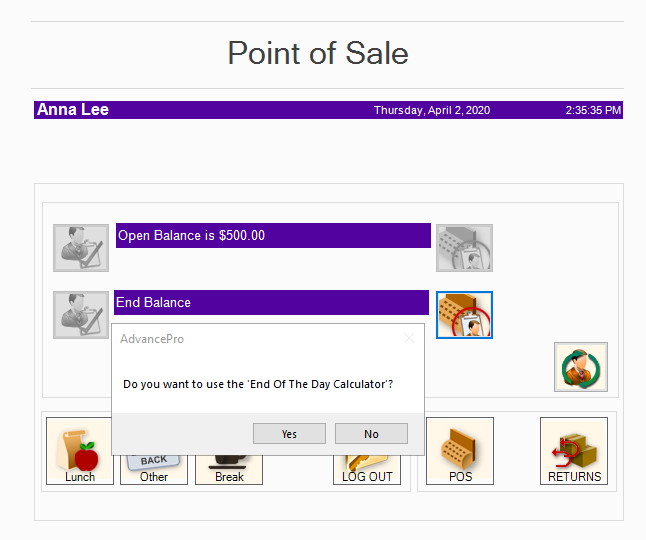
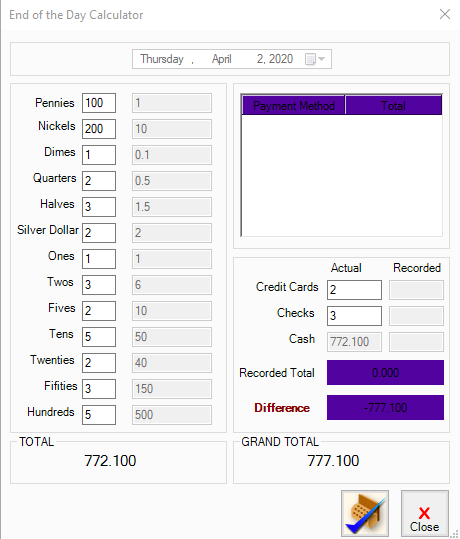
- Just click on Yes and the End of the Day calculator will be displayed. On this window, the POS User can count the payment she received and each denomination is entered there.
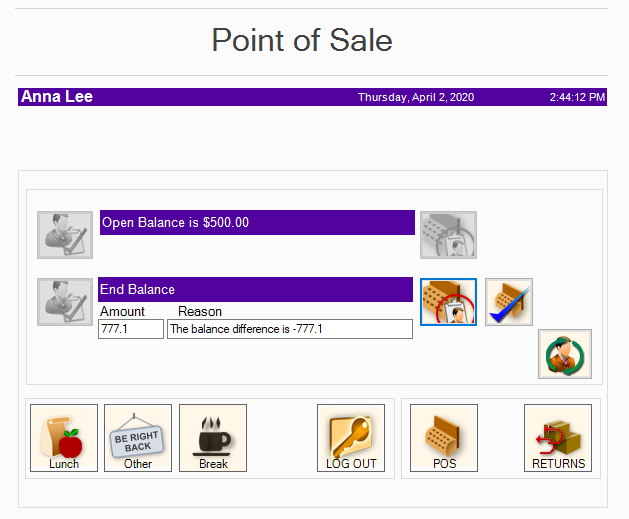
- After which, click on the button and the amount will be displayed on the end balance with the reason
- At the end of the shift, the manager can log in by clicking the manager override button to record the ending balance, print a Z Report and log out.